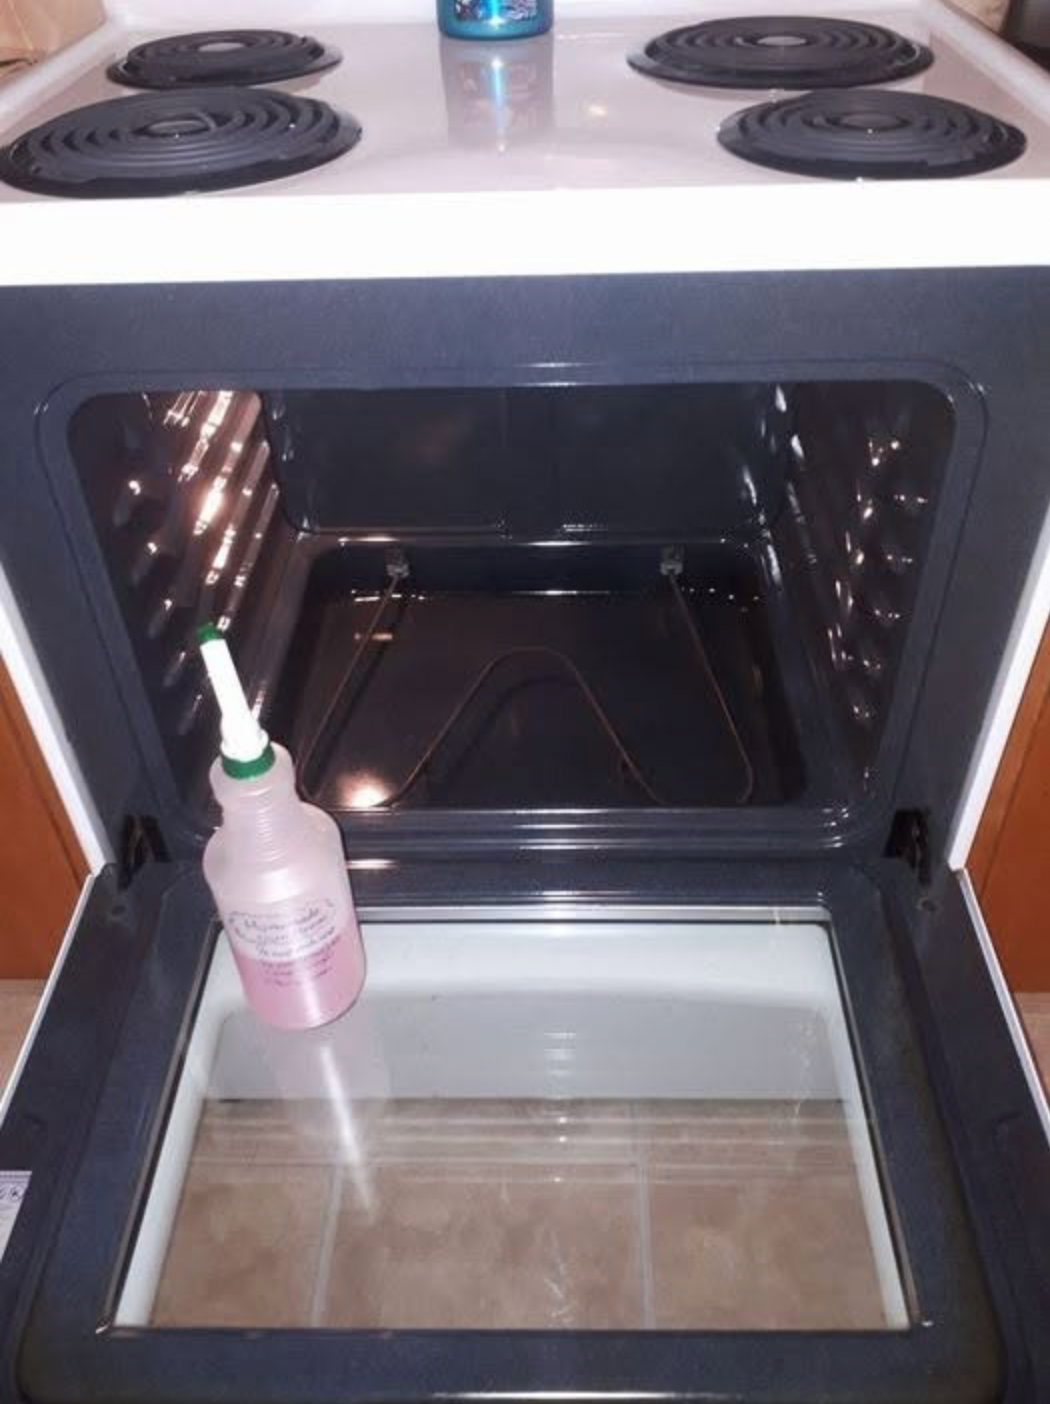
There is something strangely satisfying about seeing a dirty oven become clean again.
You open the door and see layers of baked-on grease, dark spots, splatters, and stubborn food residue that seem to have become permanently attached to the surface. You wipe once, twice, and sometimes five times, yet the grime barely moves.
The same thing happens around stovetops.
A little sauce spills over.
A few drops of oil splatter during cooking.
Milk boils over.
Grease settles around the burners.
Then the stove cools, the mess dries, and the next time you cook, another layer gets added.
Eventually, what started as a few harmless splashes becomes a sticky, brownish coating that looks almost impossible to remove.
The good news is that you don’t necessarily need an aggressive commercial oven cleaner for ordinary household grease.
A simple homemade cleaning paste made from baking soda, dish soap, and water can be surprisingly effective for many baked-on food residues and greasy surfaces.
And the best part is that it is inexpensive, easy to prepare, and made from ingredients that many people already have in their kitchens.
However, there is an important distinction to make: “homemade” does not automatically mean “safe for every surface.”
Ovens and stovetops are made from different materials, and certain surfaces can be damaged by abrasive powders, excessive water, or unsuitable chemicals.
So let’s look at the method carefully, step by step.
Why Oven Grease Is So Difficult to Remove
Fresh grease is relatively easy to wipe away.
The problem begins when grease is exposed to heat repeatedly.
During cooking, oils and food particles can undergo chemical changes. They can become more firmly attached to surfaces, especially when mixed with proteins, sugars, starches, and other food residues.
Every time you use the oven, another layer can form.
Eventually, you aren’t dealing with ordinary oil anymore.
You’re dealing with a hardened mixture of:
- cooking oil
- food particles
- sugars
- starches
- proteins
- smoke residue
- carbonized material
- dust and debris
That is why wiping with a damp cloth often doesn’t work.
The grime has essentially become a stubborn coating.
The Simple Homemade Cleaning Paste
One of the easiest homemade mixtures for ordinary oven and stovetop grime is:
Ingredients
- 1/2 cup baking soda
- 2–3 tablespoons dish soap
- enough warm water to create a spreadable paste
You don’t need the mixture to be extremely watery.
The ideal consistency is similar to a thick cream or soft paste.
It should spread easily but remain on the surface instead of immediately running away.
Why Baking Soda Helps
Baking soda, also known as sodium bicarbonate, is mildly alkaline.
Its slightly alkaline nature can help loosen certain greasy and food-based residues.
It also provides very mild abrasive action.
That means it can physically help lift residue when used carefully.
However, baking soda isn’t a magical chemical that instantly dissolves every kind of oven grime.
Its effectiveness comes from a combination of:
- mild alkalinity
- gentle abrasion
- moisture
- contact time
- mechanical scrubbing
The last two are especially important.
Why Dish Soap Is Added
Dish soap is designed specifically to help remove grease and food residues.
When combined with baking soda, it creates a useful cleaning paste.
The dish soap helps lift oils and greasy material, while the baking soda gives the mixture more body and mild scrubbing power.
The combination is generally more useful than simply sprinkling dry baking soda over the oven.
Why Warm Water Helps
Warm water helps soften certain food residues and makes the cleaning mixture easier to spread.
It also helps the baking soda and dish soap distribute more evenly across the dirty surface.
You don’t need boiling water.
Warm water is enough.
In fact, extremely hot water can create unnecessary risks when you’re cleaning a large appliance, especially if electrical components or hot surfaces are involved.
Before You Start Cleaning
The first step is not making the paste.
The first step is making sure the oven is safe to clean.
Turn the oven off.
Allow it to cool completely.
If you have recently used it, wait until the interior is comfortably cool to the touch.
Never apply a homemade cleaning mixture to a hot oven.
Hot surfaces can cause water to evaporate rapidly, spread grease, create steam, or make the cleaning process more dangerous.
Remove the Oven Racks
Take out the oven racks before cleaning the interior.
This gives you much more room to work.
It also prevents you from accidentally coating the racks with unnecessary cleaning paste.
Place the racks somewhere suitable for cleaning.
A bathtub, large basin, utility sink, or other protected area can work depending on their size and the material of the surrounding surface.
Cleaning the Oven Racks
For ordinary metal oven racks, you can use warm water and dish soap.
Let them soak for a while to soften baked-on residue.
After soaking, use a non-scratch scrubber appropriate for the rack material.
Avoid extremely aggressive scouring if the rack has a special finish.
Once clean, rinse thoroughly and dry completely.
Remove Loose Crumbs First
Before applying any paste, remove loose food debris.
Use a dry cloth, paper towel, soft brush, or suitable vacuum attachment to collect crumbs and loose particles.
This simple step makes the deeper cleaning much easier.
There’s no reason to turn loose crumbs into a wet paste while you’re trying to clean hardened grease.
Apply the Baking Soda Paste
Now spread a thin layer of the homemade mixture over the dirty areas.
Focus particularly on:
- baked-on grease
- dark splatters
- food residue
- sticky patches
- areas around the bottom of the oven
You don’t need to cover every square centimeter with a thick layer.
A moderate coating is enough.
Don’t Coat Heating Elements
This is extremely important.
Avoid applying the paste directly to electrical heating elements, gas burners, igniters, fans, vents, or other components that should not be exposed to moisture or cleaning products.
The interior design of ovens varies significantly.
Some heating elements are exposed.
Others are partially concealed.
Some ovens have fans and vents in places that can be easy to overlook.
Keep cleaning materials away from these components.
Avoid Blocking Vents
Ovens need proper airflow.
Do not pack cleaning paste into vents or openings.
If you aren’t sure whether a particular opening is a vent or an important component, leave it alone.
When cleaning an appliance, more cleaning product is not always better.
Let the Paste Sit
This is one of the most important parts of the process.
Don’t immediately scrub the paste off.
Give it time to work.
For moderate grime, around 15–30 minutes may be enough.
For heavier residue, a longer contact period may help, provided the surface manufacturer permits the method.
The goal is to soften and loosen the residue before you start scrubbing.
Why Contact Time Matters
People often assume cleaning depends entirely on scrubbing strength.
It doesn’t.
Good cleaning is frequently about allowing the cleaning agent enough time to interact with the residue.
Think about dried food on a plate.
If you scrub it immediately while it’s completely dry, it can be difficult.
If you soak the plate in warm water first, the same food becomes much easier to remove.
The same basic principle applies to oven grime.
Loosen first. Scrub second.
Use a Damp Cloth First
After the paste has had time to work, use a damp microfiber cloth or soft sponge to wipe away the loosened grime.
Don’t start with aggressive scrubbing.
First see how much comes away easily.
You may be surprised.
Some residue that looked permanently baked on will come away with relatively little effort once it has softened.
For Stubborn Areas, Repeat the Process
If certain dark patches remain, don’t immediately reach for the strongest possible scrubber.
Instead, apply another small amount of paste and allow additional contact time.
Then wipe again.
Cleaning in several gentle stages is often better than trying to remove everything through one extremely aggressive scrubbing session.
A Soft Scrub Brush Can Help
For textured surfaces or stubborn areas, a soft cleaning brush can be useful.
Use controlled pressure.
The goal is to loosen residue, not scratch the surface underneath it.
This is especially important with coated or delicate finishes.
Why You Shouldn’t Always Use Steel Wool
Steel wool can be extremely aggressive.
It may scratch certain oven finishes, stainless steel surfaces, enamel, glass, and other materials.
Once a surface is scratched, future grease can sometimes become even harder to remove because residue can settle into the microscopic scratches.
A softer sponge or non-scratch pad is usually the better starting point.
What About the Oven Door?
The oven door often collects a surprising amount of grease.
The inside of the door can become covered with baked-on splatters.
However, oven doors vary greatly.
Some have multiple layers of glass.
Some have special coatings.
Some allow the inner glass panel to be accessed.
Others should not be disassembled by the homeowner.
Never remove or dismantle parts of the door unless the manufacturer’s instructions specifically allow it.
Cleaning Oven Glass
For ordinary oven glass, you can often use a mild baking-soda paste carefully.
Apply a thin layer.
Allow it to sit briefly.
Wipe with a soft cloth.
Then remove all residue with clean water.
Avoid using abrasive tools that could scratch the glass.
Also be careful around the edges and seals.
Why You Need to Rinse Thoroughly
After cleaning, don’t leave a thick layer of baking soda and dish soap behind.
Wipe the surface repeatedly with a clean damp cloth until the residue is gone.
Then dry the surface.
This is especially important before using the oven again.
You don’t want leftover cleaning products heating up during cooking.
Never Mix Random Cleaning Chemicals
One of the most important safety rules is simple:
Don’t start combining household cleaners just because you want a stronger result.
Some combinations of cleaning products can produce dangerous fumes.
For example, bleach should not be mixed with acids or ammonia-containing products.
Commercial oven cleaners may contain strong chemicals that should never be combined with other cleaners.
Homemade cleaning should be simple.
You don’t need to create a chemistry experiment in your kitchen.
What About Vinegar and Baking Soda?
This is one of the most common cleaning combinations on the internet.
People often recommend mixing baking soda and vinegar.
The reaction produces fizzing.
It looks impressive.
But the dramatic fizz doesn’t necessarily mean you’re getting a dramatically better cleaning product.
Baking soda is alkaline.
Vinegar is acidic.
When they react, they largely neutralize one another.
The bubbling can help physically disturb loose debris, but combining them doesn’t automatically make a super-cleaner.
For greasy oven residue, it is often more useful to use the baking soda paste separately and use vinegar only where appropriate for the particular surface and cleaning task.
Don’t Use Vinegar on Every Surface
Vinegar is acidic.
Some materials tolerate it well.
Others may be damaged by repeated exposure.
Natural stone surfaces, certain finishes, and some metals can react poorly with acids.
So don’t assume that because vinegar is a common kitchen ingredient, it is safe for every appliance surface.
Always consider the material.
What About Lemon Juice?
Lemon juice is also acidic.
It can be useful for certain cleaning tasks, particularly mineral deposits and odors.
But it isn’t necessary for the basic oven-cleaning paste.
Keeping the recipe simple is often better.
Can Baking Soda Damage an Oven?
Baking soda is relatively mild compared with many commercial abrasive cleaners, but “mild” doesn’t mean “universally safe.”
It can still scratch or dull certain delicate finishes if scrubbed aggressively.
That’s why you should always test your cleaning method on a small, inconspicuous area when you’re uncertain about the surface.
Be Careful With Stainless Steel
Stainless steel requires special attention.
Some stainless steel appliances have a brushed grain.
If you’re cleaning stainless steel, wipe in the direction of the grain rather than randomly across it.
Avoid aggressive scrubbing.
A soft microfiber cloth is usually a good choice.
Also remember that stainless steel isn’t the same as every other metal surface.
Glass Cooktops Need Special Care
If your stove has a smooth glass or ceramic cooktop, don’t automatically use the same aggressive technique you would use on an oven floor.
Glass cooktops can scratch.
They can also be damaged by certain cleaning methods.
Use products and methods specifically appropriate for the cooktop’s surface.
If there is a thick layer of burnt-on material, a manufacturer-approved cooktop scraper can sometimes be useful when used correctly.
Gas Stovetops Are Different
Gas stoves contain burners, burner caps, grates, igniters, and openings.
Water and cleaning paste should not be allowed to enter sensitive components.
Remove removable parts where appropriate.
Clean them separately.
Make sure everything is completely dry before reassembling and using the stove.
Never spray cleaning solution directly into burner openings.
Electric Coil Stoves Need Care Too
Electric coil burners should also be treated carefully.
Don’t soak electrical components.
Don’t flood the area around the controls.
Clean removable drip pans separately if the manufacturer permits it.
Always allow components to dry completely before turning the appliance back on.
The Biggest Mistake: Using Too Much Water
More water doesn’t necessarily mean better cleaning.
Too much liquid can run into:
- electrical connections
- vents
- control panels
- burner openings
- heating elements
- seams
Use a damp cloth rather than soaking the appliance.
Controlled moisture is much safer.
Cleaning the Stove After Cooking
The best way to keep your stove sparkling isn’t to perform a massive deep clean every week.
It’s to prevent layers of grime from building up.
Once the surface has cooled safely, wipe up spills relatively soon after cooking.
Fresh grease is much easier to remove than grease that has been heated and baked onto the surface repeatedly.
The Five-Minute Habit
A simple routine can make an enormous difference.
After cooking:
- Allow the surface to cool appropriately.
- Remove loose crumbs.
- Wipe spills.
- Clean visible grease.
- Dry the surface.
This takes only a few minutes.
But it prevents the accumulation of months of grime.
Why Prevention Is Better Than Deep Cleaning
Imagine two kitchens.
In the first kitchen, the stove is wiped briefly after most meals.
In the second, spills are allowed to remain until the weekend.
By Saturday, the second stove may require a serious cleaning session.
The first may need only a damp cloth.
Small daily habits save enormous amounts of time.
What About Burnt Food?
Burnt food can be harder than ordinary grease.
If something has been completely carbonized, baking soda and dish soap may soften the surrounding residue but may not immediately remove the blackened material.
Don’t expect every stain to disappear instantly.
Some discoloration can become permanent.
This is particularly true if food has been repeatedly burned onto the same area.
A Clean Oven Doesn’t Always Mean a New-Looking Oven
This is an important expectation.
Cleaning removes dirt.
It doesn’t necessarily restore damaged enamel, burned finishes, discoloration, scratches, or permanent staining.
You may successfully remove the grease while still seeing a dark mark underneath.
That doesn’t necessarily mean the cleaning failed.
Sometimes the surface itself has been altered by heat.
What About Extremely Old Grease?
If your oven hasn’t been cleaned in years, don’t expect one application to solve everything.
Thick grease may require several rounds.
A good strategy is:
Apply → wait → wipe → repeat.
Each cycle can remove another layer.
Gradual cleaning is usually safer than extremely aggressive scrubbing.
A Step-by-Step Deep Cleaning Routine
For a heavily dirty oven, here’s a practical routine.
Step 1: Turn everything off
Make sure the oven and stovetop are off and sufficiently cool.
Step 2: Remove racks
Take out removable racks and clean them separately.
Step 3: Remove loose debris
Brush or wipe away crumbs and loose food particles.
Step 4: Prepare the paste
Mix baking soda with dish soap and enough warm water to create a thick paste.
Step 5: Apply carefully
Spread it over suitable dirty surfaces while avoiding heating elements, vents, electrical components, and sensitive areas.
Step 6: Let it sit
Give the mixture time to loosen the residue.
Step 7: Wipe
Use a damp microfiber cloth or soft sponge.
Step 8: Scrub gently
For remaining spots, use a suitable non-scratch brush or pad.
Step 9: Rinse
Wipe repeatedly with clean water to remove all cleaning residue.
Step 10: Dry
Use a clean towel or allow the surface to dry completely.
Step 11: Inspect
Look for remaining grease and repeat the process where necessary.
Step 12: Reassemble
Return the racks and removable components once everything is completely dry.
Don’t Forget the Space Around the Oven
The oven itself may be clean while the surrounding area remains greasy.
Check:
- cabinet edges
- handles
- backsplash
- floor near the oven
- wall behind the stove
- control knobs
- sides of the appliance
Grease can travel surprisingly far during cooking.
Cleaning the Control Knobs
Control knobs often collect a thin layer of grease because they’re touched while cooking.
If removable, they can sometimes be cleaned separately with warm soapy water, depending on the manufacturer’s instructions.
Do not allow liquid to enter the control panel.
A damp cloth is usually safer than spraying directly onto the controls.
Why Microfiber Cloths Are Useful
Microfiber cloths are excellent for many kitchen-cleaning tasks.
Their fine fibers can collect grease and residue effectively without requiring excessive pressure.
They are also useful for the final polishing step.
After cleaning, a dry microfiber cloth can help remove streaks and leave the surface looking much cleaner.
The Difference Between Cleaning and Disinfecting
Another important distinction is that removing visible grease isn’t the same as disinfecting.
The homemade baking-soda mixture is primarily a cleaning method.
Its purpose is to remove dirt, grease, and food residue.
It should not automatically be considered a disinfectant or sanitizer.
For food-contact surfaces where sanitizing is necessary, follow appropriate food-safety guidance and the manufacturer’s instructions.
What About the Smell?
A dirty oven can develop unpleasant odors because old food residue continues to heat every time you cook.
Removing the residue can reduce those smells.
But if a strange smell persists after cleaning, investigate the source.
It could come from:
- old grease
- burnt food
- a spill underneath the appliance
- electrical problems
- insulation
- another source
If you smell burning plastic, electrical odors, or anything unusual that doesn’t seem related to food, stop using the appliance and have it checked appropriately.
When You Should Not Use a Homemade Cleaner
There are situations where you should follow the manufacturer’s instructions rather than experimenting.
For example:
- self-cleaning ovens
- special catalytic liners
- steam-cleaning systems
- unusual non-stick interiors
- specialty coatings
- delicate glass surfaces
- appliances with specific cleaning restrictions
Some ovens are designed with special interior coatings that can be damaged by certain cleaners or scrubbing methods.
Self-Cleaning Ovens Are Different
If your oven has a self-cleaning function, read the manufacturer’s instructions before using any additional cleaning product.
Some self-cleaning systems use extremely high temperatures to break down food residue.
Adding cleaning chemicals beforehand may be unnecessary or inappropriate.
The safest approach is always to follow the appliance’s instructions.
Why Reading the Manual Matters
Cleaning advice found online is often generalized.
But appliances aren’t identical.
Two ovens may look almost the same while having completely different interior coatings.
One may tolerate a method that another manufacturer specifically warns against.
That’s why the manual should be your first reference when you’re unsure.
The Best Homemade Cleaner Isn’t Always the Strongest One
When people see thick grease, their first instinct is often to search for the most powerful chemical possible.
But cleaning effectiveness isn’t only about chemical strength.
A good cleaning process combines:
- the right product
- the right amount
- enough contact time
- appropriate mechanical action
- proper rinsing
A relatively mild mixture can work surprisingly well when used correctly.
The Secret Is Patience
If there is one thing that makes homemade cleaning methods more effective, it is patience.
Don’t expect baked-on grease to disappear in ten seconds.
Apply the paste.
Let it work.
Wipe.
Repeat.
The first pass may remove the loose layer.
The second may remove more.
The third may reveal the original surface underneath.
That’s normal.
A Simple Maintenance Schedule
You don’t need to deep-clean your oven every day.
A practical routine might look like this:
After cooking
Wipe obvious spills once the surface is safely cool.
Weekly
Clean the stovetop more thoroughly.
Every few weeks
Inspect the oven interior and remove visible buildup.
Occasionally
Perform a deeper cleaning depending on how frequently you cook.
If you cook every day, especially foods that produce lots of grease, you may need to clean more frequently.
Why Regular Cleaning Makes Cooking Better
A clean stove isn’t only about appearance.
Excessive grease buildup can produce smoke and unpleasant odors when heated.
Old food residue can burn and make the kitchen smell.
A cleaner cooking surface also makes it easier to notice new spills and maintain good kitchen hygiene.

Welcome to my kitchen!
I’m a passionate home cook and recipe creator who loves turning simple ingredients into delicious, comforting meals that everyone can enjoy. Through this website, I share carefully prepared recipes, practical cooking tips, and easy-to-understand food education to help you feel more confident in the kitchen.
My goal is to make cooking simple, enjoyable, and accessible. Whether you are looking for a quick family dinner, a delicious dessert, healthy meal ideas, or traditional recipes with a modern touch, you’ll find inspiration here.
More Than Just Recipes
I believe that cooking is also a way to learn. That’s why this website is not only about recipes. I also create educational articles about ingredients, cooking techniques, kitchen tips, food preparation, and the stories behind different dishes.
Each article is designed to give you useful knowledge that you can apply in your own kitchen. From understanding how ingredients work together to learning better cooking methods, my aim is to help you become a more confident and creative cook.
My Philosophy
Good food doesn’t always require complicated ingredients or professional equipment. With a little knowledge, patience, and creativity, simple ingredients can become something truly special.
I believe in sharing recipes that are practical, clearly explained, and enjoyable to make. I also love exploring new flavors while appreciating traditional cooking and the recipes passed down through generations.
Thank you for visiting my kitchen and being part of this food-loving community. I hope my recipes and articles inspire you to cook, learn, experiment, and most importantly, enjoy every bite!
Happy cooking!