There are some desserts that are delicious from the very first bite, and then there are desserts that make you pause because the combination of textures is just so satisfying.
Salted Caramel Crackle is definitely in that second category.
You’ve got buttery caramel, a little hit of sea salt, and a crisp, crunchy base that turns wonderfully snappy once everything cools. Add a drizzle of melted chocolate and suddenly you’ve got the kind of treat that disappears from the dessert table much faster than anyone expected!
I love recipes like this because they look impressive without requiring complicated decorating skills. Once the caramel is ready, everything comes together quickly, and the rustic broken pieces are actually part of the charm.
So, if you’re craving something sweet, crunchy, buttery, and just a little salty, this one deserves a spot on your baking list.
And if you love easy dessert recipes, be sure to subscribe by email so you can have more recipes like this delivered straight to your inbox!
What Is Salted Caramel Crackle?
Salted Caramel Crackle is a simple caramel-based treat made by cooking sugar, butter, and cream together until rich and glossy, then pouring the mixture over a crunchy base.
Once the caramel cools and firms up, it becomes deliciously crisp and breakable.
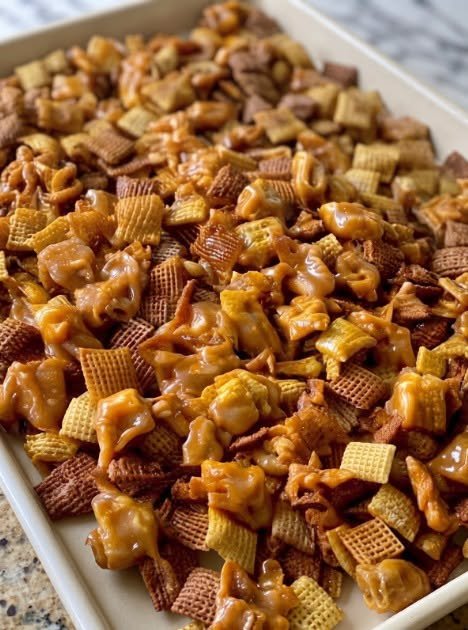
The basic version uses crackers, biscuits, nuts, or popcorn as the crunchy layer, depending on the style you’re making. A little extra sea salt finishes everything beautifully, while melted chocolate can be added for an even richer variation.
The result is sweet, buttery, crunchy, and slightly salty—all in one bite.
Why You’ll Love This Recipe
There are plenty of reasons to keep this recipe handy.
It’s Easy to Make
The ingredient list is short, and most of the work happens in one saucepan.
The Texture Is Incredible
Soft caramel transforms into a firm, crunchy coating as it cools. That’s where the wonderful crackle comes from!
Sweet and Salty Work Beautifully Together
The sea salt keeps the caramel from tasting overwhelmingly sweet and gives every bite a little extra contrast.
It’s Easy to Customize
Use crackers, biscuits, nuts, or popcorn for the base. Add chocolate if you’re in the mood for something extra decadent.
It Looks Rustic and Homemade
There’s no need for perfectly shaped pieces. Once the caramel has hardened, simply break it into irregular chunks.
Anything but boring!!
What Does Salted Caramel Crackle Taste Like?
The first thing you’ll notice is the deep sweetness of caramel.
Butter adds richness, while heavy cream gives the caramel a smooth, luxurious quality. Vanilla rounds out the flavor, and sea salt cuts through the sweetness with a delicate savory note.
Then comes the crunch.
That contrast between the crisp base and hard caramel coating is what makes this dessert so addictive. If you add chocolate, you get another layer of richness that pairs beautifully with both caramel and salt.
It’s the sort of treat that’s perfect with coffee, tea, or simply grabbed from the dessert plate when nobody is looking.
Ingredients You’ll Need
For the Caramel
1 cup granulated sugar
½ cup unsalted butter
¼ cup heavy cream
1 teaspoon vanilla extract
½ teaspoon sea salt, plus extra for finishing
For the Crunchy Base
Choose your preferred option:
2 cups crackers, biscuits, nuts, or popcorn
Optional Chocolate Topping
½ cup melted chocolate
The base is flexible, so you can choose the ingredient that gives you the texture and flavor you enjoy most.
Ingredient Notes and Substitutions
Granulated Sugar
Regular white granulated sugar works best for creating the caramel base.
Keep a close eye on it as it melts. The difference between beautifully amber caramel and burnt sugar can happen quickly.
Unsalted Butter
Using unsalted butter gives you more control over the final salt level.
Since sea salt is added separately, you can adjust the flavor to your liking.
Heavy Cream
Heavy cream helps turn the caramel into a rich, smooth mixture.
Pour it in slowly and carefully because the hot caramel will bubble vigorously when the cream is added.
Sea Salt
This is the ingredient that gives the recipe its signature salted-caramel character.
Use the amount in the recipe for the caramel itself, then add a little extra over the surface while it’s still warm.
Crackers, Biscuits, Nuts, or Popcorn
The recipe allows plenty of room for creativity here.
A sturdy cracker creates a crisp, classic base. Biscuits can add extra sweetness, while nuts provide a wonderful roasted crunch. Popcorn gives the treat a fun, snack-style texture.
Chocolate
Chocolate is completely optional, but I highly recommend trying it at least once.
Dark, milk, or semisweet chocolate can all create a delicious contrast with the buttery salted caramel.
Tools You’ll Need
Before you begin, gather:
Heavy-bottomed saucepan
Wooden spoon or heat-resistant spatula
Baking tray
Parchment paper or silicone baking mat
Measuring cups and spoons
Spatula for spreading
Small bowl for melting or mixing chocolate, if using
Sharp knife, if you prefer cutting the finished crackle
A heavy-bottomed saucepan is particularly helpful because it distributes heat more evenly while the sugar melts.
How to Make Salted Caramel Crackle
Step 1: Prepare Your Workspace
Before starting the caramel, prepare everything you need.
Caramel waits for no one!
Line a baking tray with parchment paper or a silicone baking mat.
If you’re using crackers, biscuits, nuts, or popcorn as your base, arrange them evenly across the tray.
Measure your butter, cream, vanilla, and salt ahead of time so they’re ready to add when needed.
This little bit of preparation makes the caramel-making process much less stressful.
Step 2: Make the Caramel Base
Place the granulated sugar in a heavy-bottomed saucepan over medium heat.
Allow the sugar to melt gradually.
Try not to stir excessively at the beginning. Instead, gently swirl the saucepan from time to time to encourage the sugar to melt evenly.
You’ll see the sugar go through several stages.
First, it begins melting around the edges. Then it turns into a clear syrup before gradually developing a golden amber color.
That amber color is what gives caramel its deep, toasted flavor.
Watch it carefully because caramel can go from beautifully golden to bitter and burnt surprisingly quickly.
Step 3: Add the Butter Carefully
Once the sugar has reached a rich amber color, slowly add the butter.
Be careful here—the caramel will bubble aggressively.
Stir continuously until the butter is fully incorporated and the mixture looks smooth.
The butter adds richness and helps give the finished crackle its luxurious texture.
Step 4: Add the Cream and Flavorings
Slowly pour the heavy cream into the caramel while stirring constantly.
Again, expect plenty of bubbling.
Keep stirring until the mixture becomes smooth and glossy.
Add the vanilla extract and ½ teaspoon of sea salt.
The vanilla enhances the caramel flavor, while the salt balances the sweetness and creates that unmistakable salted-caramel taste.
Cook for another minute or two, until the caramel has thickened slightly.
Step 5: Build the Crackle Layer
Immediately pour the hot caramel over your prepared base.
Use a spatula to spread it into an even layer.
Work fairly quickly because the caramel will begin to thicken as it cools.
If you’re adding extra sea salt, sprinkle it over the warm caramel now.
For a chocolate version, drizzle the melted chocolate over the caramel before everything has completely hardened.
The combination of chocolate + caramel + sea salt is seriously hard to resist!
Step 6: Let It Cool Completely
Allow the Salted Caramel Crackle to cool at room temperature until firm.
If you’re short on time, you can place it in the refrigerator for about 30 minutes to help it set.
Once completely hardened, break it into irregular pieces using your hands or cut it with a knife.
Don’t worry about making every piece identical.
The uneven edges are part of the rustic look—and they make the crackly texture even more fun to eat.
Tips for Making the Best Salted Caramel Crackle
Have Everything Ready Before Starting
This is probably my biggest tip.
Once your sugar reaches that beautiful amber stage, things move quickly. Measure everything before you turn on the stove.
Watch the Caramel Closely
Don’t walk away while the sugar is caramelizing.
It can change color very quickly, especially toward the end.
Don’t Overwork the Sugar
Gentle swirling is generally enough to help the sugar melt evenly.
Too much stirring can encourage crystallization.
Be Careful When Adding Butter and Cream
Both ingredients cause the hot caramel to bubble dramatically.
Add them slowly and keep your hands and face away from the rising steam.
Spread the Caramel Quickly
As soon as the caramel hits the crunchy base, spread it evenly before it begins setting.
Let It Harden Fully
If you try to break the crackle apart while it’s still soft, you won’t get that satisfying crisp texture.
Give it time to cool completely.
Delicious Variations to Try
Once you’ve made the classic version, it’s incredibly easy to experiment.
Chocolate Salted Caramel Crackle
Drizzle ½ cup melted chocolate over the warm caramel layer.
Let it set before breaking the crackle into pieces.
Nutty Caramel Crackle
Use chopped almonds or hazelnuts as the base for extra crunch and a roasted flavor.
Popcorn Caramel Crackle
Spread popcorn across the tray before pouring over the caramel.
This creates a fun sweet-and-salty snack that’s perfect for movie nights and parties.
Biscuit Caramel Crackle
Use sturdy biscuits for a sweeter, cookie-like base.
This version is especially nice alongside coffee or tea.
Extra-Salty Version
If you’re a serious sweet-and-salty fan, finish the warm caramel with a slightly more generous sprinkle of flaky sea salt.
Just remember that the caramel already contains salt, so add the finishing salt gradually.
What to Serve With Salted Caramel Crackle
This dessert is wonderful on its own, but there are plenty of ways to serve it.
Try it with:
Hot coffee
Black tea
Hot chocolate
Vanilla ice cream
Whipped cream
Fresh berries
A dessert platter
After-dinner espresso
You can also crumble pieces over ice cream for an easy caramel crunch topping.
And if you’re putting together a holiday dessert table, pile the irregular pieces onto a serving board. The rustic look works perfectly.
How to Store Salted Caramel Crackle
Once completely cooled and hardened, store the pieces in an airtight container.
Keep them in a cool, dry place.
Humidity can soften the caramel and reduce the crisp texture, so avoid leaving the crackle uncovered for long periods.
If you are stacking pieces, parchment paper between layers can help prevent them from sticking together.
For the best texture, enjoy the crackle while it’s fresh and crisp.
Can You Make Salted Caramel Crackle Ahead of Time?
Yes.
That’s one of the reasons I love it for entertaining.
Prepare the crackle, allow it to cool completely, break it into pieces, and store it in an airtight container until you’re ready to serve.
Keeping it protected from moisture is the key to maintaining that satisfying crunch.
Frequently Asked Questions
Why did my caramel turn too dark?
The sugar may have cooked for too long.
Caramel continues cooking from residual heat, so remove it from the heat once it reaches a rich amber color rather than waiting until it becomes extremely dark.
Why did my caramel crystallize?
Crystallization can happen when sugar crystals are encouraged to form during cooking.
Avoid excessive stirring while the sugar is initially melting and use a clean, heavy-bottomed saucepan.
Why did my caramel become hard?
That’s actually part of what makes this dessert a crackle!
As the caramel cools, it becomes firm and crisp. If it becomes extremely hard or brittle, the caramel may have been cooked to a higher temperature than necessary.
Can I use salted butter?
You can, but keep in mind that the recipe already includes sea salt.
If using salted butter, consider reducing the added salt and adjusting to taste.
Can I use different types of chocolate?
Yes. Dark, milk, and semisweet chocolate can all work beautifully with caramel.
The choice simply depends on how sweet or intense you want the finished dessert to be.
Why is my crackle sticky?
Moisture is usually the enemy of crisp caramel.
Make sure the crackle has cooled completely before storing it, and keep it in an airtight container in a cool, dry environment.
Can I use popcorn instead of crackers?
Yes. Popcorn is one of the optional crunchy bases listed in the recipe and gives the finished treat a fun, snackable texture.
Do I have to use a crunchy base?
The recipe is designed around a crunchy base, but the exact choice is flexible. Crackers, biscuits, nuts, and popcorn can all be used depending on the version you want to make.
General Recipe Information
Recipe: Salted Caramel Crackle
Category: Dessert / Sweet Snack
Main flavors: Caramel, butter, vanilla, sea salt
Texture: Crisp, crunchy, crackly
Optional topping: Melted chocolate
Preparation style: Stovetop caramel with a chilled or room-temperature set
Best served: As a snack, dessert, or addition to a dessert platter
Approximate Nutrition
Nutrition will vary considerably depending on the type of base, chocolate, portion size, and exact ingredients used.
Because this recipe allows crackers, biscuits, nuts, or popcorn as optional base choices, there isn’t a single reliable nutritional value for every version.
For the most accurate information, calculate nutrition based on the specific ingredients and quantities you use.
More Easy Dessert Ideas to Try
If you love the combination of sweet, crunchy, and indulgent, you might also enjoy trying:
Classic homemade caramel treats
Chocolate-covered pretzel bites
Salted chocolate bark
Homemade toffee
No-bake cookie bars
Chocolate peanut butter clusters
Crunchy caramel popcorn
Final Thoughts
Salted Caramel Crackle is proof that you don’t need an elaborate dessert to make something people remember.
A handful of simple ingredients transforms into something rich, crisp, buttery, and completely irresistible.
The magic happens when that golden caramel meets a crunchy base, a little sea salt, and—if you’re feeling indulgent—a drizzle of chocolate.
And that final crack when you break it into pieces?
That’s the best part.
Make a batch for a party, package some up as a homemade gift, or simply keep a container nearby for those moments when you need something sweet and crunchy.
Just don’t be surprised if it disappears before you get the chance to put it away!
If you make this Salted Caramel Crackle, I’d love to hear how it turned out. Leave a review, share your favorite variation, and save the recipe to Pinterest so you can find it the next time a caramel craving hits.

Welcome to my kitchen!
I’m a passionate home cook and recipe creator who loves turning simple ingredients into delicious, comforting meals that everyone can enjoy. Through this website, I share carefully prepared recipes, practical cooking tips, and easy-to-understand food education to help you feel more confident in the kitchen.
My goal is to make cooking simple, enjoyable, and accessible. Whether you are looking for a quick family dinner, a delicious dessert, healthy meal ideas, or traditional recipes with a modern touch, you’ll find inspiration here.
More Than Just Recipes
I believe that cooking is also a way to learn. That’s why this website is not only about recipes. I also create educational articles about ingredients, cooking techniques, kitchen tips, food preparation, and the stories behind different dishes.
Each article is designed to give you useful knowledge that you can apply in your own kitchen. From understanding how ingredients work together to learning better cooking methods, my aim is to help you become a more confident and creative cook.
My Philosophy
Good food doesn’t always require complicated ingredients or professional equipment. With a little knowledge, patience, and creativity, simple ingredients can become something truly special.
I believe in sharing recipes that are practical, clearly explained, and enjoyable to make. I also love exploring new flavors while appreciating traditional cooking and the recipes passed down through generations.
Thank you for visiting my kitchen and being part of this food-loving community. I hope my recipes and articles inspire you to cook, learn, experiment, and most importantly, enjoy every bite!
Happy cooking!