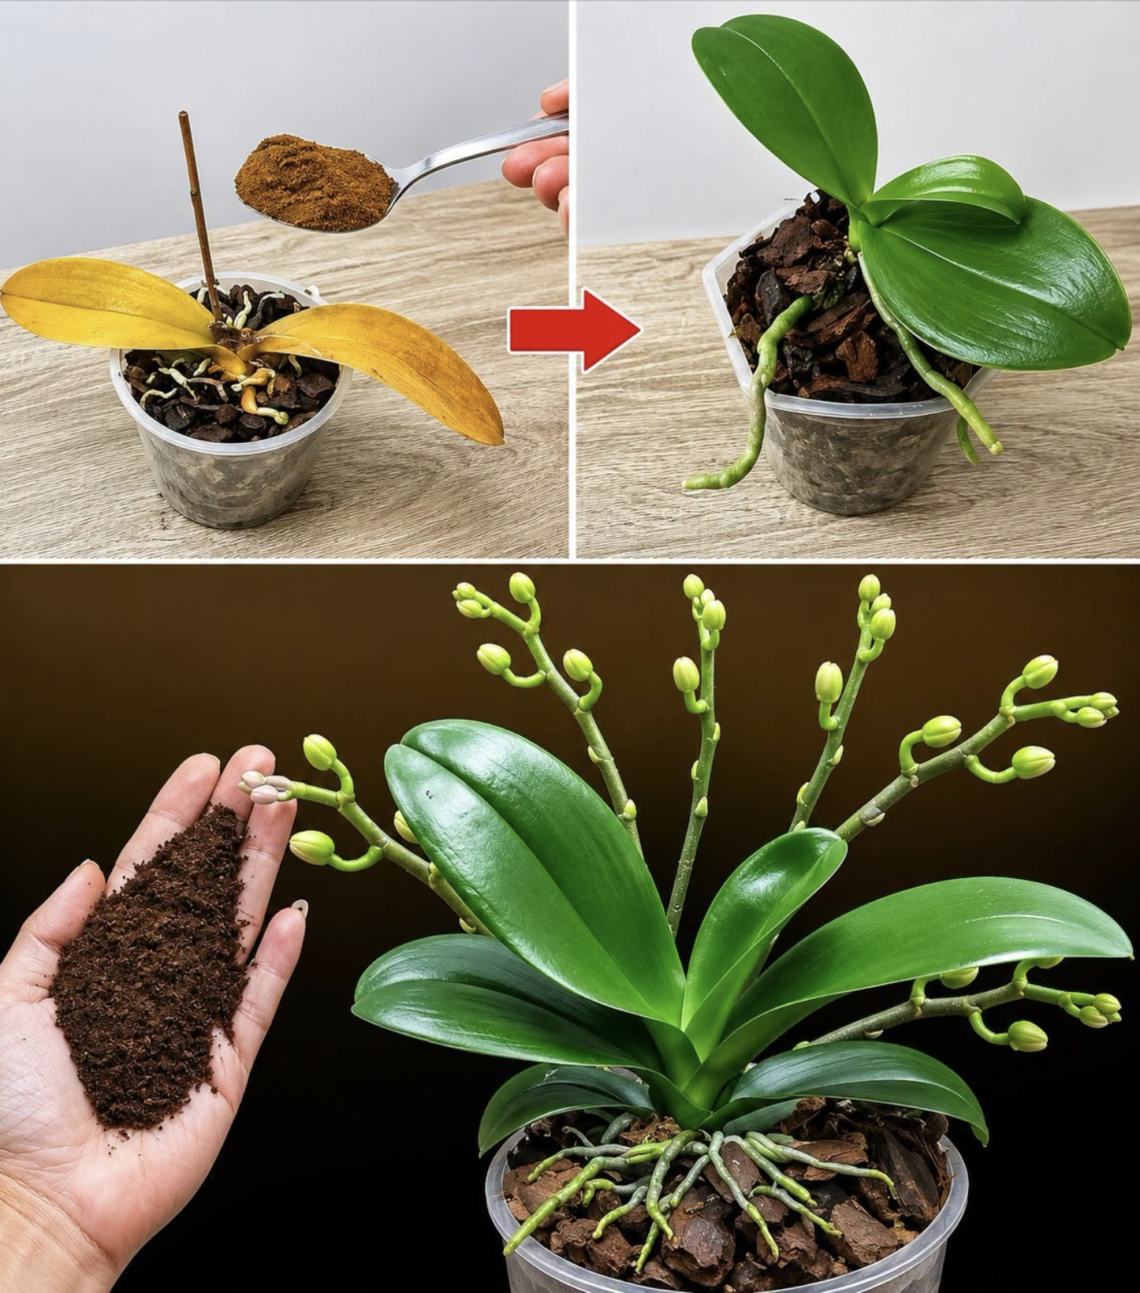
Orchids are among the most beautiful flowering plants you can grow indoors. Their elegant stems, glossy leaves, delicate roots, and long-lasting flowers make them a favorite for windowsills, living rooms, offices, balconies, and even kitchens. Yet anyone who has owned an orchid for a while knows that getting it to bloom again can sometimes feel like a mystery.
You buy an orchid covered with beautiful flowers. For weeks or even months, it looks spectacular. Then, one day, the flowers begin to fade and fall. The flower spike remains, the leaves stay green, and the plant appears perfectly healthy—but no new flowers seem to come.
This is the moment when many people become frustrated.
They start searching for special fertilizers, complicated homemade mixtures, expensive orchid products, or unusual techniques that promise to make the plant flower overnight.
But there is an important truth that every orchid owner should understand:
There is no magical teaspoon that can force a healthy orchid to produce flowers instantly.
However, a very small amount of the right orchid fertilizer, used correctly and at the appropriate time, can provide the nutrients the plant needs to produce new growth, strengthen its roots, and eventually support another spectacular flowering cycle.
The secret is not simply the teaspoon itself. The real secret is understanding what your orchid needs, how much it needs, when to provide it, and what mistakes can prevent it from blooming.
Why Orchids Sometimes Stop Blooming
Before adding anything to an orchid, it is important to understand why flowering stops in the first place.
An orchid does not flower continuously. Flowering is part of its natural growth cycle. After producing flowers for weeks or months, the plant may naturally enter a resting or vegetative period.
During this time, the orchid may concentrate its energy on:
- producing new leaves
- developing roots
- storing energy
- strengthening existing growth
- preparing a new flower spike
- recovering after flowering
Therefore, an orchid without flowers is not necessarily an unhealthy orchid.
Sometimes it is simply between flowering cycles.
The biggest mistake is assuming that the absence of flowers automatically means the plant needs more fertilizer.
In reality, several factors influence flowering.
Light is one of the most important.
Watering is another.
Temperature, humidity, roots, potting medium, nutrition, and the age and condition of the plant also matter.
If one of these factors is significantly wrong, adding fertilizer may not solve the problem.
In fact, excessive fertilizer can sometimes make things worse.
The Teaspoon Trick: What Is Actually Happening?
When gardeners talk about giving an orchid “just a teaspoon” of something, they are often referring to a small quantity of diluted fertilizer or another nutrient solution.
The idea is simple.
Orchids need nutrients just like other plants. Nitrogen supports vegetative growth. Phosphorus is involved in many plant processes, including energy transfer and reproductive development. Potassium contributes to overall plant function and helps support strong growth.
Orchids also require smaller quantities of secondary and micronutrients.
These include:
- calcium
- magnesium
- sulfur
- iron
- manganese
- zinc
- copper
- boron
- molybdenum
The plant does not need huge quantities.
That is why the concept of using a small amount makes sense.
The goal is not to drown the orchid in fertilizer.
The goal is to provide appropriate nutrition at a concentration the plant can safely use.
A teaspoon of properly diluted fertilizer can therefore be very different from a teaspoon of concentrated fertilizer.
That distinction is extremely important.
Never Assume More Fertilizer Means More Flowers
One of the most common orchid-care mistakes is believing that increasing the amount of fertilizer will make the plant bloom faster.
It doesn’t work that way.
Orchids are relatively sensitive to excessive fertilizer salts.
If too much fertilizer accumulates around the roots, the concentration of dissolved salts can become harmful.
This can lead to:
- damaged roots
- brown root tips
- leaf problems
- dehydration
- poor nutrient absorption
- stunted growth
- weakened plants
In severe cases, excessive fertilizer can contribute to root loss.
And an orchid without healthy roots is unlikely to produce impressive flowers.
Therefore, the principle should always be:
Small amounts, properly diluted, consistently applied.
What Kind of Fertilizer Should You Use?
For most cultivated orchids, particularly common Phalaenopsis orchids, a balanced orchid fertilizer is usually the safest and simplest choice.
You may see fertilizer formulas represented by three numbers, such as:
10-10-10
or
20-20-20
These numbers represent the percentages of nitrogen, phosphorus, and potassium.
The exact formula is less important than using a product specifically designed for orchids and following its dilution instructions carefully.
Some fertilizers marketed for orchids contain additional micronutrients.
That can be useful because orchids need more than the three major nutrients represented on the front of the package.
The important point is to avoid guessing.
If the fertilizer label says to dilute a certain amount in a particular volume of water, follow those instructions.
Don’t automatically assume that doubling the concentration will produce twice as many flowers.
It can do the opposite.
Why a Healthy Root System Comes First
If you want an orchid covered in flowers, start by looking underneath the leaves.
The roots are extremely important.
Healthy orchid roots are often:
- firm
- thick
- relatively smooth
- green when wet
- silvery or pale when dry
Depending on the orchid and its growing conditions, roots can look somewhat different, but they should generally feel firm rather than mushy.
Unhealthy roots may appear:
- brown
- black
- hollow
- soft
- mushy
- severely shriveled
If an orchid has extensive root damage, fertilizer should not be treated as a miracle cure.
The plant first needs appropriate care and recovery.
This is why the phrase “just a teaspoon” can be misleading when taken literally.
The teaspoon is not what creates flowers.
Healthy roots + adequate light + proper watering + appropriate temperature + sufficient nutrition = the conditions that allow flowering to occur.
The Importance of Light
If there is one factor that is frequently underestimated in orchid care, it is light.
Many people keep orchids in dark corners because they believe orchids cannot tolerate sunlight.
This is only partially true.
Most common indoor orchids prefer bright, indirect light.
They need enough light to photosynthesize and produce the energy required for growth and flowering.
A dark room may keep an orchid alive for a while, but it may not provide enough energy for reliable flowering.
An ideal location for many Phalaenopsis orchids is near a bright window where they receive plenty of filtered or indirect light.
An east-facing window can be excellent because it often provides gentle morning sunlight.
A bright north-facing location can work depending on the climate and season.
A south- or west-facing window may provide stronger light and may require filtering to prevent excessive direct sunlight.
The exact requirements depend on the species, climate, season, window, and indoor environment.
How to Tell Whether Your Orchid Is Getting Enough Light
The leaves can provide clues.
Very dark green leaves can sometimes indicate that the orchid is receiving less light than ideal.
A medium green color is often associated with better light levels for flowering orchids.
If the leaves become yellow, bleached, or develop scorched areas, excessive light may be a problem.
The goal is not to put the orchid directly under intense midday sun.
The goal is to provide enough bright light without overheating or burning the leaves.
Think of light as the plant’s energy source.
Fertilizer provides raw materials, but light allows the plant to manufacture the energy it needs to use those resources.
Watering Is More Important Than Many People Realize
Another common mistake is watering orchids according to a rigid calendar.
For example:
“I water my orchid every Sunday.”
That sounds organized, but it may not be appropriate.
The orchid doesn’t know what day of the week it is.
Its water requirements depend on:
- temperature
- humidity
- pot size
- potting medium
- airflow
- season
- root condition
- amount of light
Instead of watering according to a fixed schedule, learn to observe the plant.
If the roots are green and the growing medium is still wet, additional water may not be necessary.
If the roots have become silvery and the medium has dried significantly, watering may be appropriate.
The exact timing varies.
The Biggest Watering Mistake: Leaving the Orchid Sitting in Water
Orchids need water.
But their roots also need oxygen.
This is particularly important for epiphytic orchids such as Phalaenopsis, which naturally grow attached to trees rather than sitting in constantly saturated soil.
When an orchid is kept in stagnant water for long periods, the roots can become deprived of oxygen.
This encourages root deterioration and creates conditions favorable to rot.
Therefore, drainage is essential.
A decorative outer pot may look beautiful, but if water collects at the bottom and the orchid’s roots remain submerged, problems can develop.
After watering, excess water should be allowed to drain away.
Why the Potting Medium Matters
Orchids should generally not be planted in ordinary garden soil.
Their roots need a growing medium that provides both moisture and air.
Common orchid-growing materials include:
- bark
- sphagnum moss
- perlite
- charcoal
- specialized orchid mixes
Different materials behave differently.
Bark tends to provide good airflow and drains relatively quickly.
Sphagnum moss can retain more moisture and therefore requires careful watering.
A very moisture-retentive medium can be useful in dry environments, but it can also become problematic if the plant is watered too frequently.
The best medium depends on your growing conditions and watering habits.
When Should You Fertilize?
There is no universal schedule that works perfectly for every orchid.
However, many growers use a principle often described as:
“weakly, weekly.”
This means applying a relatively diluted fertilizer regularly during active growth rather than giving a very strong dose occasionally.
But even this principle should be adapted to the plant.
If the orchid is stressed, severely dehydrated, recently repotted, suffering from root problems, or otherwise unhealthy, fertilizer may not be the first priority.
The plant should first be stabilized.
During active growth, appropriate feeding can support new roots and leaves.
As the plant matures and begins preparing to flower, good nutrition combined with proper environmental conditions can help support the flowering process.
Should You Use Sugar Water?
You may see viral orchid-care advice recommending sugar, honey, milk, coffee, or other kitchen ingredients.
These methods are often presented as secret tricks.
But caution is necessary.
Sugar is not a complete fertilizer.
Giving sugar water to an orchid does not magically provide the balanced nutrition the plant needs.
In addition, sugary substances can attract insects and microorganisms and may create other problems if applied incorrectly.
The same principle applies to many homemade mixtures.
Just because something is natural or found in the kitchen does not automatically mean it is beneficial for orchids.
What About Rice Water?
Rice water is another popular home gardening remedy.
Some gardeners use diluted rice water as a source of certain nutrients.
However, rice water should not be viewed as a miracle flowering treatment.
Its nutrient composition is variable, and it does not replace a properly formulated orchid fertilizer.
If someone claims that one teaspoon of rice water will cause an orchid to suddenly produce dozens of flowers, that claim should be treated skeptically.
Plant growth is influenced by many factors, and flowering cannot reliably be triggered by a single kitchen ingredient.
What About Banana Peels?
Banana peel mixtures are also frequently recommended for flowering plants.
Bananas contain potassium and other minerals, but homemade banana-peel solutions are not equivalent to a carefully formulated fertilizer.
The amount of nutrients available to the orchid is unpredictable.
Furthermore, decomposing organic material can encourage microbial growth and attract insects.
If you want reliable nutrition, a fertilizer formulated for orchids is generally much easier to control.
The Real “Miracle” Is Often Better Care
Sometimes an orchid appears to respond dramatically after receiving a teaspoon of fertilizer.
The flowers may appear soon afterward.
This can make it seem as though the fertilizer caused flowering overnight.
But the plant may actually have been preparing that flowering cycle for weeks or months.
Orchids do not generally go from completely dormant to fully flowering because of a single dose.
Flower spikes develop over time.
Buds also develop gradually.
By the time you notice the first flower, the plant has already been undergoing a series of biological processes.
The fertilizer may have contributed to the plant’s overall nutritional status, but it did not create the entire flowering process in a single moment.
How an Orchid Produces a Flower Spike
Flowering begins with changes in the plant’s growth and environmental signals.
A mature orchid needs sufficient resources to support reproduction.
The plant must have enough energy and nutrients to produce a flower spike and then develop buds.
Temperature can also influence flowering in many orchids.
Phalaenopsis orchids, for example, can respond to cooler nighttime temperatures.
A modest difference between daytime and nighttime temperatures can sometimes help signal that conditions are changing.
This is one reason some orchids begin producing flower spikes during seasonal transitions.
Of course, temperature requirements vary by species.
You should always consider the specific orchid you have.
Don’t Cut the Flower Spike Too Quickly
After flowering, many people immediately cut the entire flower spike.
Sometimes that is appropriate.
But with Phalaenopsis orchids, the decision can depend on the condition of the spike.
If the spike remains green and healthy, some growers choose to leave it intact or cut it above a suitable node.
If the spike has turned completely brown or dry, removing it is generally more appropriate.
The plant may sometimes produce a secondary branch from a remaining node.
However, allowing an old spike to produce another branch can also require energy from the plant.
If the orchid is weak or needs recovery, encouraging new roots and leaves may be more beneficial than trying to force another round of flowers immediately.
What If the Orchid Has Lots of Leaves but No Flowers?
This is a common situation.
You may have an orchid with:
- large green leaves
- strong roots
- no obvious disease
- no flowers
If the plant looks healthy but refuses to bloom, light is one of the first things worth examining.
Too little light can result in beautiful foliage but poor flowering.
Think of it this way:
The orchid may have enough energy to maintain itself, but not enough to invest in reproduction.
Increasing suitable light gradually may therefore be more useful than increasing fertilizer.
Why Overfeeding Can Produce Leaves Instead of Flowers
Nitrogen is especially associated with vegetative growth.
If an orchid receives excessive nitrogen, it may put more resources into leaves and stems rather than flowering.
That does not mean nitrogen is bad.
The plant needs nitrogen.
But balance matters.
An orchid should receive appropriate nutrition rather than excessive amounts of one nutrient.
This is another reason why balanced orchid fertilizers can be preferable to homemade mixtures with unknown nutrient concentrations.
The Importance of Humidity
Orchids often appreciate moderate to relatively high humidity, especially compared with the dry air found in some heated or air-conditioned homes.
However, humidity should not be considered separately from airflow.
High humidity with poor airflow can create a favorable environment for fungal and bacterial problems.
The goal is not simply to make the room as humid as possible.
Instead, aim for a balanced environment where the plant has:
- adequate humidity
- good air circulation
- appropriate temperature
- sufficient light
- controlled watering
A small fan providing gentle air movement can sometimes be helpful, provided it does not blast the plant continuously with very strong dry air.
Don’t Mist the Flowers Constantly
Misting is often recommended as an orchid-care trick.
But repeatedly spraying the flowers or allowing water to remain trapped around the crown can cause problems.
The crown is the central point where the leaves emerge.
If water remains there for extended periods, particularly in a cool environment with poor airflow, rot can develop.
If water accidentally collects in the crown, gently remove it using a clean tissue or allow it to evaporate under appropriate airflow.
Watering the roots and growing medium appropriately is generally more important than constantly misting the foliage.
What Does a Healthy Orchid Look Like?
A healthy orchid typically has:
- firm leaves
- active roots
- no spreading dark spots
- no persistent foul smell
- stable growth
- appropriate leaf color
- no severe pest infestation
Healthy leaves should not necessarily be perfectly flawless.
Small imperfections can occur naturally.
The important thing is whether the plant is maintaining or producing healthy growth.
A plant with healthy roots and leaves has a much better chance of flowering than a plant struggling with root rot or severe dehydration.
A Simple Feeding Routine
If your orchid is healthy and actively growing, you can establish a simple routine.
First, inspect the plant.
Check the roots.
Check the leaves.
Check the growing medium.
Check the light.
If everything looks appropriate, prepare your orchid fertilizer according to the label.
Use clean water.
Dilute the fertilizer properly.
Apply the solution to the growing medium rather than repeatedly pouring concentrated fertilizer directly onto the roots.
Allow excess water to drain.
Do not leave the pot sitting in fertilizer solution.
Periodically flush the growing medium with plain water to help remove accumulated fertilizer salts, especially if you fertilize regularly.
The exact frequency depends on the fertilizer, growing medium, water quality, and growing environment.
Why Flushing Matters
When fertilizer is repeatedly applied, not every mineral is necessarily absorbed immediately.
Some dissolved salts can remain in the growing medium.
Over time, this accumulation can become harmful.
Flushing means thoroughly watering the medium with plain water and allowing it to drain freely.
This helps wash away excess soluble salts.
This is particularly important when using mineral fertilizers.
However, flushing should be done thoughtfully and in a way that does not leave the plant constantly saturated.
Water Quality Can Matter
Tap water is perfectly acceptable for many orchids.
However, water quality varies considerably from one location to another.
Some water supplies contain relatively high levels of dissolved minerals.
If you notice repeated white mineral deposits on the pot, growing medium, or roots, your water may contain significant mineral content.
In such situations, some growers use filtered or rainwater, where practical and safe.
But don’t assume that bottled water is automatically better.
Different bottled waters have different mineral profiles.
The best choice depends on your local water quality and the specific orchid.
The Orchid’s Leaves Are Like a Health Report
Learn to observe the leaves.
They can tell you a lot.
Soft, limp leaves may indicate dehydration or root problems.
Yellowing of an older lower leaf can sometimes be natural if the plant is replacing it.
But widespread yellowing may indicate a more serious issue.
Dark or black lesions can be associated with disease or environmental problems.
Wrinkled leaves may occur when the orchid is not receiving enough water, but they can also occur when the roots are damaged and unable to absorb water properly.
This is why simply watering more is not always the answer.
If an orchid is dehydrated because its roots have rotted, adding more water will not solve the underlying problem.
The Hidden Problem: Root Rot
Root rot is one of the most common problems associated with indoor orchids.
It often begins when the growing medium stays wet for too long.
The roots gradually deteriorate.
The orchid may then appear dehydrated even though the pot is full of moisture.
This creates a confusing situation.
The owner sees wrinkled leaves and thinks:
“The orchid needs more water.”
So they water it again.
But the damaged roots cannot absorb the water.
The problem gets worse.
This is why checking the roots can be so valuable.
What to Do If You Find Rotten Roots
If an orchid has severely damaged roots, the priority is recovery.
Remove the plant carefully from its container.
Inspect the roots.
Healthy roots should generally be firm.
Rotten roots are often soft, mushy, hollow, or collapsing.
Sterilized cutting tools can be used to remove severely damaged tissue.
The orchid can then be repotted in fresh, appropriate orchid medium.
Avoid burying the crown.
Provide suitable light and airflow.
Water carefully while the plant recovers.
Do not try to compensate for root loss by adding excessive fertilizer.
A recovering orchid needs time.
Patience Is the Forgotten Ingredient
If you want an orchid with many flowers, patience may be the most important ingredient of all.
A healthy orchid does not operate on a human timetable.
You cannot tell it:
“Bloom tomorrow.”
Flower spikes take time.
Buds take time.
Roots take time.
New leaves take time.
Even when everything is correct, flowering may take weeks or months.
This is normal.
Instead of judging your orchid every day, observe its progress over several weeks.
Look for:
- new roots
- new leaves
- changes in root color
- flower spike development
- swelling nodes
- healthy leaves
These are signs that the plant is actively growing.
The “One Teaspoon” Should Be Viewed as a Symbol of Precision
The phrase “just one teaspoon” sounds exciting because it suggests that something extremely simple can create an extraordinary result.
And there is some truth behind the idea that plants often need surprisingly small amounts of nutrients.
But precision is more important than quantity.
A teaspoon of concentrated fertilizer and a teaspoon of diluted fertilizer are completely different things.
A teaspoon of an unknown homemade mixture is also completely different from a teaspoon of a professionally formulated orchid fertilizer diluted according to instructions.
Therefore, never blindly copy a recipe from a social-media video.
Always consider the concentration.
Why Viral Orchid Tricks Become Popular
Orchids are visually dramatic plants.
When a plant suddenly produces a flower spike, the transformation is easy to photograph.
Someone can show:
“Before: no flowers.”
Then:
“After: dozens of flowers.”
Then they say:
“I used one teaspoon.”
This creates a powerful impression.
But the photograph does not show everything that happened between the two images.
We don’t see:
- the light level
- the watering schedule
- the temperature
- the humidity
- the fertilizer history
- the orchid’s age
- the root condition
- the season
- the previous months of growth
The missing information can be more important than the teaspoon.
A Better Way to Think About Orchid Flowering
Instead of asking:
“What can I put on my orchid to make it bloom?”
Ask:
“What conditions allow my orchid to bloom naturally?”
This change in thinking is extremely useful.
The goal becomes creating an environment where the orchid has enough resources and the appropriate signals to flower.
That means:
- Provide sufficient light.
- Maintain healthy roots.
- Water appropriately.
- Use a suitable growing medium.
- Provide balanced nutrition.
- Avoid fertilizer buildup.
- Maintain suitable temperatures.
- Provide reasonable humidity.
- Ensure airflow.
- Give the plant enough time.
When these factors work together, flowering becomes much more likely.
Can You Make an Orchid Bloom More Than Once a Year?
Many orchids can bloom repeatedly under suitable conditions.
Phalaenopsis orchids are especially popular because individual plants can produce flowers for extended periods and may rebloom.
But frequency varies.
Some orchids naturally bloom once a year.
Others may flower multiple times.
Some require particular seasonal cues.
The plant’s age and maturity also matter.
A young orchid may need time to become large enough to support substantial flowering.
Therefore, comparing your orchid with a photograph on social media can be misleading.
Don’t Compare Your Orchid to a Greenhouse Orchid
Commercially grown orchids often receive carefully controlled conditions.
They may be grown with:
- optimized light
- controlled temperatures
- precise irrigation
- carefully formulated fertilizer
- controlled humidity
- professional pest management
- specialized production techniques
When you bring that orchid home, the environment changes dramatically.
Your living room is not a greenhouse.
The plant may need time to adjust.
This is one reason why an orchid can arrive from a store covered in flowers and then stop blooming for a period after being brought home.
That does not necessarily mean you have failed.
The Best Location in the Home
Look for a bright area with indirect light.
Avoid placing the orchid:
- directly above a heater
- directly beside strong air-conditioning
- in a dark corner
- in a location exposed to cold drafts
- against extremely hot glass
- in a place where water frequently sits around the crown
A stable environment is usually better than constant changes.
Orchids appreciate consistency.
Temperature Can Encourage Flower Spikes
Many orchids respond to temperature changes.
For Phalaenopsis, slightly cooler nighttime temperatures can sometimes encourage flowering.
The difference does not need to be extreme.
A natural day-night temperature variation can provide useful environmental cues.
However, avoid exposing tropical orchids to dangerously cold conditions.
Never assume that colder is always better.
The correct temperature depends on the orchid species.
Know Which Orchid You Own
Not all orchids behave the same way.
Phalaenopsis orchids are commonly sold as indoor houseplants.
But there are many other genera, including:
- Dendrobium
- Cattleya
- Oncidium
- Paphiopedilum
- Cymbidium
- Vanda
Their light, temperature, watering, and flowering requirements can differ substantially.
A technique that works well for one type may not be appropriate for another.
Therefore, identify your orchid before creating a detailed care routine.
Why Fertilizer Alone Cannot Fix Poor Light
Imagine an orchid sitting in a dark hallway.
You give it a teaspoon of fertilizer.
The plant now has nutrients, but it still lacks sufficient light.
Without enough light, the plant’s ability to produce energy is limited.
Adding more fertilizer cannot replace sunlight or suitable artificial light.
It is similar to giving a person ingredients without providing the ability to cook.
The ingredients alone do not create the finished meal.
Artificial Lighting Can Help
If your home does not receive enough natural light, artificial grow lighting can sometimes help.
A suitable plant light can provide the intensity and duration needed for photosynthesis.
However, the light should be appropriate for indoor plant use and positioned at a suitable distance.
Do not assume that simply placing the orchid underneath the brightest possible lamp is ideal.
Too much intensity can damage leaves.
The objective is appropriate light, not maximum light.
A Practical Weekly Orchid Check
Instead of constantly changing your orchid’s care, create a simple observation routine.
Once or twice a week, look closely at:
The leaves
Are they firm?
Are they developing unusual spots?
Are they severely wrinkled?
The roots
Are they firm?
Are they green when wet and silvery when dry?
The growing medium
Is it still wet?
Has it dried appropriately?
Is it decomposing?
The pot
Does it drain properly?
Is water collecting at the bottom?
The flower spike
Is it green?
Is it drying?
Are new buds developing?
This simple observation can tell you far more than a viral “miracle” recipe.
A Safe Approach to Feeding
If you want to use the teaspoon approach, think of it as measuring a small quantity of already diluted fertilizer, not pouring a teaspoon of concentrated fertilizer directly onto the plant.
Read the fertilizer label first.
Determine the recommended dilution.
Mix it thoroughly with water.
Then apply the diluted solution as part of your normal watering routine.
Never exceed the manufacturer’s recommended concentration simply because you want faster flowers.
The plant cannot be forced to flower safely by increasing fertilizer concentration.
Fertilizing a Dry Orchid
Some growers prefer to water the orchid lightly with plain water before applying fertilizer, particularly if the roots are very dry.
The reasoning is that applying concentrated fertilizer to extremely dry roots may increase the risk of salt injury.
A thoroughly dehydrated plant may need hydration first.
Again, the exact method depends on the fertilizer and growing conditions.
The important principle is avoiding unnecessary stress.
What If Your Orchid Is Already Flowering?
If your orchid is currently producing beautiful flowers, don’t suddenly change everything.
Avoid moving it repeatedly.
Avoid overwatering.
Avoid dramatically increasing fertilizer.
Avoid exposing it to extreme temperature changes.
Maintain stable conditions.
Flowers can last a surprisingly long time when the plant is kept in a suitable environment.
After the Flowers Fall
When flowers eventually fall, don’t assume the orchid is dying.
This is normal.
The flowering period has ended.
The plant now needs to recover and prepare for future growth.
Continue appropriate light.
Continue appropriate watering.
Continue sensible nutrition during active growth.
Observe the flower spike.
Watch for new leaves and roots.
With good care, the orchid may eventually produce another spike.
Why Some Orchids Bloom Better After a Rest
A rest period can be beneficial.
The plant has just spent considerable resources producing flowers.
Allowing it to focus on roots and leaves can help rebuild energy reserves.
Trying to force continuous flowering can sometimes weaken the plant.
A strong orchid naturally cycles between vegetative growth and reproductive growth.
The goal is not to prevent rest.
The goal is to support the plant throughout its entire cycle.
Don’t Remove Healthy Leaves Just Because They’re Old
Leaves are valuable energy-producing organs.
Removing healthy leaves unnecessarily reduces the plant’s ability to photosynthesize.
Only remove leaves when there is a good reason.
If a leaf is naturally aging and yellowing from the base, allow the plant to complete the process unless there is another concern.
If you see sudden widespread yellowing, investigate.
Do not simply cut everything away.
Common Mistakes That Prevent Orchids From Blooming
Mistake 1: Too little light
The orchid survives but doesn’t have enough energy to flower.
Mistake 2: Too much water
Roots begin to deteriorate.
Mistake 3: Fertilizing too heavily
Salt buildup damages roots.
Mistake 4: Using ordinary soil
The roots may not receive enough air.
Mistake 5: Keeping the orchid constantly wet
The root environment becomes unhealthy.
Mistake 6: Constantly moving the plant
The orchid cannot establish stable conditions.
Mistake 7: Cutting flower spikes unnecessarily
You may remove potential growth points.
Mistake 8: Using random kitchen ingredients
Nutrient concentrations are unpredictable.
Mistake 9: Expecting immediate results
Flowering takes time.
Mistake 10: Ignoring the roots
The roots are one of the best indicators of overall plant health.
The Secret Is Balance
Successful orchid care is not about giving the plant as much of everything as possible.
It is about balance.
Too much water is bad.
Too little water is bad.
Too much fertilizer is bad.
Too little nutrition is also bad.
Too little light prevents good growth.
Too much intense light can burn the leaves.
Too much humidity without airflow can create problems.
Too little humidity can stress the plant in certain environments.
This is why experienced orchid growers focus on observing the plant rather than following one rigid recipe.
A Simple “Flower Booster” Philosophy
If you want your orchid to produce lots of flowers, use this philosophy:
Don’t force it. Prepare it.
Prepare the plant by giving it:
- healthy roots
- adequate light
- appropriate watering
- good airflow
- suitable temperature
- balanced nutrition
- appropriate humidity
- time
Once the plant is strong, flowering becomes much more likely.
The teaspoon of fertilizer is simply one small part of the larger system.
What You Should Expect After Feeding
Don’t expect flowers the next morning.
Instead, look for gradual signs.
You may first see:
- stronger roots
- new root tips
- new leaf growth
- thicker leaves
- increased overall vigor
Later, under suitable conditions, a flower spike may emerge.
At first, it may look like a small green point.
As it grows, it becomes easier to distinguish from a root.
Eventually, nodes may develop along the spike.
Then flower buds begin to form.
Finally, the orchid opens its flowers.
This entire process can take considerable time.
How to Recognize a Flower Spike
On Phalaenopsis orchids, a new flower spike often emerges from the area between a leaf and the main stem.
A root tends to have a rounded, smooth appearance and often grows downward or outward.
A flower spike is usually flatter or more pointed and may develop small nodes.
Learning to distinguish the two is a fun part of orchid ownership.
Many beginners mistakenly think a new root is a flower spike.
Then they are surprised when it grows in the wrong direction.
Why Orchids Can Produce So Many Flowers
When conditions are right, an established orchid can produce an impressive number of flowers.
This is not because one ingredient suddenly transformed it.
It is because the plant has accumulated enough resources and received the appropriate environmental signals to support reproduction.
The flowers are the final result of many processes happening inside the plant.
This is why the best orchid care is long-term care.
The Difference Between “Blooming” and “Growing”
Sometimes people think their orchid is doing poorly because it is producing leaves instead of flowers.
But leaf production is not failure.
In fact, new leaves can be a very positive sign.
A new leaf means the orchid is actively growing.
Once it has sufficient size and resources, flowering may follow.
Think of vegetative growth as preparation.
The orchid is building the machinery it needs for future flowers.
If Your Orchid Has No Flowers for Months
Don’t immediately panic.
First ask:
Is the plant healthy?
Are the roots healthy?
Is the plant getting enough light?
Is the temperature suitable?
Is the growing medium still good?
Am I overwatering?
Am I under-watering?
Am I fertilizing excessively?
Has the plant recently finished flowering?
How old and mature is it?
What species is it?
These questions will usually lead you closer to the answer than searching for another miracle mixture.
The Most Important Rule About Fertilizer
Always remember:
Fertilizer is not medicine.
If the orchid has root rot, fertilizer does not cure root rot.
If the orchid is in complete darkness, fertilizer does not provide light.
If the plant is severely dehydrated, fertilizer does not replace proper hydration.
If the roots are dead, fertilizer cannot make dead roots absorb nutrients.
Fertilizer is a nutritional supplement for a plant that can actually use those nutrients.
That distinction can save your orchid from many unnecessary experiments.
Why Simple Care Often Works Better
Orchids can appear complicated because the internet is full of elaborate recipes.
But the fundamentals are surprisingly simple.
Give the plant appropriate light.
Water when needed.
Let excess water drain.
Keep the roots healthy.
Feed appropriately.
Provide airflow.
Maintain suitable temperatures.
Then wait.
You don’t need ten different homemade mixtures.
You don’t need to spray the plant every morning.
You don’t need to change its location every few days.
You don’t need to bury strange ingredients in the pot.
Consistency is usually more valuable than complexity.

Welcome to my kitchen!
I’m a passionate home cook and recipe creator who loves turning simple ingredients into delicious, comforting meals that everyone can enjoy. Through this website, I share carefully prepared recipes, practical cooking tips, and easy-to-understand food education to help you feel more confident in the kitchen.
My goal is to make cooking simple, enjoyable, and accessible. Whether you are looking for a quick family dinner, a delicious dessert, healthy meal ideas, or traditional recipes with a modern touch, you’ll find inspiration here.
More Than Just Recipes
I believe that cooking is also a way to learn. That’s why this website is not only about recipes. I also create educational articles about ingredients, cooking techniques, kitchen tips, food preparation, and the stories behind different dishes.
Each article is designed to give you useful knowledge that you can apply in your own kitchen. From understanding how ingredients work together to learning better cooking methods, my aim is to help you become a more confident and creative cook.
My Philosophy
Good food doesn’t always require complicated ingredients or professional equipment. With a little knowledge, patience, and creativity, simple ingredients can become something truly special.
I believe in sharing recipes that are practical, clearly explained, and enjoyable to make. I also love exploring new flavors while appreciating traditional cooking and the recipes passed down through generations.
Thank you for visiting my kitchen and being part of this food-loving community. I hope my recipes and articles inspire you to cook, learn, experiment, and most importantly, enjoy every bite!
Happy cooking!