Sometimes the best home-decor ideas don’t begin in an expensive furniture showroom.
They begin in a thrift store.
You walk past a shelf filled with mismatched baskets, old frames, dishes, lamps, and pieces of furniture that have clearly lived another life. Most shoppers see ordinary objects waiting to be repurposed.
But every once in a while, someone sees something completely different.
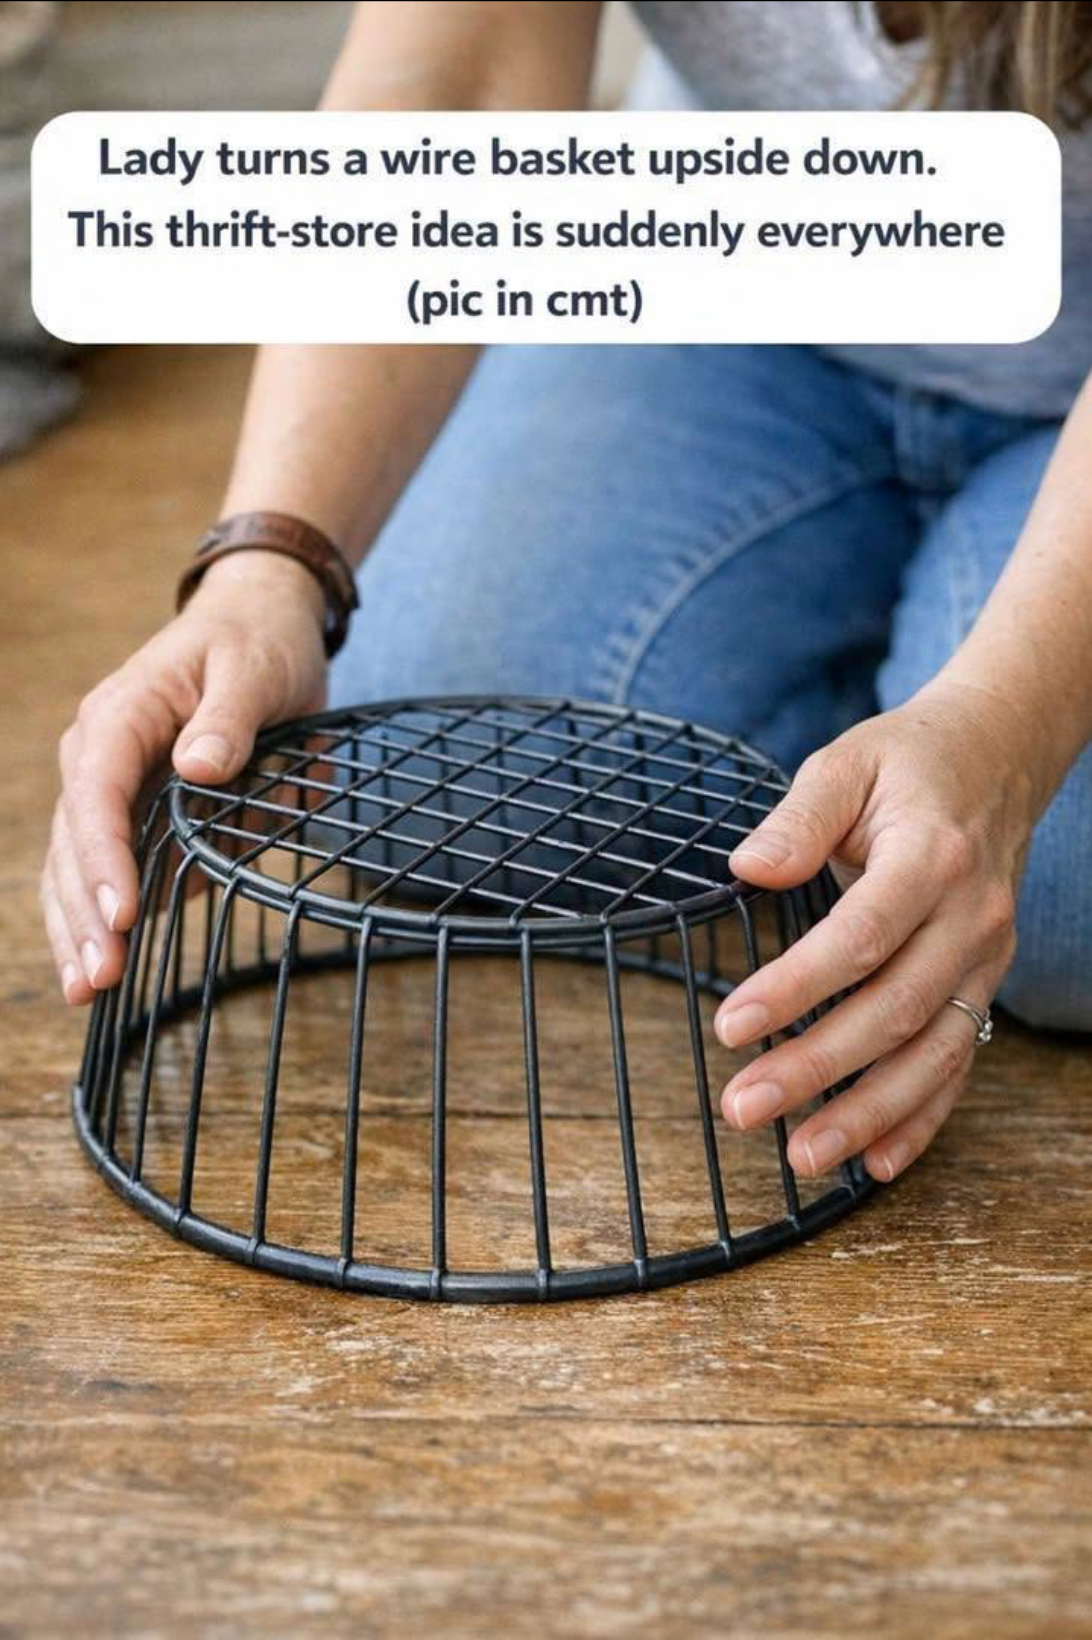
That’s what happened when a simple wire basket was turned upside down and transformed into a charming little side table.
At first, it seems almost too simple.
A wire basket isn’t a table.
It’s a storage container.
But turn it upside down, add a suitable tabletop, and suddenly its shape makes perfect sense. The basket becomes the base, while the broad opening provides a sturdy visual foundation for the top.
The result is a lightweight, inexpensive accent table that can look surprisingly polished.
And the best part?
You don’t necessarily need advanced woodworking skills to create one.
Why This Thrift-Store Idea Is So Appealing
Furniture can be expensive, particularly when you’re looking for a small table that has a distinctive design.
A basic side table may not seem like a major purchase, but prices add up quickly when you’re furnishing an entire home.
A thrift-store basket offers another possibility.
Instead of buying a finished piece, you start with something inexpensive and give it a completely new purpose.
That makes the project appealing to people who enjoy:
- upcycling,
- budget decorating,
- DIY projects,
- farmhouse-style interiors,
- modern minimalist design,
- creative thrift-store finds.
The finished piece also has something mass-produced furniture often lacks:
a story.
You can tell someone, “I found the basket at a thrift store and turned it into this table.”
Suddenly, the furniture becomes a conversation piece.
What You’ll Need
The exact materials depend on the basket and tabletop you choose, but a basic project may require:
- one sturdy wire basket,
- a suitable tabletop,
- strong mounting hardware or an appropriate adhesive,
- measuring tape,
- screwdriver or drill if required,
- sandpaper if you’re refinishing the tabletop,
- paint or spray paint if you want to change the color,
- protective pads for the bottom if necessary.
If you’re working with tools, choose equipment appropriate for the material and follow the manufacturer’s safety instructions.
Choosing the Right Wire Basket
Not every basket is suitable for becoming a table base.
Look for one that is:
Stable
Place it upside down on a flat surface.
It should sit without rocking excessively.
Strong
The wire should feel sturdy rather than flimsy.
Wide Enough
A broader base generally creates a more stable table.
Appropriate in Height
Consider where you intend to use the table.
A small accent table beside a chair may have different proportions from a bedside table.
Visually Appealing
Remember that the basket itself becomes part of the finished design.
A geometric wire pattern can create a modern appearance, while a simple rounded basket may work beautifully with farmhouse or rustic decor.
Choosing the Tabletop
The tabletop determines much of the final personality of the project.
A round wooden board is one of the easiest options because it works naturally with a circular basket.
You could also consider:
- a square wooden panel,
- a reclaimed-wood board,
- a finished furniture panel,
- a suitable glass top,
- another appropriately sized rigid surface.
The tabletop should be properly supported and securely attached.
Avoid using a top that is excessively heavy for the basket base.
Step 1: Clean the Basket
If you’ve found the basket at a thrift store, give it a thorough cleaning before beginning.
Remove dust, dirt, and residue.
Allow it to dry completely.
Inspect the wire carefully for:
- sharp ends,
- loose sections,
- rust,
- bent areas,
- damaged welds.
Don’t use a basket with structural damage that could make the finished table unstable.
Step 2: Turn the Basket Upside Down
Now comes the surprisingly satisfying part.
Turn the basket upside down and place it on a level surface.
The original opening becomes the broad lower section of the base, while the narrower bottom becomes the upper support point.
Stand back and look at the proportions.
Does it look balanced?
Is the height appropriate?
Does the base sit firmly?
If the answer is yes, you’ve got the foundation of your table.
Step 3: Decide on the Finish
You can leave the wire exactly as you found it if you like its original appearance.
But paint can completely change the character of the piece.
Depending on your decor, you might choose a neutral finish such as:
- black,
- white,
- cream,
- gray,
- bronze,
- metallic tones.
If painting, use a coating appropriate for the basket’s material and follow the product’s instructions regarding ventilation, preparation, drying time, and application.
Step 4: Prepare the Tabletop
If you’re using unfinished wood, lightly sand it until the surface feels smooth.
Then choose the finish you want.
You could:
- stain the wood,
- paint it,
- leave it natural,
- apply a clear protective finish.
A natural wood top paired with a dark wire base creates a particularly attractive contrast.
The warm appearance of wood softens the industrial quality of the metal.
Step 5: Attach the Top Securely
This is the most important part of the project.
The tabletop needs to be securely connected to the basket base so that it doesn’t slide or tip when someone places an object on it.
The appropriate attachment method depends on the materials and construction.
For some lightweight decorative tables, a suitable adhesive may work.
For other designs, mechanical fasteners or brackets may be more appropriate.
Always choose hardware and adhesives according to their intended use and weight limits.
Step 6: Check Stability
Once everything has been assembled, place the table on a level surface.
Gently test it.
Does it rock?
Does the top shift?
Does the base remain centered?
If anything feels unstable, fix it before putting objects on the table.
A beautiful DIY project isn’t successful unless it’s also safe and functional.
Step 7: Add Protective Pads
Small protective pads can help prevent the table from scratching floors.
They can also compensate for tiny differences in the base and reduce movement.
This is particularly useful if the table will sit on:
- hardwood,
- laminate,
- tile,
- polished concrete.
The Fun Part: Decorating It
Once the table is finished, you can style it in countless ways.
Try placing:
- a small lamp,
- a vase,
- a plant,
- a stack of books,
- a decorative bowl,
- a framed photograph.
The key is to avoid overcrowding the tabletop.
The wire base already provides visual interest, so a simple arrangement often looks best.
Turn It Into a Bedside Table
The design can work particularly well as a compact bedside table.
The open wire base keeps the piece visually light, which can be helpful in smaller bedrooms.
You could place a lamp and book on top while using the open space underneath for a decorative basket.
Just make sure the finished table is stable enough for its intended use.
Create a Living-Room Accent Table
Placed beside a sofa or armchair, the table can become a convenient surface for:
- a cup or glass,
- a book,
- a small lamp,
- a remote control,
- decorative accessories.
Its small footprint makes it useful in rooms where a large coffee table isn’t practical.
Make It Part of a Matching Set
If you find multiple matching baskets, you can create a coordinated pair.
Two identical tables can work beautifully on either side of a sofa or bed.
Alternatively, slightly different baskets can create an intentional mismatched look.
That’s one of the advantages of thrifted furniture: imperfections can become part of the design.
A Great Project for Personalization
Perhaps the best part of this idea is how easily you can make it your own.
The basic concept remains the same:
basket + tabletop = side table.
But the final result can look completely different depending on your choices.
Change the basket finish.
Change the wood.
Change the shape of the top.
Add decorative details.
Use a completely different color combination.
You can create something that fits your home instead of trying to make your home fit a mass-produced piece of furniture.
Why Upcycling Can Be So Satisfying
There is something rewarding about taking an object that someone else no longer wanted and giving it another purpose.
Instead of seeing an ordinary wire basket, you’re seeing potential.
That mindset can transform thrift shopping.
A basket becomes a table.
An old frame becomes wall art.
A discarded drawer becomes a shelf.
A worn wooden piece becomes a planter stand.
The possibilities are limited mostly by imagination—and by making sure the finished object is structurally suitable for its new purpose.
A Few Things to Keep in Mind
Before starting, remember that not every thrift-store object is suitable for every DIY project.
Check the basket carefully for damage and make sure the materials are appropriate for the intended use.
If the table will support anything heavy, choose a strong construction method and verify that the base and tabletop can handle the load.
And if you’re using power tools, paint, adhesives, or other workshop materials, work in an appropriate ventilated area and follow the safety directions for those products.