A Complete, Step-by-Step Guide to Eliminating the Problem at Its Source
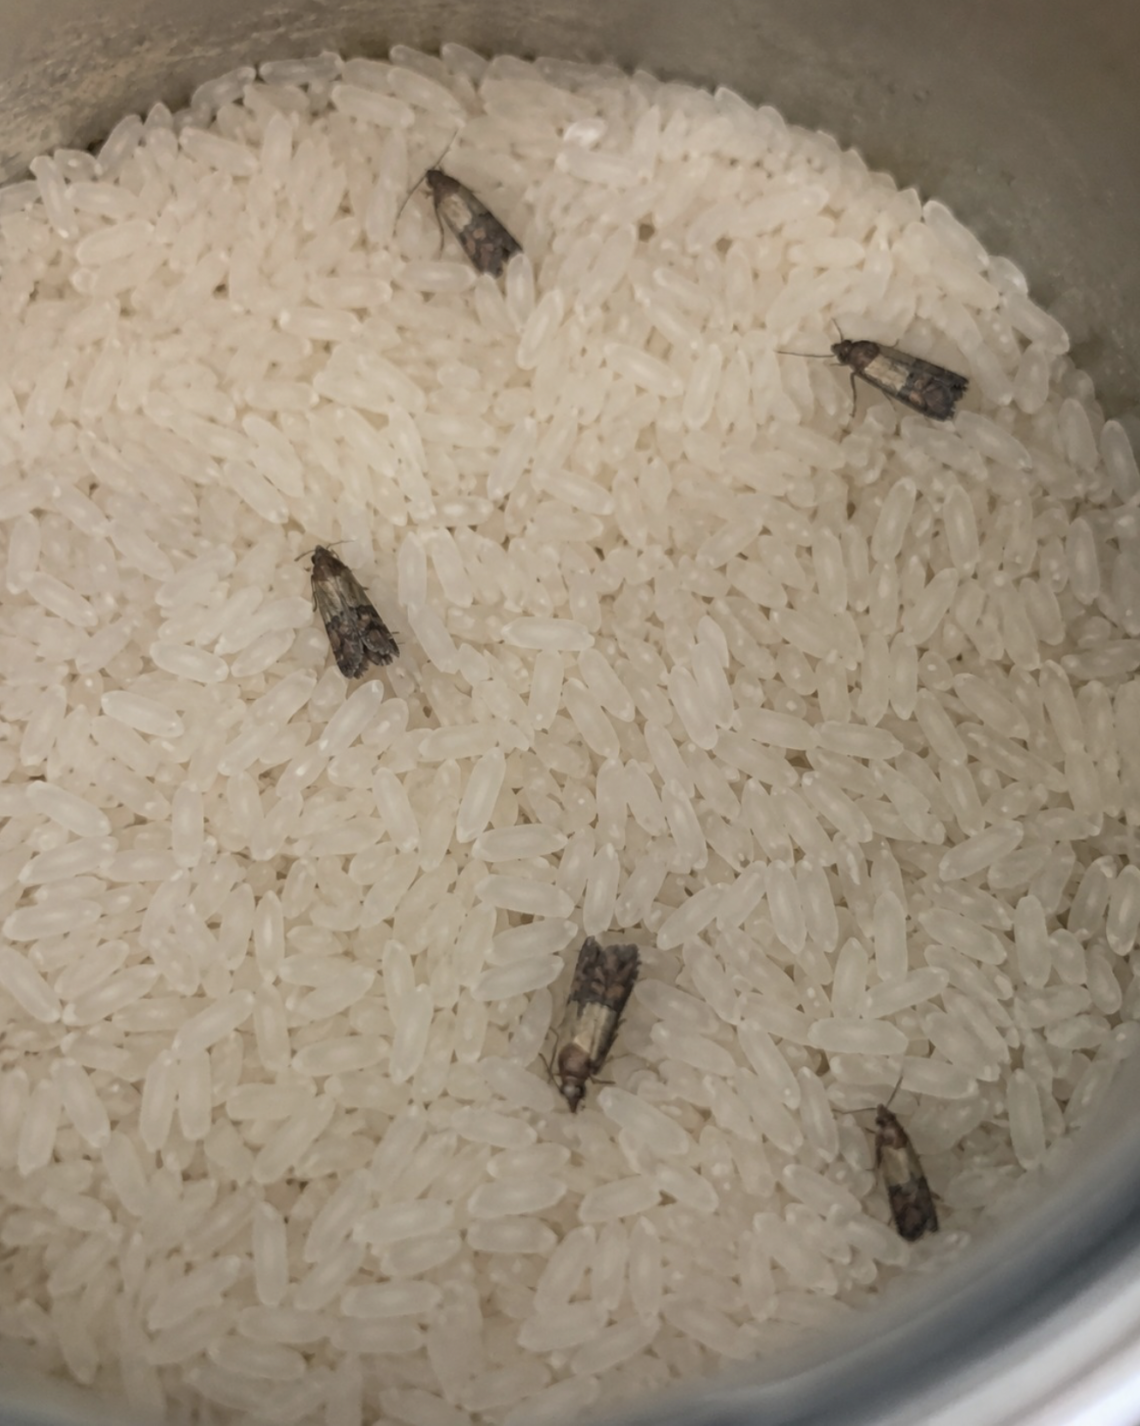
Finding pantry moths in your kitchen can be frustrating—and honestly a bit unsettling. You open a bag of flour, rice, cereal, or pasta and suddenly notice tiny flying moths or fine web-like strands inside the food.
The good news: pantry moth infestations are very common, and they can be completely eliminated if you follow a careful, thorough process.
The key is understanding one important truth:
You are not just dealing with adult moths—you are dealing with eggs, larvae, and hidden contamination.
If you only kill the visible moths, the problem will come back. So the solution requires a full reset of your pantry system.
What Pantry Moths Actually Are
Pantry moths (often Indian meal moths) are small insects that infest dry food products.
They typically target:
- flour
- rice
- pasta
- cereal
- grains
- nuts
- dried fruit
- pet food
- spices
They are not dangerous to humans in the sense of biting or spreading disease, but they contaminate food, making it unsafe or unappetizing to eat.
The Life Cycle (Why They Keep Coming Back)
To eliminate them, you need to understand how they reproduce:
1. Eggs
- Extremely tiny
- Laid directly in food or packaging cracks
2. Larvae (the real problem stage)
- Worm-like caterpillars
- Feed on stored food
- Create silky webbing
3. Pupae
- Hide in corners, shelves, or ceiling cracks
- Transform into adults
4. Adult moths
- Fly around your kitchen
- Lay more eggs and restart the cycle
If even a few eggs survive, the infestation continues.
Step 1: Identify the Infested Items
Start by checking every dry food item in your pantry.
Look for:
- fine webbing inside packages
- clumped or sticky grains
- tiny larvae (cream or brown colored worms)
- holes in packaging
- adult moths flying when you open cabinets
Important:
Even if a package looks “mostly fine,” it can still be infested.
When in doubt, throw it out.
Step 2: Remove Everything From the Pantry
This step is essential.
Take out:
- all food items
- containers
- shelf liners
- spices
- pet food
You need a completely empty space to reset the environment.
Step 3: Dispose of Contaminated Food Properly
Infested items should be:
- sealed in plastic bags
- taken outside immediately
- placed in outdoor trash bins
Do not leave them inside your kitchen garbage—moths can escape.
Step 4: Deep Clean the Entire Pantry
This is where most people underestimate the problem.
You must clean:
- every shelf
- corners and edges
- screw holes
- hinges
- cracks in wood
Cleaning solution:
- hot soapy water
- vinegar solution (optional for extra cleaning power)
Scrub thoroughly to remove:
- eggs
- larvae
- sticky residue
- invisible food particles
Step 5: Vacuum Hidden Areas
Use a vacuum to reach:
- shelf corners
- wall edges
- cabinet seams
- behind shelves
Immediately empty the vacuum outside after use, because eggs or larvae may survive inside.
Step 6: Use Heat or Cold Treatment (Optional but Effective)
Pantry moth eggs and larvae are sensitive to temperature.
You can:
- freeze dry goods for 3–4 days
or - heat certain items (if safe) at low oven temperature
This helps ensure any hidden eggs in unopened items are destroyed.
Step 7: Store Food in Airtight Containers
This step is critical for preventing reinfestation.
Use:
- glass jars
- thick plastic containers
- metal tins
Avoid:
- thin plastic bags
- cardboard boxes
- loosely sealed packaging
Why?
Moths can chew through weak packaging or enter through tiny gaps.
Step 8: Set Pantry Moth Traps
Use pheromone traps designed specifically for pantry moths.
They work by:
- attracting male moths
- disrupting breeding cycles
- reducing population over time
Place traps:
- inside pantry
- near food storage areas
- behind shelves if possible
Step 9: Natural Repellents (Supportive Method)
While not enough alone to eliminate an infestation, these can help prevent return:
Bay leaves
Placed in containers or shelves (mild deterrent effect)
Cloves
Strong scent that may discourage insects
Cedar blocks
Often used in storage areas
Step 10: Monitor for 2–3 Weeks
Even after cleaning, you must watch for:
- flying moths
- new larvae
- webbing
- trap activity
If moths reappear, repeat cleaning process immediately.
Why Pantry Moths Keep Coming Back
Common reasons include:
1. Missed eggs
Tiny eggs hide in corners and packaging folds.
2. Unsealed food
One open bag can restart the infestation.
3. Overlooked items
People often forget:
- spices
- tea boxes
- pet food
4. Reintroduced food
New contaminated products from store shelves.
Prevention Tips for Long-Term Protection
1. Freeze new dry goods
Freeze flour, grains, or nuts for 2–3 days before storage.
2. Buy smaller quantities
Less storage time = lower risk.
3. Clean pantry regularly
Light wipe-down every few weeks helps.
4. Rotate food
Use older items first.
5. Inspect packaging before storing
Look for holes or tears.
Natural vs Chemical Methods
Most infestations can be solved without chemicals.
Natural approach:
- cleaning
- disposal
- airtight storage
- traps
Chemical approach:
Only needed in severe infestations and should be used carefully in food areas.
The Most Important Rule
If you remember only one thing, remember this:
You cannot solve a pantry moth problem without removing contaminated food completely.
Cleaning alone is not enough. Traps alone are not enough. Repellents alone are not enough.
It requires a full reset.

Welcome to my kitchen!
I’m a passionate home cook and recipe creator who loves turning simple ingredients into delicious, comforting meals that everyone can enjoy. Through this website, I share carefully prepared recipes, practical cooking tips, and easy-to-understand food education to help you feel more confident in the kitchen.
My goal is to make cooking simple, enjoyable, and accessible. Whether you are looking for a quick family dinner, a delicious dessert, healthy meal ideas, or traditional recipes with a modern touch, you’ll find inspiration here.
More Than Just Recipes
I believe that cooking is also a way to learn. That’s why this website is not only about recipes. I also create educational articles about ingredients, cooking techniques, kitchen tips, food preparation, and the stories behind different dishes.
Each article is designed to give you useful knowledge that you can apply in your own kitchen. From understanding how ingredients work together to learning better cooking methods, my aim is to help you become a more confident and creative cook.
My Philosophy
Good food doesn’t always require complicated ingredients or professional equipment. With a little knowledge, patience, and creativity, simple ingredients can become something truly special.
I believe in sharing recipes that are practical, clearly explained, and enjoyable to make. I also love exploring new flavors while appreciating traditional cooking and the recipes passed down through generations.
Thank you for visiting my kitchen and being part of this food-loving community. I hope my recipes and articles inspire you to cook, learn, experiment, and most importantly, enjoy every bite!
Happy cooking!