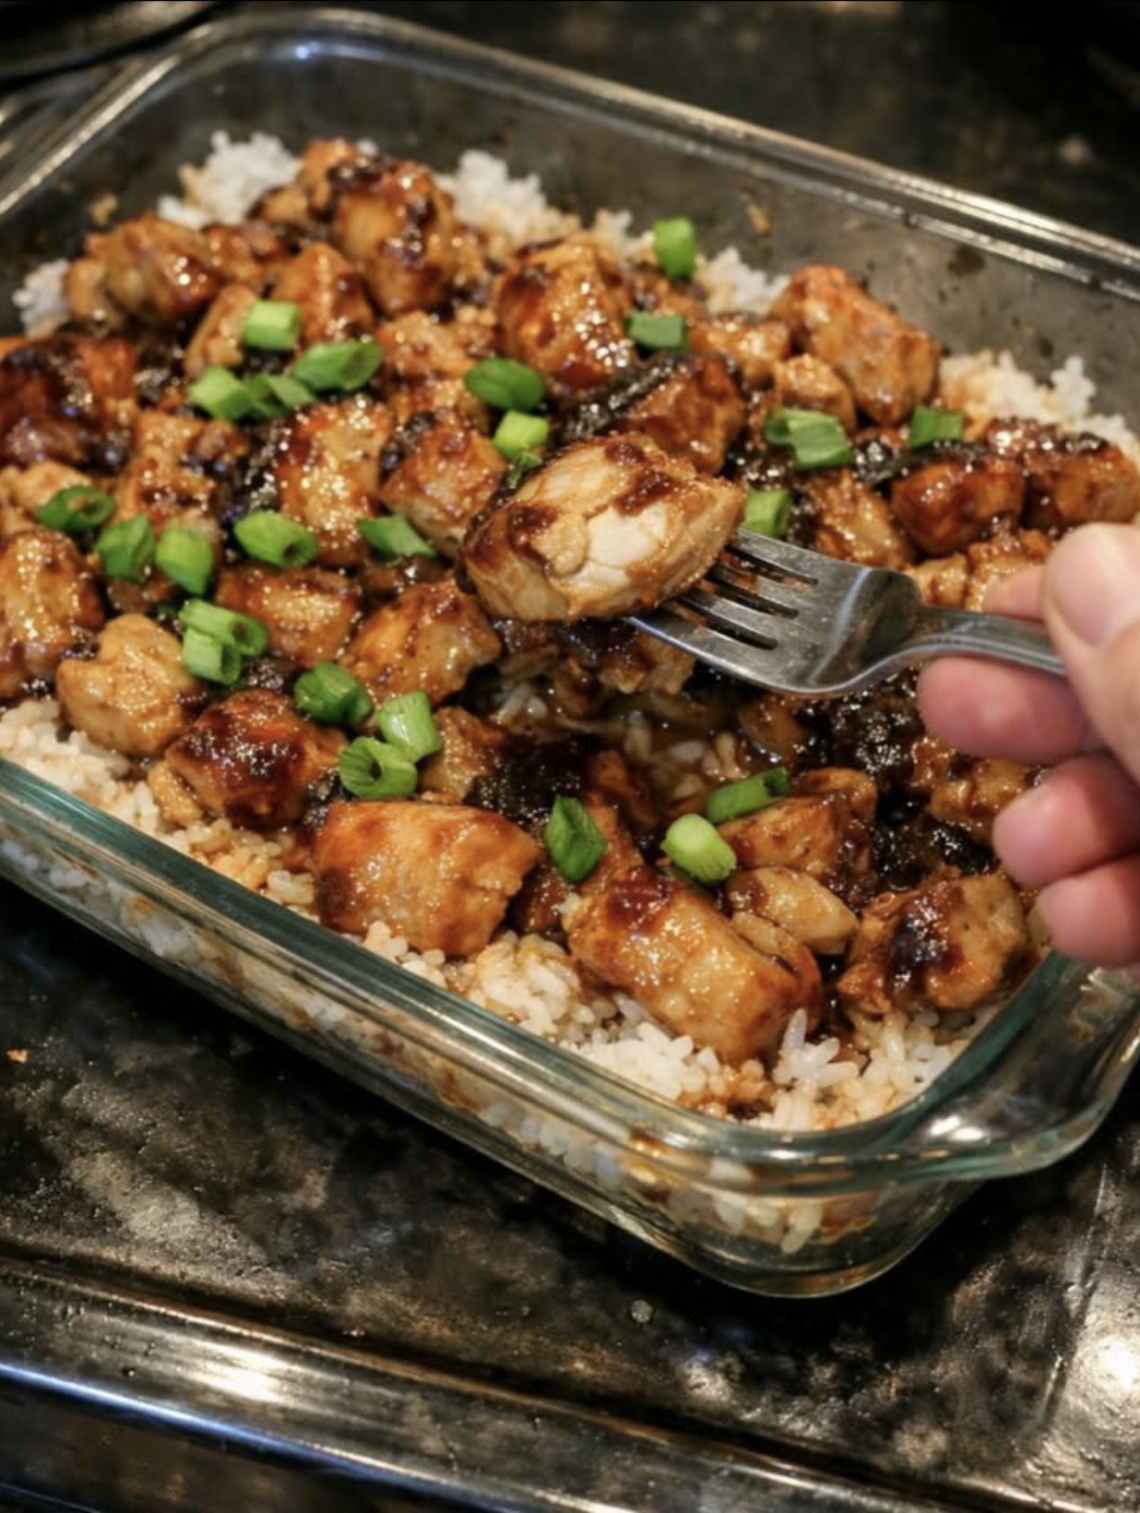
There are certain dinners that everyone looks forward to the moment they smell them baking in the oven, and this Easy Chicken Teriyaki Rice Bake is one of those meals. With tender, juicy chicken, fluffy rice, colorful vegetables, and a rich homemade teriyaki glaze that caramelizes beautifully as it bakes, every bite is packed with sweet, savory, and comforting flavors. It’s the kind of meal that feels like your favorite takeout but is made entirely in your own kitchen using simple, wholesome ingredients.
One of the best things about this recipe is that everything cooks together in a single baking dish. As the chicken roasts, its natural juices blend with the teriyaki sauce and cooking liquid, allowing the rice to absorb every bit of flavor. By the time the casserole comes out of the oven, the rice is tender and infused with a rich, savory sauce, while the chicken develops lightly caramelized edges that add incredible texture and depth.
Whether you’re preparing dinner after a busy day at work, feeding a hungry family, or looking for a comforting meal to enjoy throughout the week, this one-pan recipe delivers maximum flavor with minimal cleanup. It’s satisfying enough for Sunday dinner, simple enough for a weeknight, and impressive enough to serve when guests come over.
Why You’ll Love This Recipe
- Everything cooks in one baking dish.
- Easy preparation with minimal cleanup.
- Better than takeout.
- Family-friendly.
- Perfect for meal prep.
- Rich sweet-and-savory flavor.
- Tender, juicy chicken every time.
- Fluffy rice infused with teriyaki sauce.
- Easily customizable with vegetables.
- Great for leftovers.
- Beginner-friendly recipe.
- Perfect balance of protein, rice, and vegetables in one meal.
Ingredients
For the Chicken
- 2 pounds (900 g) boneless, skinless chicken thighs or chicken breasts, cut into bite-sized pieces
- 1 tablespoon vegetable oil
- Salt and freshly ground black pepper, to taste
For the Rice
- 1½ cups uncooked long-grain white rice
- 3 cups low-sodium chicken broth
- 1 tablespoon butter
For the Homemade Teriyaki Sauce
- ½ cup low-sodium soy sauce
- ¼ cup brown sugar
- 2 tablespoons honey
- 2 tablespoons rice vinegar
- 2 teaspoons sesame oil
- 3 cloves garlic, minced
- 1 tablespoon fresh ginger, grated
- 1 tablespoon cornstarch
- 2 tablespoons water
Vegetables
- 1 cup broccoli florets
- 1 cup sliced carrots
- ½ cup diced red bell pepper
- ½ cup frozen peas
Garnishes
- Sliced green onions
- Sesame seeds
- Fresh cilantro (optional)
- Extra teriyaki sauce
- Lime wedges (optional)
Equipment Needed
- 9 × 13-inch baking dish
- Medium saucepan
- Large mixing bowl
- Measuring cups
- Measuring spoons
- Whisk
- Aluminum foil
- Cutting board
- Sharp knife
Choosing the Best Chicken
Boneless, skinless chicken thighs are highly recommended because they remain juicy throughout baking and develop beautifully caramelized edges.
Chicken breasts also work well, especially if you prefer leaner meat. Just be careful not to overcook them, as they can dry out more quickly than thighs.
Cut the chicken into evenly sized pieces to ensure everything cooks at the same rate.
Why Homemade Teriyaki Sauce Makes a Difference
Making teriyaki sauce from scratch takes only a few minutes and produces a fresher, richer flavor than many bottled versions.
The soy sauce provides a savory, umami-rich base, while brown sugar and honey add sweetness and help the chicken caramelize during baking. Fresh garlic and ginger contribute aromatic depth, and a touch of sesame oil gives the sauce its signature nutty finish.
The cornstarch gently thickens the sauce, allowing it to coat the chicken and rice beautifully.
Step-by-Step Instructions
Step 1: Preheat the Oven
Preheat your oven to 375°F (190°C).
Lightly grease a 9 × 13-inch baking dish with cooking spray or butter.
Step 2: Prepare the Teriyaki Sauce
In a medium saucepan, combine:
- Soy sauce
- Brown sugar
- Honey
- Rice vinegar
- Sesame oil
- Garlic
- Ginger
Bring the mixture to a gentle simmer over medium heat.
In a small bowl, whisk together the cornstarch and water until smooth.
Slowly stir the cornstarch mixture into the simmering sauce.
Cook for 2–3 minutes, stirring constantly, until the sauce thickens slightly.
Remove from the heat and set aside.
Step 3: Prepare the Rice
Spread the uncooked rice evenly across the bottom of the prepared baking dish.
Pour the chicken broth over the rice.
Add the butter and stir gently to distribute it throughout the liquid.
Step 4: Season the Chicken
Place the chicken pieces in a large bowl.
Drizzle with vegetable oil and season lightly with salt and black pepper.
Pour about half of the prepared teriyaki sauce over the chicken and toss until every piece is evenly coated.
Reserve the remaining sauce for later.
Step 5: Assemble the Casserole
Arrange the coated chicken evenly over the rice.
Scatter the broccoli, carrots, bell peppers, and peas around the chicken.
The vegetables will steam gently while absorbing the flavorful cooking liquid.
Step 6: Bake
Cover the baking dish tightly with aluminum foil.
Bake for 45 minutes.
During this time, the rice absorbs the broth and teriyaki sauce while the chicken cooks gently.
Step 7: Finish Baking
Remove the foil.
Pour the remaining teriyaki sauce evenly over the chicken.
Return the dish to the oven uncovered.
Bake for another 15–20 minutes, or until:
- The chicken reaches an internal temperature of 165°F (74°C).
- The rice is fully tender.
- Most of the liquid has been absorbed.
- The sauce is bubbling.
- The chicken develops lightly caramelized edges.
If you prefer extra caramelization, broil the dish for the final 2–3 minutes, watching carefully to prevent burning.
Step 8: Rest
Remove the casserole from the oven.
Allow it to rest for 5–10 minutes.
This resting time lets the rice finish absorbing any remaining liquid and allows the sauce to thicken slightly.
Step 9: Garnish and Serve
Sprinkle generously with:
- Green onions
- Sesame seeds
- Fresh cilantro if desired
Serve hot with extra teriyaki sauce on the side.
Expert Tips for Success
- Rinse the rice before baking to remove excess starch and improve texture.
- Use hot chicken broth to help the rice cook more evenly.
- Cover the dish tightly during the first stage of baking to trap steam.
- Cut the chicken into similar-sized pieces.
- Fresh garlic and ginger provide the best flavor.
- Let the casserole rest before serving for fluffier rice.
Delicious Variations
Pineapple Chicken Teriyaki
Add pineapple chunks during the last 15 minutes of baking for a sweet tropical flavor.
Spicy Teriyaki
Mix sriracha, chili garlic sauce, or crushed red pepper flakes into the teriyaki sauce for extra heat.
Mushroom Teriyaki Bake
Add sliced mushrooms for additional earthy flavor.
Cashew Chicken Version
Sprinkle roasted cashews over the finished casserole for extra crunch.
Vegetable-Packed Version
Add:
- Snap peas
- Zucchini
- Baby corn
- Edamame
- Water chestnuts
These vegetables increase both nutrition and texture.
Cheesy Fusion Version
Although not traditional, a light sprinkle of mozzarella during the final few minutes creates a creamy fusion-style casserole.
What to Serve With
Although this casserole is a complete meal on its own, it pairs beautifully with:
- Asian cucumber salad
- Steamed edamame
- Egg rolls
- Vegetable spring rolls
- Miso soup
- Wonton soup
- Garlic green beans
- Stir-fried bok choy
- Asian slaw
- Fresh fruit salad
Storage
Allow leftovers to cool completely.
Store in an airtight container in the refrigerator for up to 4 days.
The flavors continue to develop overnight, making leftovers even more delicious.
Freezing
Freeze individual portions in airtight freezer-safe containers for up to 3 months.
Thaw overnight in the refrigerator before reheating.
Reheating
Oven
Cover with foil and bake at 350°F (175°C) for 20 minutes, adding a splash of chicken broth if the rice seems dry.
Microwave
Heat individual portions for 2–3 minutes, stirring halfway through.
Stovetop
Warm gently over medium-low heat with a small amount of broth or water until heated through.
Approximate Nutritional Information (Per Serving)
- Calories: 510
- Protein: 34 g
- Fat: 14 g
- Saturated Fat: 3 g
- Carbohydrates: 58 g
- Fiber: 4 g
- Sugars: 15 g
- Cholesterol: 95 mg
- Sodium: 820 mg
- Potassium: 650 mg
- Calcium: 6% Daily Value
- Iron: 12% Daily Value
Nutrition values are estimates and may vary depending on the ingredients used.
Frequently Asked Questions
Can I use brown rice instead of white rice?
Yes, but brown rice requires more liquid and a longer cooking time. Add approximately ½ to 1 cup of additional broth and expect the casserole to bake for 20–30 minutes longer.
Can I use bottled teriyaki sauce?
Absolutely. If you’re short on time, about 1 cup of good-quality bottled teriyaki sauce can replace the homemade version. However, making it from scratch allows you to control the sweetness and sodium while providing a fresher flavor.
Can I prepare this casserole ahead of time?
Yes. Assemble the casserole, cover it tightly, and refrigerate for up to 24 hours before baking. You may need to add an extra 5–10 minutes to the baking time if starting from cold.
How do I prevent the rice from being undercooked?
Use long-grain white rice, measure the liquid accurately, cover the dish tightly with foil during the initial baking stage, and allow the casserole to rest after baking so the rice can finish absorbing any remaining liquid.
What vegetables work best?
Broccoli, carrots, bell peppers, peas, mushrooms, zucchini, snap peas, and edamame all hold up well during baking and complement the teriyaki flavors beautifully.
Can I make this recipe gluten-free?
Yes. Use a certified gluten-free soy sauce or tamari and ensure your chicken broth and other ingredients are labeled gluten-free. The rest of the recipe remains the same.

Welcome to my kitchen!
I’m a passionate home cook and recipe creator who loves turning simple ingredients into delicious, comforting meals that everyone can enjoy. Through this website, I share carefully prepared recipes, practical cooking tips, and easy-to-understand food education to help you feel more confident in the kitchen.
My goal is to make cooking simple, enjoyable, and accessible. Whether you are looking for a quick family dinner, a delicious dessert, healthy meal ideas, or traditional recipes with a modern touch, you’ll find inspiration here.
More Than Just Recipes
I believe that cooking is also a way to learn. That’s why this website is not only about recipes. I also create educational articles about ingredients, cooking techniques, kitchen tips, food preparation, and the stories behind different dishes.
Each article is designed to give you useful knowledge that you can apply in your own kitchen. From understanding how ingredients work together to learning better cooking methods, my aim is to help you become a more confident and creative cook.
My Philosophy
Good food doesn’t always require complicated ingredients or professional equipment. With a little knowledge, patience, and creativity, simple ingredients can become something truly special.
I believe in sharing recipes that are practical, clearly explained, and enjoyable to make. I also love exploring new flavors while appreciating traditional cooking and the recipes passed down through generations.
Thank you for visiting my kitchen and being part of this food-loving community. I hope my recipes and articles inspire you to cook, learn, experiment, and most importantly, enjoy every bite!
Happy cooking!