Understanding White Rings, Why They Happen, and How to Fix Them Step by Step
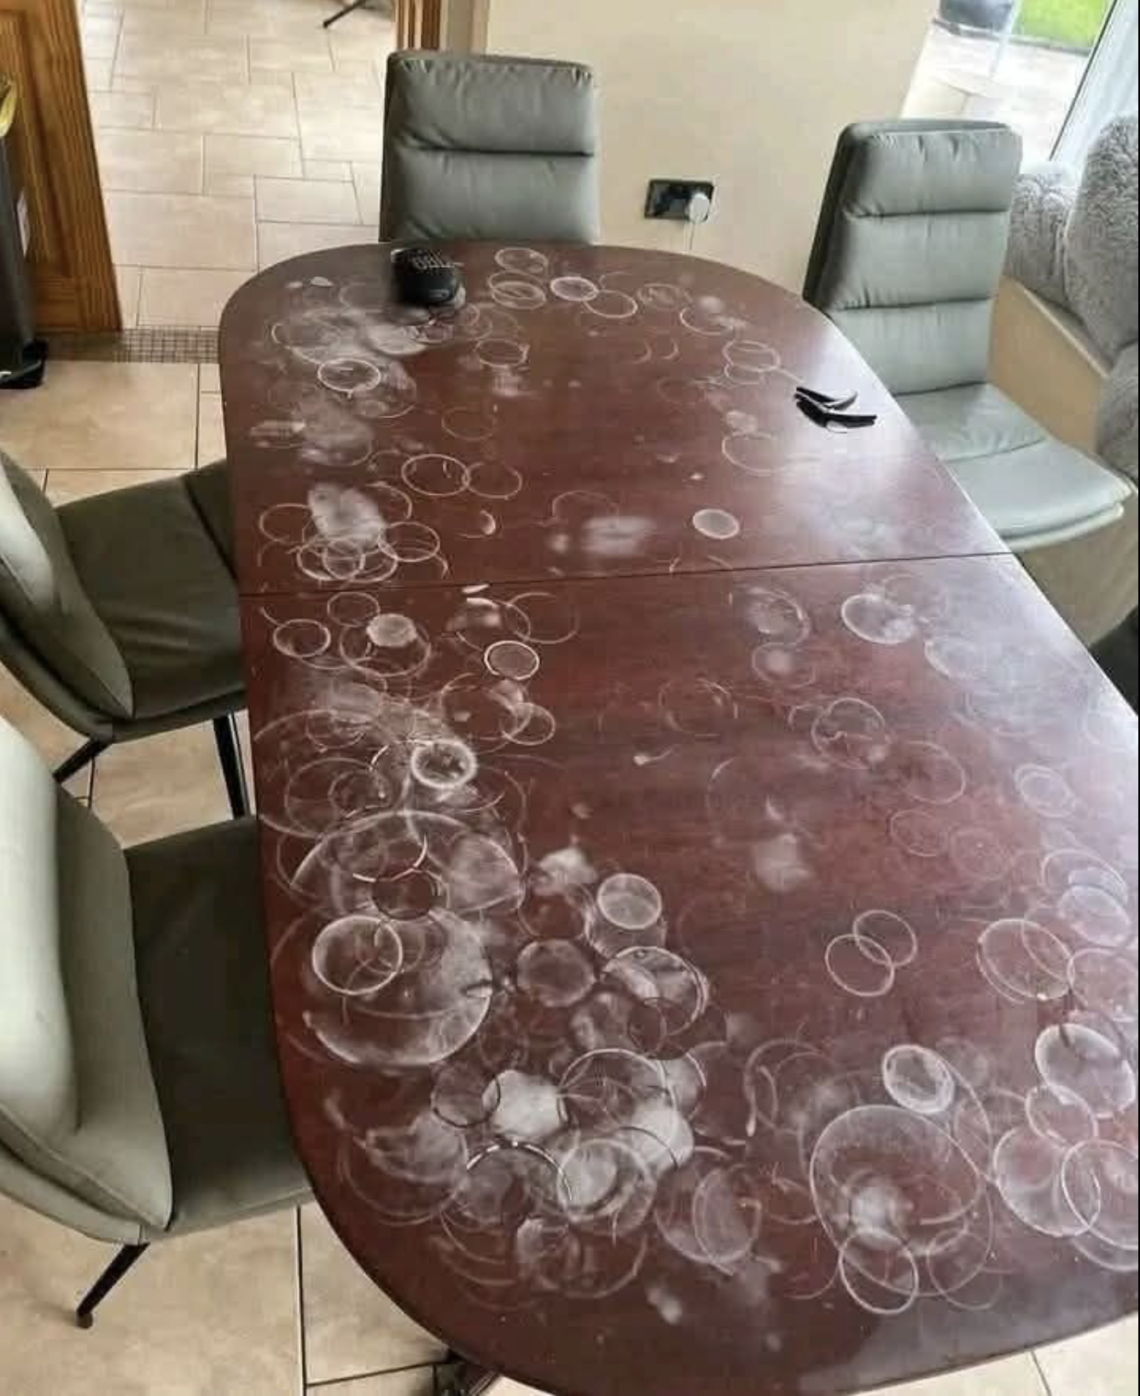
Those white cup rings on a wooden table can be frustrating, especially when the furniture is something you care about. At first glance, it looks like the wood is permanently damaged or “burned,” but in many cases that’s not actually what’s happening.
What you’re usually seeing is not a stain inside the wood itself, but a reaction happening in the protective finish sitting on top of it.
That finish is typically something like:
- polyurethane
- lacquer
- varnish
- or a combination of protective coatings
When moisture or heat gets trapped under or inside that finish layer, it causes a cloudy, milky, or whitish mark. The wood underneath is often still perfectly fine.
So the goal is not to “clean the wood,” but to repair or reverse what’s happening in the finish layer.
Why Cup Rings Appear in the First Place
To understand how to fix the problem, it helps to understand what causes it.
There are two main reasons:
1. Moisture trapped under the finish
Cold drinks sweat. When a glass sits directly on a table, condensation forms underneath it. That moisture can slowly seep into microscopic openings in the finish.
When it gets trapped, it scatters light differently, which creates the white cloudy ring you see.
2. Heat reaction
Hot cups (tea, coffee, soup bowls) can temporarily soften or disturb the finish layer. This changes how light reflects off the surface, again creating a pale or hazy mark.
In both cases, the wood is usually not ruined—it’s the finish that is disturbed.
Step 1: The Safest First Attempt (Gentle Heat Method)
This is always the best starting point because it targets the most common cause: trapped moisture.
Why heat works
Heat helps evaporate moisture trapped inside the finish layer and can sometimes “reset” the surface.
Hair dryer method (safe and controlled)
- Set the hair dryer to low or medium heat
- Hold it about 10–15 cm away from the stain
- Move it slowly in circles or side-to-side
- Do this for 1–3 minutes at a time
- Pause and check the result
- Repeat if needed
What you might notice:
- the white ring slowly fading
- the surface becoming clearer
- the finish regaining its normal tone
Important:
Do not overheat one spot. Too much heat can damage the finish further.
Iron method (stronger but riskier)
If the stain is stubborn:
- Place a clean cotton cloth over the stain
- Set iron to low heat (NO steam)
- Press lightly for 5–10 seconds
- Lift and check immediately
- Repeat in short intervals
Why this works
The cloth acts as a barrier while heat pulls moisture out of the finish layer.
Warning:
Too much heat or direct contact can permanently damage the finish, so go slowly.
Step 2: Oil-Based Restoration (Mayonnaise or Petroleum Jelly Trick)
This method sounds strange, but it works surprisingly often on mild white rings.
What it does
The oils help:
- rehydrate dry or cloudy finish
- fill microscopic gaps in the surface
- improve light reflection
How to apply:
- Put a small amount of mayonnaise or petroleum jelly on the stain
- Spread it evenly over the ring
- Let it sit for several hours or overnight
- Wipe clean with a soft cloth
- Buff gently afterward
Result:
Sometimes the stain disappears completely, and sometimes it becomes much less visible.
Step 3: Mild Abrasion (Baking Soda Method)
If the ring is still visible, you may need light polishing.
How to make the paste:
- 1 teaspoon baking soda
- a few drops of water
You want a smooth paste—not gritty or dry.
How to use:
- Apply gently with a soft cloth
- Rub in small circular motions
- Use very light pressure
- Stop after 30–60 seconds
- Wipe clean immediately
- Dry and inspect
What this does:
It lightly smooths the damaged finish layer and reduces haze.
Warning:
Do not scrub hard. You are not sanding—you are polishing gently.
Step 4: Toothpaste Method (Surprisingly Effective for Light Rings)
White, non-gel toothpaste contains very mild abrasives.
How to use it:
- Apply a small amount to a cloth
- Rub gently in circles
- Work for 30–60 seconds
- Wipe clean with a damp cloth
- Buff dry
When it works best:
- very light rings
- newer stains
- glossy finishes
Step 5: Furniture Polish or Restoring Oils
If the stain is faint but still noticeable, sometimes the goal is not removal—but blending.
Products that help:
- furniture polish
- lemon oil
- wood conditioner
- wax-based restorers
What they do:
- restore shine
- reduce contrast
- make the ring less visible
- refresh dried finishes
This is especially useful for older furniture.
Step 6: When the Stain Is Deeper Than the Finish
If nothing works, the damage may have gone deeper into the finish or even slightly into the wood layer.
At this stage, options include:
1. Light refinishing
- sanding the surface lightly
- applying a new clear coat
2. Touch-up markers
- temporary color blending
- useful for small spots
3. Professional restoration
- for antique or valuable furniture
What You Should NEVER Do
Some methods can make things worse:
Avoid harsh chemicals:
- bleach
- acetone
- strong degreasers
Avoid rough scrubbing:
- steel wool
- abrasive pads
- hard brushes
Avoid soaking the table:
Extra moisture can worsen the problem.
Why Some Tables Stain More Easily Than Others
Not all finishes are equal.
Some tables are more vulnerable because:
- the protective layer is thin
- the finish has aged or cracked
- low-quality lacquer was used
- the surface has micro-scratches
Older furniture is especially prone because finishes naturally break down over time.
How to Prevent Future Cup Rings (Very Important)
Once you fix the problem, prevention becomes key.
Simple habits that make a big difference:
- always use coasters
- avoid placing hot mugs directly on wood
- wipe condensation quickly
- don’t leave wet glasses sitting for long periods
Extra protection ideas:
- apply furniture wax every few months
- use tablecloths for heavy-use tables
- add clear protective glass or acrylic top for dining tables
A Helpful Mindset Shift
It’s easy to panic when you see white rings on wood, but in most cases:
- the table is NOT ruined
- the wood is NOT permanently damaged
- the issue is usually cosmetic and reversible
Most of the time, you’re just dealing with a surface-level reaction—not structural damage.