A Vintage Recipe That Has Stood the Test of Time
Some desserts require careful measuring, multiple mixing bowls, special equipment, and years of baking experience. Others remind us that delicious homemade treats don’t have to be complicated. One of the most beloved examples is the classic Cuppa Cuppa Cake—a charming old-fashioned dessert that has been passed from generation to generation because of its remarkable simplicity.
Its name tells you almost everything you need to know. Instead of weighing ingredients or searching for measuring spoons, you simply use a cup to measure equal amounts of the main ingredients. One cup of flour, one cup of sugar, and one cup of fruit are the heart of this nostalgic recipe, making it one of the easiest cakes you’ll ever prepare.
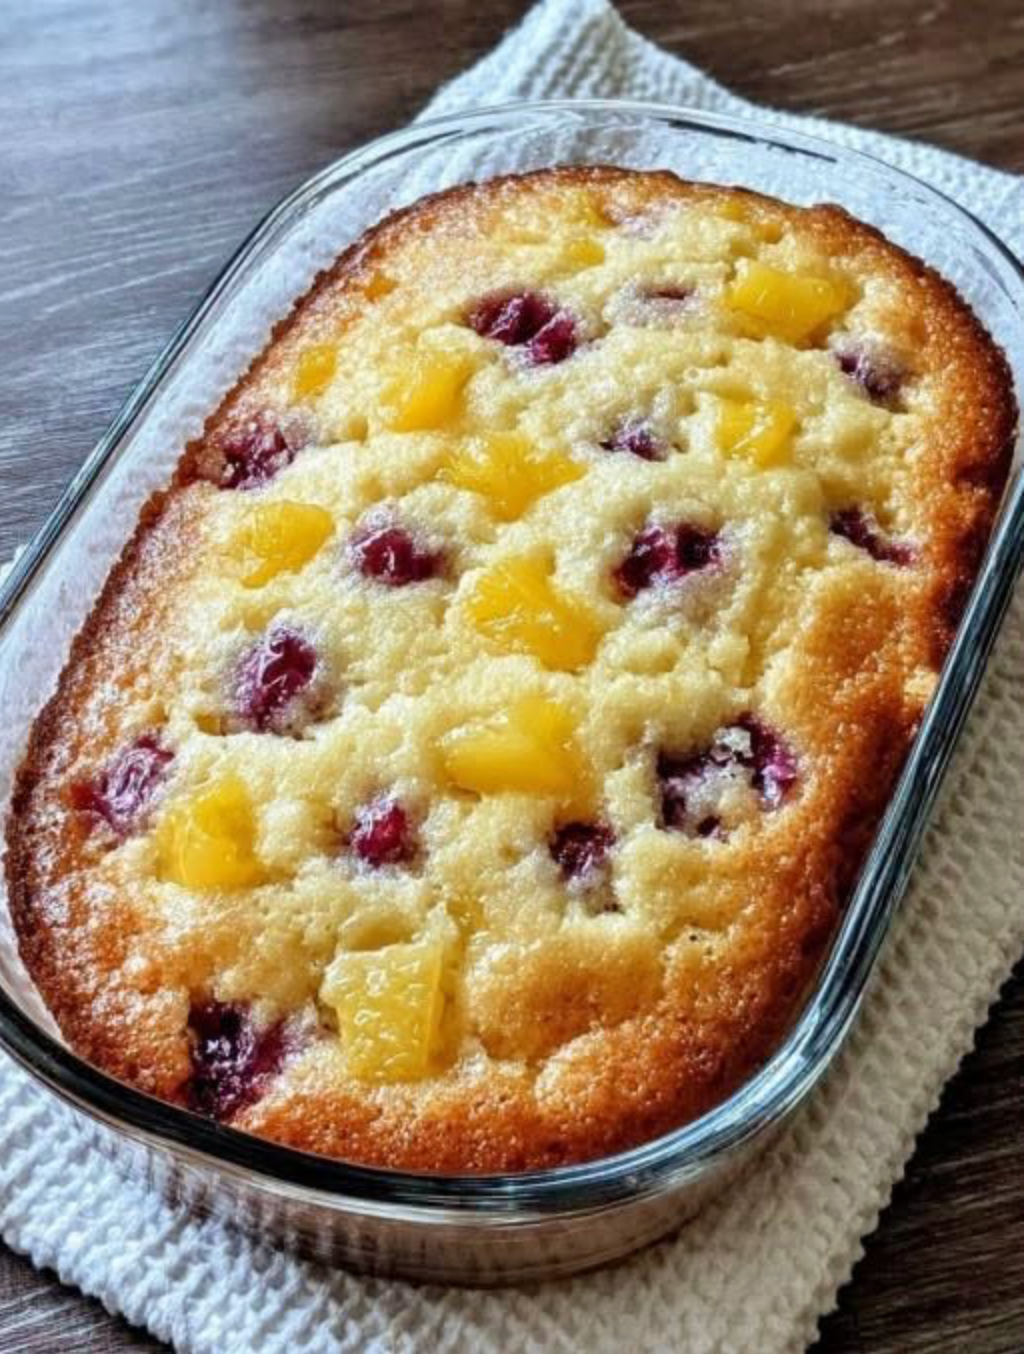
Despite its humble beginnings, Cuppa Cuppa Cake delivers incredible flavor. As it bakes, the butter melts into the dry ingredients while the fruit releases its natural juices, creating a dessert that’s somewhere between a buttery cake, a fruit cobbler, and a crisp. The top becomes beautifully golden and lightly crunchy, while the center stays soft, moist, and filled with sweet fruit.
Whether you’re an experienced baker or someone who rarely turns on the oven, this foolproof dessert is perfect for family dinners, potlucks, holiday gatherings, or those evenings when you’re craving something homemade without spending hours in the kitchen.
Why Is It Called Cuppa Cuppa Cake?
The recipe earned its memorable name because nearly every major ingredient is measured using one cup.
Traditionally, the recipe calls for:
- 1 cup self-rising flour
- 1 cup granulated sugar
- 1 cup fruit (or a can of fruit with its juices, depending on the variation)
Everything is measured in “cups,” making the recipe incredibly easy to remember.
This simple method made it especially popular long before smartphones, digital scales, and online recipes existed. Many home cooks could prepare it entirely from memory.
Why Families Love This Recipe
Cuppa Cuppa Cake has remained a favorite for decades because it is:
- Extremely easy to make
- Budget-friendly
- Perfect for beginner bakers
- Made with pantry staples
- Wonderfully adaptable
- Delicious served warm or cold
- Ideal for holidays and family gatherings
- Comforting and nostalgic
It’s the kind of dessert that feels like home after the very first bite.
Ingredients
Basic Recipe
- 1 cup self-rising flour
- 1 cup granulated sugar
- 1 can (about 20 ounces / 565 g) crushed pineapple with its juice
- 1 can (about 21 ounces / 595 g) fruit pie filling (such as apple, peach, cherry, or blueberry)
- 1 cup (2 sticks / 225 g) unsalted butter, melted
Optional Flavor Boosters
Although the traditional recipe is wonderfully simple, many home bakers enjoy adding extra flavor.
Popular additions include:
- 1 teaspoon vanilla extract
- 1 teaspoon ground cinnamon
- ¼ teaspoon nutmeg
- Lemon zest
- Orange zest
- Chopped pecans
- Chopped walnuts
- Shredded coconut
- Brown sugar sprinkled on top
- Oats for extra crunch
These optional ingredients give the cake a unique twist while preserving its rustic charm.
Equipment You’ll Need
One reason this dessert is so beloved is that it requires very little equipment.
You’ll need:
- A 9 × 13-inch baking dish
- Measuring cup
- Small bowl for melting butter
- Oven
- Spoon for serving
No electric mixer is required.
Step-by-Step Instructions
Step 1: Preheat the Oven
Preheat your oven to 350°F (175°C).
Lightly grease your baking dish with butter or non-stick cooking spray.
Step 2: Add the Fruit
Spread the crushed pineapple, including all of its juice, evenly across the bottom of the baking dish.
Next, spoon the pie filling over the pineapple.
Do not stir the layers together.
Keeping the fruit separate helps create the dessert’s distinctive texture.
Step 3: Mix the Dry Ingredients
In a bowl, combine:
- Self-rising flour
- Granulated sugar
Stir until evenly mixed.
Step 4: Sprinkle the Dry Mixture
Evenly sprinkle the flour and sugar mixture over the fruit.
Avoid stirring.
The dry layer may look unusual at this stage, but that’s exactly how the recipe is supposed to look.
Step 5: Add the Butter
Slowly drizzle the melted butter over the entire surface.
Try to cover as much of the dry mixture as possible.
As the cake bakes, the butter melts through the flour and sugar, creating a golden, buttery crust.
Step 6: Bake
Bake for approximately 45–55 minutes.
The cake is ready when:
- The top is golden brown.
- The edges are bubbling.
- The fruit is hot and thick.
- The crust feels lightly crisp.
Allow the cake to cool for about 10–15 minutes before serving.
What Makes This Cake So Special?
Unlike traditional cakes, Cuppa Cuppa Cake isn’t mixed into a smooth batter.
Instead, the layers transform during baking.
As the butter melts downward and the fruit bubbles upward, everything combines naturally inside the oven.
The result is a dessert with several delicious textures:
- Crispy top
- Soft cake-like middle
- Warm fruit filling
- Buttery edges
Every spoonful offers a perfect balance of sweetness and comfort.
Delicious Fruit Variations
One of the best features of this recipe is its versatility.
Try different pie fillings such as:
Apple
Warm, comforting, and perfect with cinnamon.
Peach
Sweet and juicy with a classic Southern flavor.
Cherry
Bright, slightly tart, and beautifully colorful.
Blueberry
Rich and bursting with fruity flavor.
Mixed Berry
A combination of berries creates a vibrant, slightly tangy dessert.
Blackberry
Excellent served with vanilla ice cream.
Strawberry
Fresh-tasting and wonderfully sweet.
Add Some Crunch
For extra texture, sprinkle one of these over the butter before baking:
- Chopped pecans
- Walnuts
- Sliced almonds
- Rolled oats
- Brown sugar
- Toasted coconut
The topping becomes beautifully crisp in the oven.
Serving Suggestions
Serve Cuppa Cuppa Cake warm with:
- Vanilla ice cream
- Fresh whipped cream
- Custard
- Greek yogurt
- Caramel sauce
- Fresh berries
- Powdered sugar
- A drizzle of honey
It’s equally delicious with a cup of coffee or hot tea.
Perfect Occasions
This easy dessert works wonderfully for:
- Sunday dinners
- Family reunions
- Church potlucks
- Holiday celebrations
- Backyard barbecues
- Birthday parties
- Casual gatherings
- Weeknight desserts
Because it feeds a crowd, it’s especially popular at community events.
Storage
Allow leftovers to cool completely.
Store covered in the refrigerator for up to 4 days.
Reheating
Individual portions can be reheated in the microwave for about 20–30 seconds.
For a crispier topping, warm the dessert in a 325°F (165°C) oven for about 10–15 minutes.
Can You Freeze It?
Yes.
Wrap the cooled cake tightly or store it in an airtight freezer-safe container.
Freeze for up to 3 months.
Thaw overnight in the refrigerator before reheating.
Frequently Asked Questions
Why don’t you mix everything together?
That’s part of the magic of Cuppa Cuppa Cake. The ingredients are layered rather than stirred, allowing the butter and fruit juices to create the cake’s signature texture as it bakes.
Can I use fresh fruit?
Absolutely. Fresh sliced peaches, apples, berries, or cherries can be used. Depending on the fruit, you may want to add a little sugar and a splash of juice to provide enough moisture.
Can I reduce the sugar?
Yes. If you’re using very sweet fruit or pie filling, you can reduce the added sugar to suit your taste.
Why is my cake still powdery on top?
This usually means the melted butter didn’t fully cover the dry ingredients. Try drizzling the butter more evenly across the surface before baking.
Tips for Success
- Use room-temperature ingredients whenever possible.
- Spread each layer evenly.
- Don’t stir the layers.
- Melt the butter completely before pouring.
- Bake until the top is deeply golden and bubbling.
- Let the cake rest before serving so the filling can thicken slightly.
A Dessert Rooted in Simplicity
Cuppa Cuppa Cake became popular during a time when home cooks relied on practical recipes made with inexpensive pantry staples. Its straightforward method, minimal equipment, and forgiving nature made it a dependable favorite for busy families and community gatherings. Even today, it remains a reminder that some of the best desserts don’t require complicated techniques—just a handful of simple ingredients and a warm oven.

Welcome to my kitchen!
I’m a passionate home cook and recipe creator who loves turning simple ingredients into delicious, comforting meals that everyone can enjoy. Through this website, I share carefully prepared recipes, practical cooking tips, and easy-to-understand food education to help you feel more confident in the kitchen.
My goal is to make cooking simple, enjoyable, and accessible. Whether you are looking for a quick family dinner, a delicious dessert, healthy meal ideas, or traditional recipes with a modern touch, you’ll find inspiration here.
More Than Just Recipes
I believe that cooking is also a way to learn. That’s why this website is not only about recipes. I also create educational articles about ingredients, cooking techniques, kitchen tips, food preparation, and the stories behind different dishes.
Each article is designed to give you useful knowledge that you can apply in your own kitchen. From understanding how ingredients work together to learning better cooking methods, my aim is to help you become a more confident and creative cook.
My Philosophy
Good food doesn’t always require complicated ingredients or professional equipment. With a little knowledge, patience, and creativity, simple ingredients can become something truly special.
I believe in sharing recipes that are practical, clearly explained, and enjoyable to make. I also love exploring new flavors while appreciating traditional cooking and the recipes passed down through generations.
Thank you for visiting my kitchen and being part of this food-loving community. I hope my recipes and articles inspire you to cook, learn, experiment, and most importantly, enjoy every bite!
Happy cooking!