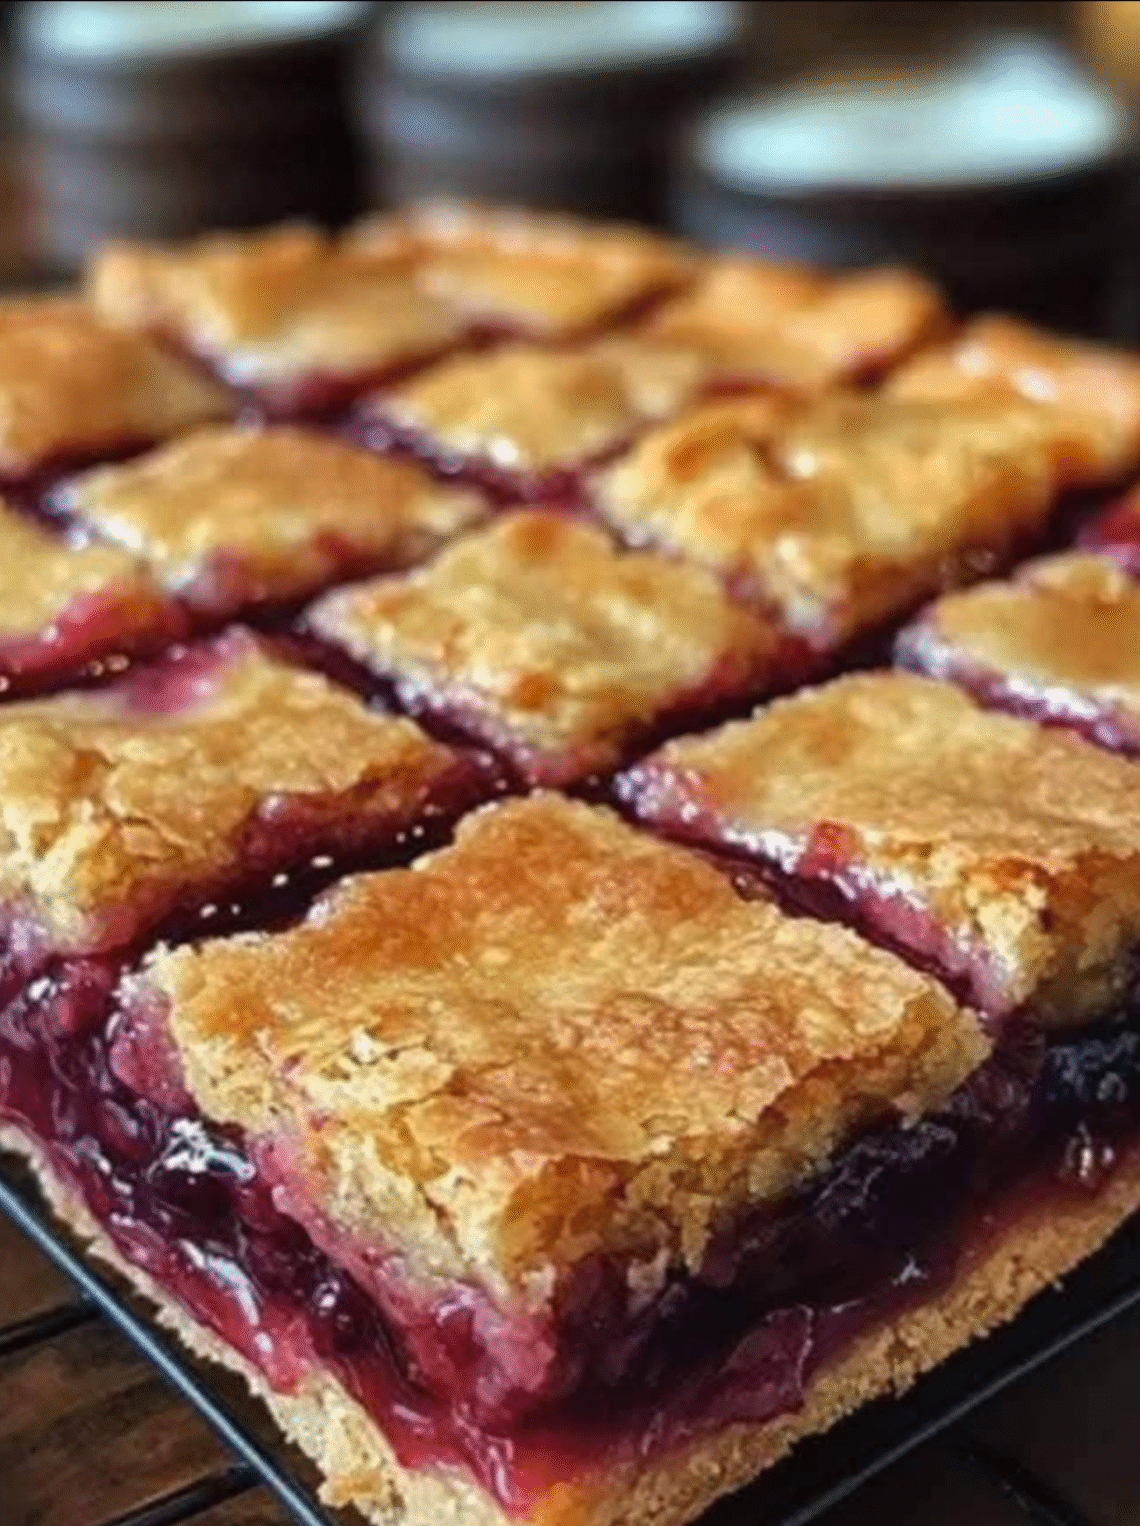
Christmas cherry bars are a holiday classic that combine the tenderness of a buttery shortbread base, the sweet tang of cherry pie filling, and a delicate almond-scented glaze. They’re simple to make yet look and taste like something from a bakery. These bars are perfect for Christmas gatherings, cookie exchanges, or simply to enjoy with a hot cup of tea while the lights of the tree sparkle.
Unlike cookies that require shaping or rolling, these bars are baked in one pan, sliced neatly, and offer layers of flavor: buttery bottom crust, glossy cherries in the middle, and soft, golden crumbles on top.
Ingredients
For the dough:
- 1 cup (226 g) unsalted butter, softened to room temperature
- 1 ¾ cups (350 g) granulated sugar
- 4 large eggs, room temperature
- 1 ½ teaspoons pure vanilla extract
- ¼ teaspoon pure almond extract (optional, but adds wonderful flavor)
- 3 cups (375 g) all-purpose flour
- ½ teaspoon baking powder
- ½ teaspoon fine salt
For the filling:
- 1 can (21 ounces / 595 g) cherry pie filling (homemade or store-bought)
For the glaze (optional but recommended):
- 1 cup (120 g) confectioners’ sugar
- 1–2 tablespoons milk or heavy cream
- ½ teaspoon vanilla extract
- A few drops of almond extract (optional)
Instructions
1. Prepare the pan and preheat the oven
Preheat your oven to 350°F (175°C).
Line a 9×13-inch (23×33 cm) baking dish with parchment paper, leaving some overhang on the sides so it’s easy to lift out the bars later. Lightly butter or spray the parchment to ensure the bars release easily after baking.
2. Cream the butter and sugar
In a large mixing bowl, use a hand mixer or stand mixer to beat the butter and sugar together until the mixture becomes light, fluffy, and pale in color — this should take about 2–3 minutes on medium speed. This step is important because it incorporates air into the butter, which gives the bars a tender and melt-in-your-mouth texture.
3. Add the eggs and flavor extracts
Beat in the eggs, one at a time, scraping down the bowl after each addition. Add the vanilla and almond extract and mix just until combined. The batter will look smooth, creamy, and slightly thick.
4. Combine dry ingredients
In a separate bowl, whisk together the flour, baking powder, and salt. Gradually add this dry mixture to the wet ingredients, mixing on low speed until fully incorporated. The dough will be soft and slightly sticky — similar to thick cake batter but not as pourable.
5. Assemble the layers
Spread about two-thirds of the dough evenly across the bottom of the prepared pan. Use a spatula or the back of a spoon dipped lightly in water to smooth it out evenly.
Then, spoon the cherry pie filling over the top, spreading it into an even layer from edge to edge.
Finally, drop spoonfuls of the remaining dough over the cherries. You don’t need to cover it completely — small gaps will allow the cherry filling to peek through and bubble up during baking, giving a beautiful marbled look.
6. Bake
Bake for 35–40 minutes, or until the top is lightly golden and the edges are just beginning to pull away from the pan.
The cherry filling should be bubbling lightly, and the dough on top should be cooked through but still soft in the center.
Let the bars cool in the pan for at least 1 hour on a wire rack before glazing or slicing.
7. Prepare the glaze
While the bars are cooling, whisk together confectioners’ sugar, milk, and vanilla (plus almond extract if using) in a small bowl until smooth. Adjust the consistency as needed — if it’s too thick, add a few more drops of milk; if too thin, whisk in more sugar.
8. Glaze and slice
Once the bars are completely cool, drizzle the glaze evenly over the top using a spoon or a piping bag.
Let the glaze set for 15–20 minutes, then lift the bars out of the pan using the parchment overhang and place them on a cutting board.
Slice into squares or rectangles — you should get about 24 generous bars.
Serving Suggestions
These bars taste best slightly chilled or at room temperature. They pair beautifully with coffee, hot chocolate, or eggnog during the holidays.
For a festive touch, sprinkle the top with crushed candied cherries or a dusting of powdered sugar before serving.
You can also make them a day ahead — in fact, they taste even better the next day as the flavors meld and the texture softens.
Storage Tips
- Room Temperature: Keep in an airtight container for up to 3 days.
- Refrigerator: Store for up to a week for maximum freshness.
- Freezer: Wrap individual bars in plastic wrap, then place them in a sealed container. They freeze beautifully for up to 3 months. Thaw at room temperature before serving.
Recipe Notes and Variations
- You can replace the cherry pie filling with blueberry, raspberry, or apple filling for a different twist.
- For an extra-rich flavor, sprinkle sliced almonds or white chocolate chips over the top before baking.
- To make the bars taste more like a tart, substitute part of the butter with cream cheese for a slightly tangier dough.

Welcome to my kitchen!
I’m a passionate home cook and recipe creator who loves turning simple ingredients into delicious, comforting meals that everyone can enjoy. Through this website, I share carefully prepared recipes, practical cooking tips, and easy-to-understand food education to help you feel more confident in the kitchen.
My goal is to make cooking simple, enjoyable, and accessible. Whether you are looking for a quick family dinner, a delicious dessert, healthy meal ideas, or traditional recipes with a modern touch, you’ll find inspiration here.
More Than Just Recipes
I believe that cooking is also a way to learn. That’s why this website is not only about recipes. I also create educational articles about ingredients, cooking techniques, kitchen tips, food preparation, and the stories behind different dishes.
Each article is designed to give you useful knowledge that you can apply in your own kitchen. From understanding how ingredients work together to learning better cooking methods, my aim is to help you become a more confident and creative cook.
My Philosophy
Good food doesn’t always require complicated ingredients or professional equipment. With a little knowledge, patience, and creativity, simple ingredients can become something truly special.
I believe in sharing recipes that are practical, clearly explained, and enjoyable to make. I also love exploring new flavors while appreciating traditional cooking and the recipes passed down through generations.
Thank you for visiting my kitchen and being part of this food-loving community. I hope my recipes and articles inspire you to cook, learn, experiment, and most importantly, enjoy every bite!
Happy cooking!