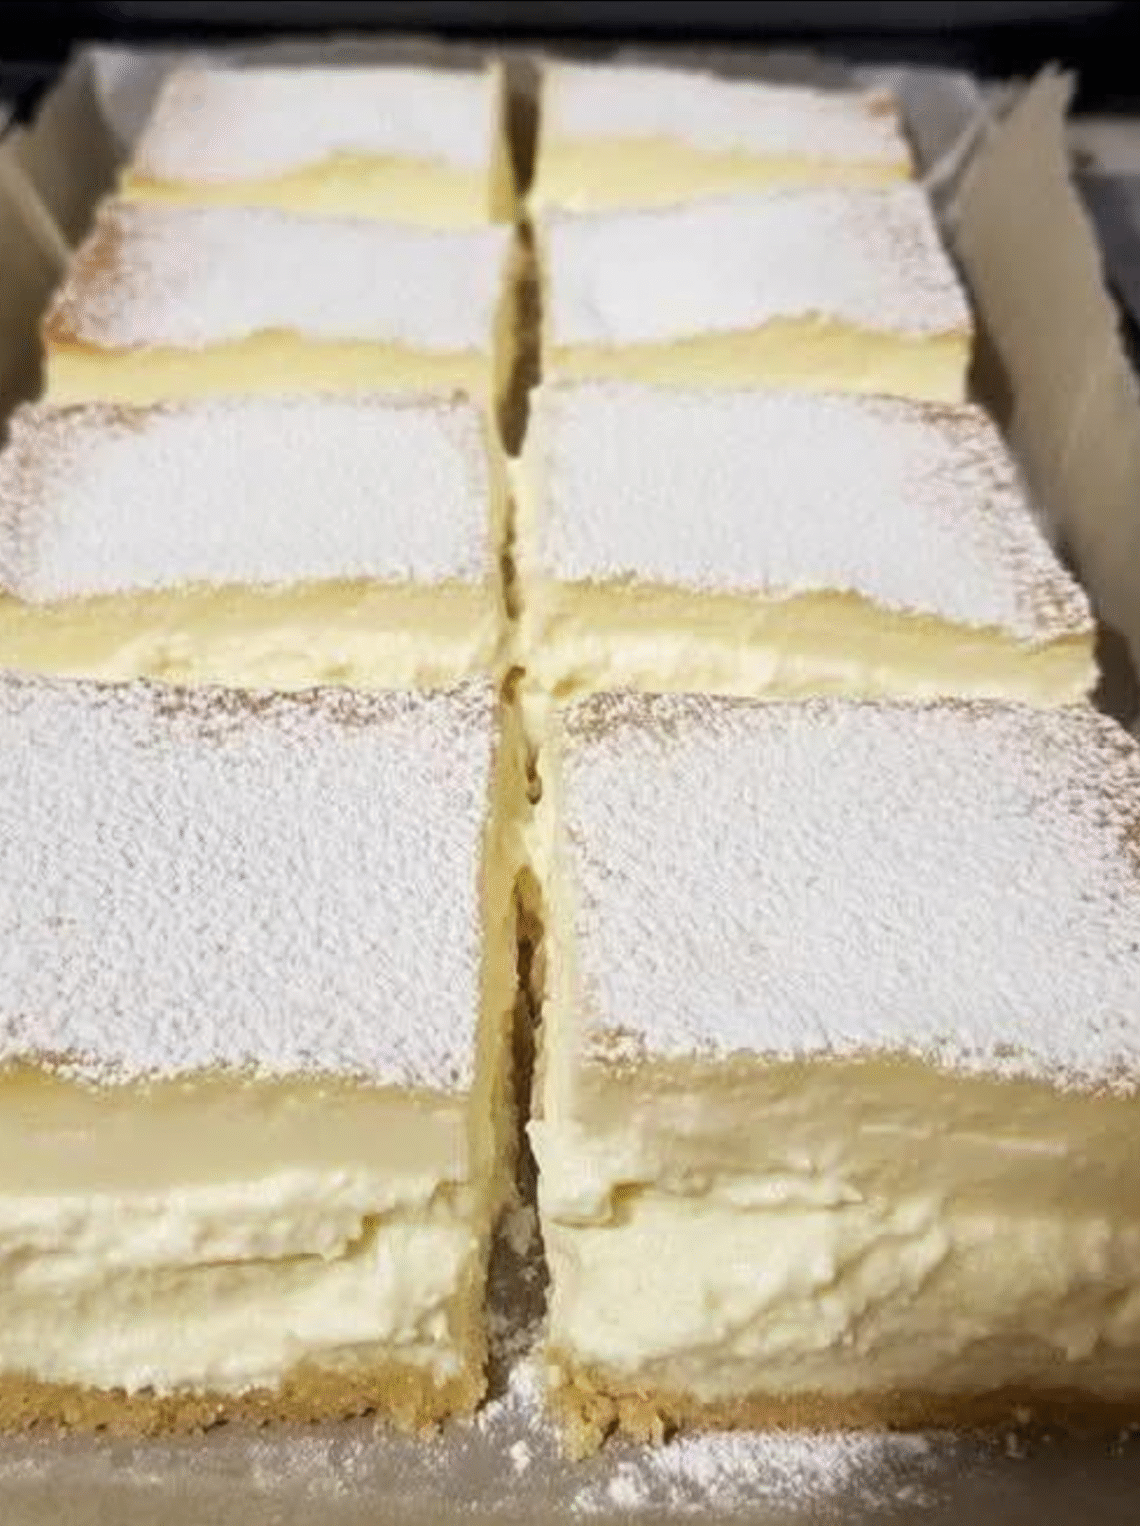
There are few desserts as timeless and satisfying as Vanilla Custard Cream Squares. Known in many European countries as mille-feuille, kremšnita, or Napoleon squares, this dessert combines crisp layers of flaky pastry with a soft, luscious vanilla custard that melts in your mouth. The contrast of textures — buttery crunch against silky cream — makes every bite unforgettable.
This recipe captures that classic balance between richness and delicacy. It uses a carefully prepared custard thickened with egg yolks, milk, and cornstarch, then sandwiched between layers of golden puff pastry. The top is finished with powdered sugar for a clean, elegant presentation.
While the process involves several steps, none are difficult when you understand the why behind each stage. The key is precision, patience, and respect for the ingredients.
Ingredients (Makes 9 to 12 squares)
For the Pastry Layers:
- 1 package (about 500 g) puff pastry, thawed if frozen
- All-purpose flour, for dusting
For the Vanilla Custard Cream:
- 4 cups (1 liter) whole milk
- 6 large egg yolks
- 3/4 cup (150 g) granulated sugar
- 1/4 cup (30 g) cornstarch
- 3 tablespoons (25 g) all-purpose flour
- 1 vanilla bean, split and scraped (or 2 teaspoons pure vanilla extract)
- 1 tablespoon unsalted butter
- 1/2 cup (120 ml) heavy cream, whipped to soft peaks (optional, for a lighter texture)
For the Finishing:
- Powdered sugar, for dusting the top
- Optional: thin layer of apricot jam or fondant glaze for a polished pastry finish
Step-by-Step Instructions
1. Prepare the Puff Pastry Layers
Preheat your oven to 400°F (200°C). Line two baking sheets with parchment paper.
Roll out each sheet of puff pastry on a lightly floured surface to about 1/8 inch (3 mm) thick. You want even, flat sheets that will bake into crisp layers without too much puffing.
Prick the entire surface with a fork to prevent air bubbles. Lay the sheets on the prepared trays and cover each with a second piece of parchment paper. Place another baking tray on top to weigh them down — this helps keep the layers flat and uniform as they bake.
Bake for 15–20 minutes, until golden brown and crisp. Remove the top tray and parchment halfway through baking to allow the pastry to brown evenly.
Once baked, transfer to a wire rack and let cool completely. When cool, trim the edges neatly and cut into equal squares or rectangles — one sheet will be the bottom layer, the other the top.
2. Make the Vanilla Custard Cream
In a large saucepan, heat 3½ cups (875 ml) of the milk with the vanilla bean (and seeds) over medium heat until just below a simmer. If using vanilla extract instead, add it later with the butter.
Meanwhile, in a mixing bowl, whisk together the egg yolks, sugar, cornstarch, flour, and the remaining ½ cup milkuntil smooth and pale. The mixture should be thick but pourable.
When the milk is steaming, remove the vanilla bean and slowly pour about one-third of the hot milk into the egg mixture while whisking constantly — this step, called tempering, prevents the eggs from curdling.
Pour the tempered egg mixture back into the saucepan and return it to medium heat.
Whisk continuously as the custard begins to thicken. The transformation happens quickly — within 3 to 5 minutes. The mixture will go from foamy to glossy and smooth. Keep cooking and stirring until it reaches a thick, pudding-like consistency that coats the back of a spoon.
Remove from heat, then stir in the butter (and vanilla extract, if using). The butter adds richness and helps smooth out the custard’s texture.
Pour the custard into a clean bowl and cover it directly with plastic wrap, pressing it onto the surface to prevent a skin from forming. Let it cool to room temperature, then refrigerate for at least 1 hour until firm and chilled.
3. Whip and Lighten the Custard (Optional but Recommended)
Once the custard is cold, whisk it gently to loosen its texture. If you prefer a lighter, more mousse-like filling, fold in the softly whipped heavy cream at this stage. The result will be exceptionally smooth and airy, with a delicate mouthfeel.
4. Assemble the Cream Squares
Place one baked pastry layer on a flat serving board or tray. Spread the cooled vanilla custard evenly over the surface, using an offset spatula to smooth it into an even layer.
Top carefully with the second pastry layer. Press very gently to adhere, but don’t squish the custard.
For clean presentation, use a sharp knife to trim the edges again if needed. If you want a glossy finish, brush the top lightly with warm apricot jam or cover with a thin layer of vanilla fondant glaze.
Refrigerate the assembled dessert for at least 2 to 3 hours, or ideally overnight. This resting time allows the custard to firm up and the layers to meld together beautifully, making it easier to cut later.
5. Serve and Garnish
Before serving, dust the top generously with powdered sugar through a fine sieve. For a more elegant touch, you can create a lattice pattern by placing strips of parchment across the top before dusting, then removing them for clean white lines.
Cut the dessert into neat squares or rectangles with a long, sharp knife. Wipe the blade clean between each cut to keep the layers tidy.
Serve chilled. The first bite should offer a satisfying crack of flaky pastry, followed by the soft, buttery custard that melts luxuriously on the tongue.
Storage and Make-Ahead
- Refrigeration: Store covered in the refrigerator for up to 3 days.
- Do not freeze: Custard loses its smooth texture when frozen and thawed.
- Advance preparation: Both the pastry layers and custard can be made a day ahead; assemble just before serving.
Expert Tips for Perfect Results
- Use real vanilla. A vanilla bean or high-quality extract gives depth and aroma that imitation vanilla cannot replicate.
- Whisk constantly while cooking the custard. This prevents lumps and ensures an ultra-smooth texture.
- Cook the custard until thick enough. If undercooked, it will not hold its shape when sliced. It should be thick like pastry cream, not like sauce.
- Chill thoroughly before cutting. Patience makes for clean, professional-looking layers.
- Bake the pastry correctly. Too pale, and it will taste doughy; too dark, and it becomes bitter. Aim for an even golden hue.
- For a crisp finish, assemble the dessert close to serving time to preserve the pastry’s texture. Over time, the layers soften slightly — still delicious, but less crisp.
Serving Suggestions
Vanilla Custard Cream Squares are elegant enough for celebrations yet comforting enough for casual gatherings. Serve them as part of an afternoon tea, a dinner party dessert, or a Sunday treat. They pair beautifully with:
- A cup of black tea or espresso
- Fresh berries or fruit compote
- A drizzle of warm caramel or chocolate sauce for an indulgent twist
For a refined presentation, serve each portion on a chilled dessert plate with a small dusting of powdered sugar and a few fresh chive-sized vanilla seeds sprinkled on top.
The Science Behind the Texture
This dessert succeeds because of the balance between structure and softness. The puff pastry provides crispness through steam expansion between its buttery layers, while the custard provides creaminess through the careful coagulation of egg yolks and starch.
Cooking the custard gently and fully ensures a stable filling that sets firmly without curdling. The starch (cornstarch and flour) helps prevent the proteins from tightening too quickly, while the butter and fat from the yolks give the cream its smooth, luxurious mouthfeel.
The result is a textural masterpiece — crisp, soft, and melting all at once.
Final Thoughts
Vanilla Custard Cream Squares embody the essence of fine pastry: precision, patience, and indulgence. They are buttery yet light, sweet but not cloying, and endlessly elegant. Each layer — from the shatter of golden pastry to the cool creaminess beneath — tells the story of classic European baking at its finest.
The process takes time, but each step builds toward that moment when your knife cuts cleanly through the layers and the cream holds perfectly in place. It’s not just dessert — it’s craftsmanship, captured in a single, beautiful square.

Welcome to my kitchen!
I’m a passionate home cook and recipe creator who loves turning simple ingredients into delicious, comforting meals that everyone can enjoy. Through this website, I share carefully prepared recipes, practical cooking tips, and easy-to-understand food education to help you feel more confident in the kitchen.
My goal is to make cooking simple, enjoyable, and accessible. Whether you are looking for a quick family dinner, a delicious dessert, healthy meal ideas, or traditional recipes with a modern touch, you’ll find inspiration here.
More Than Just Recipes
I believe that cooking is also a way to learn. That’s why this website is not only about recipes. I also create educational articles about ingredients, cooking techniques, kitchen tips, food preparation, and the stories behind different dishes.
Each article is designed to give you useful knowledge that you can apply in your own kitchen. From understanding how ingredients work together to learning better cooking methods, my aim is to help you become a more confident and creative cook.
My Philosophy
Good food doesn’t always require complicated ingredients or professional equipment. With a little knowledge, patience, and creativity, simple ingredients can become something truly special.
I believe in sharing recipes that are practical, clearly explained, and enjoyable to make. I also love exploring new flavors while appreciating traditional cooking and the recipes passed down through generations.
Thank you for visiting my kitchen and being part of this food-loving community. I hope my recipes and articles inspire you to cook, learn, experiment, and most importantly, enjoy every bite!
Happy cooking!