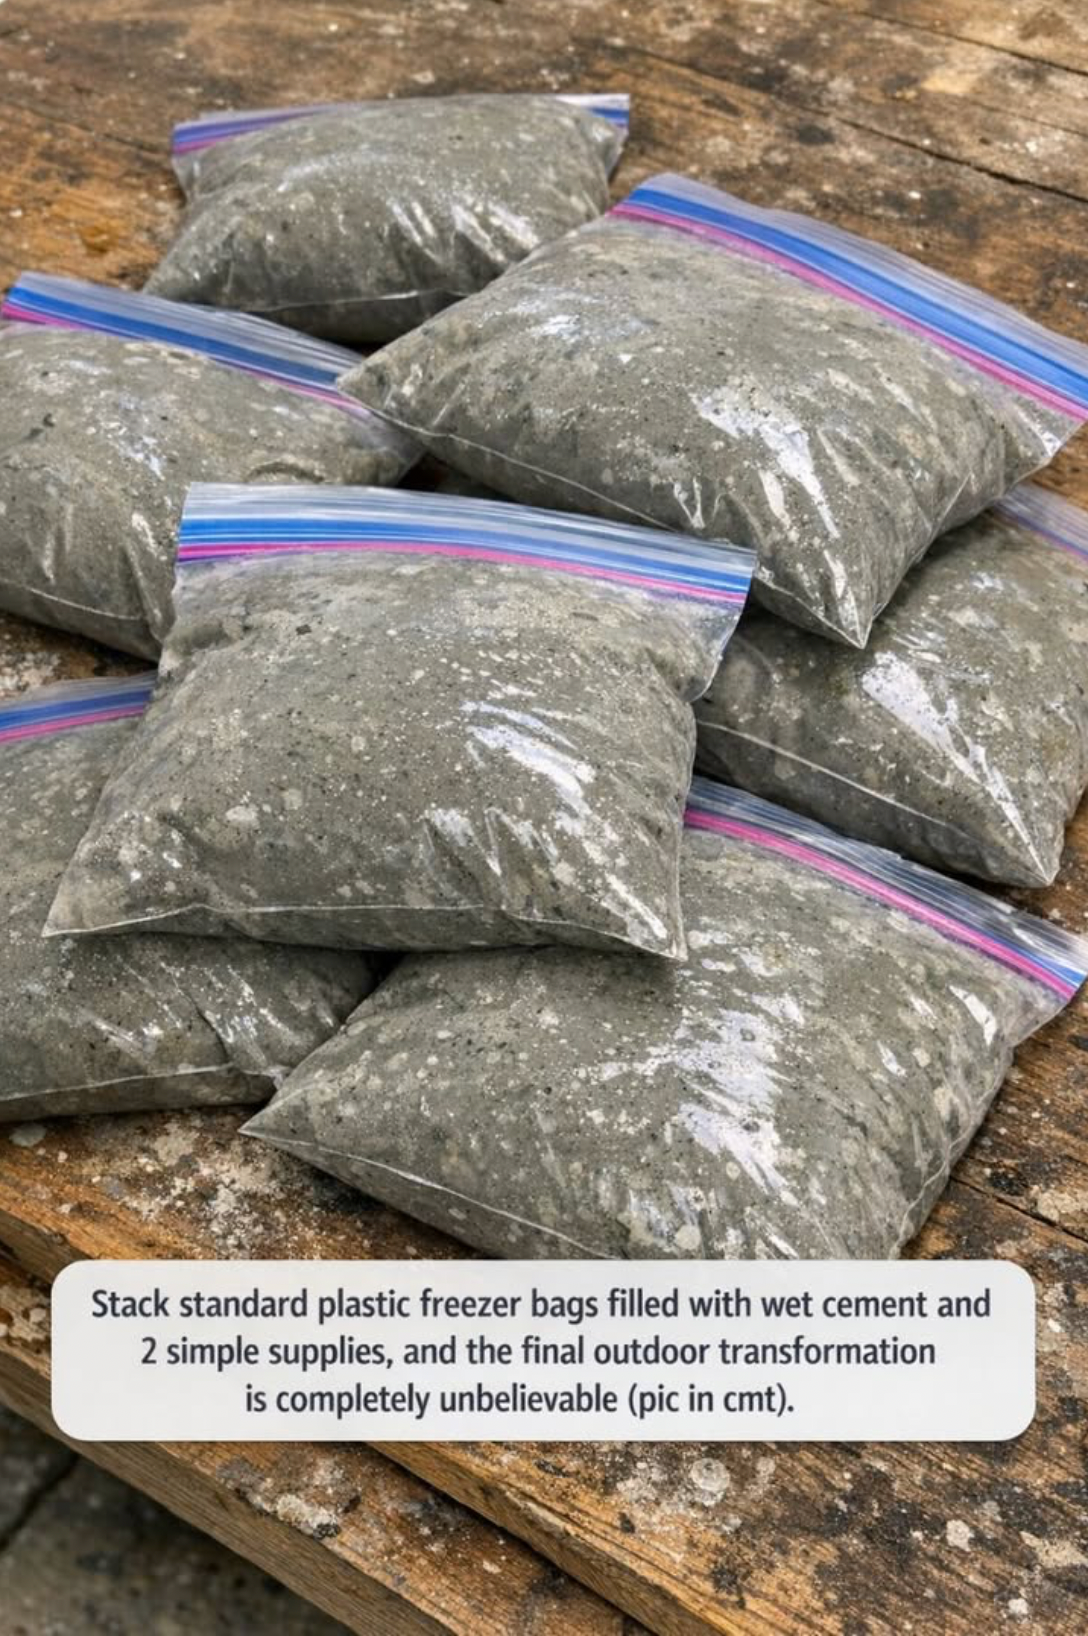
At first, the idea sounds almost too strange to take seriously: filling standard plastic freezer bags with wet cement, stacking them, and using just a couple of simple supplies to create something that completely transforms an outdoor space.
It doesn’t look like traditional construction. It doesn’t require expensive molds, heavy tools, or professional skills. Yet once it hardens, the result can resemble natural stone pathways, sculpted garden edging, rustic stepping stones, or even modern abstract outdoor design pieces.
This DIY trend has become popular because it sits at the intersection of creativity and practicality: low cost, minimal tools, and surprisingly high-impact visual results.
What This DIY Method Actually Is
The basic idea is simple:
- take standard plastic freezer bags
- fill them with wet cement or concrete mix
- shape and stack them in a controlled layout
- allow them to partially set or fully cure
- finish with minimal shaping or placement adjustments
The “2 simple supplies” usually refer to:
- cement or concrete mix
- water (to activate the mix)
Sometimes people also add optional tools like gloves or a trowel, but the core idea stays extremely minimal.
Why Freezer Bags Are Used
It may seem unusual to use plastic bags for cement, but they actually serve several important functions:
1. Natural Molding Shape
The bag naturally forms irregular, organic shapes as it fills. This creates a stone-like appearance when cured.
2. Flexibility
Unlike rigid molds, plastic bags allow:
- curved edges
- uneven textures
- natural “rock-like” forms
This gives a more natural outdoor aesthetic.
3. Easy Release
Once the cement sets, the plastic can be:
- peeled away
- cut off
- or left partially embedded depending on design
4. Low Cost
Freezer bags are cheap, disposable, and widely available.
What You Can Create With This Method
This technique is surprisingly versatile. Depending on how you shape and stack the bags, you can create:
Garden Pathways
- stepping stones
- irregular stone trails
- rustic walkways
Outdoor Borders
- flower bed edges
- garden dividers
- lawn separation lines
Decorative Sculptures
- abstract garden art
- stacked stone-like formations
- modern outdoor décor pieces
Planter Bases
- elevated plant stands
- heavy decorative pot supports
Why the Final Result Looks So Good
The visual appeal comes from one key idea: controlled randomness.
When cement is poured into flexible plastic, it doesn’t form perfect geometric shapes. Instead, it naturally creates:
- soft curves
- uneven surfaces
- organic edges
- stone-like textures
Once hardened, this mimics natural rock formations.
The human eye associates irregular shapes with natural materials, which is why the final result feels “expensive” and artistic.
Step-by-Step Process (Detailed Explanation)
Step 1: Prepare the Cement Mix
Mix cement with water until it reaches a thick, moldable consistency.
It should be:
- wet enough to pour
- thick enough to hold shape
Step 2: Fill Plastic Bags
Pour the cement mixture into freezer bags.
Key points:
- do not overfill
- leave room for shaping
- seal or loosely close the bag
Step 3: Shape the Bags
This is where design begins.
You can:
- flatten them for stepping stones
- stack them for height
- press edges for natural rock-like shapes
Step 4: Arrange in Desired Layout
Place the filled bags in position before full curing.
Examples:
- along a garden path
- around flower beds
- in layered stacks for decorative effect
Step 5: Let Cement Cure
Allow sufficient time for hardening.
During curing:
- cement solidifies
- shape becomes permanent
- strength increases
Step 6: Remove or Adjust Plastic (Optional)
Depending on design:
- peel plastic away for natural stone look
- or leave partially for texture effects
The Science Behind Why It Works
Cement is essentially a mixture that hardens through a chemical reaction called hydration.
When water is added:
- particles bind together
- crystals form inside the mixture
- structure becomes rigid
The plastic bag simply acts as a temporary mold while this process occurs.
Because plastic is flexible, it doesn’t restrict the cement’s natural expansion—resulting in organic shapes.
Design Variations You Can Try
1. Layered “Stone Wall” Effect
Stack bags vertically before curing to create wall-like formations.
2. Flat Stepping Stones
Press bags flat for walkway stones.
3. Textured Surface Finish
Before curing, press leaves, stones, or fabric into the surface for natural patterns.
4. Colored Cement
Add pigment to create:
- gray stone look
- terracotta tones
- modern charcoal finish
5. Mixed Size Layouts
Use different bag sizes for more natural landscaping aesthetics.
Common Mistakes to Avoid
1. Too watery cement
Leads to weak structure and collapse.
2. Overfilled bags
Causes uncontrolled shape and instability.
3. Not leveling placement
Creates uneven walkways.
4. Moving before curing
Can ruin shape completely.
5. Using thin plastic bags
May tear under weight of cement.
Why People Love This DIY Trend
This method has become popular because it offers:
- extremely low cost materials
- no advanced tools required
- creative freedom
- strong and durable results
- high visual impact
It turns something as basic as cement into a design material.
The Psychological Effect of the Final Look
The finished product often surprises people because:
- it resembles natural stone formations
- it looks like expensive landscaping work
- it feels custom-made rather than DIY
The brain tends to associate:
irregular shapes + earth tones = natural luxury design
So even simple cement bags can appear artistic and high-end once hardened.
Safety Considerations
While simple, cement work still requires caution:
- wear gloves to avoid skin irritation
- avoid inhaling dry cement dust
- keep mixture away from eyes
- handle wet bags carefully (they are heavy)