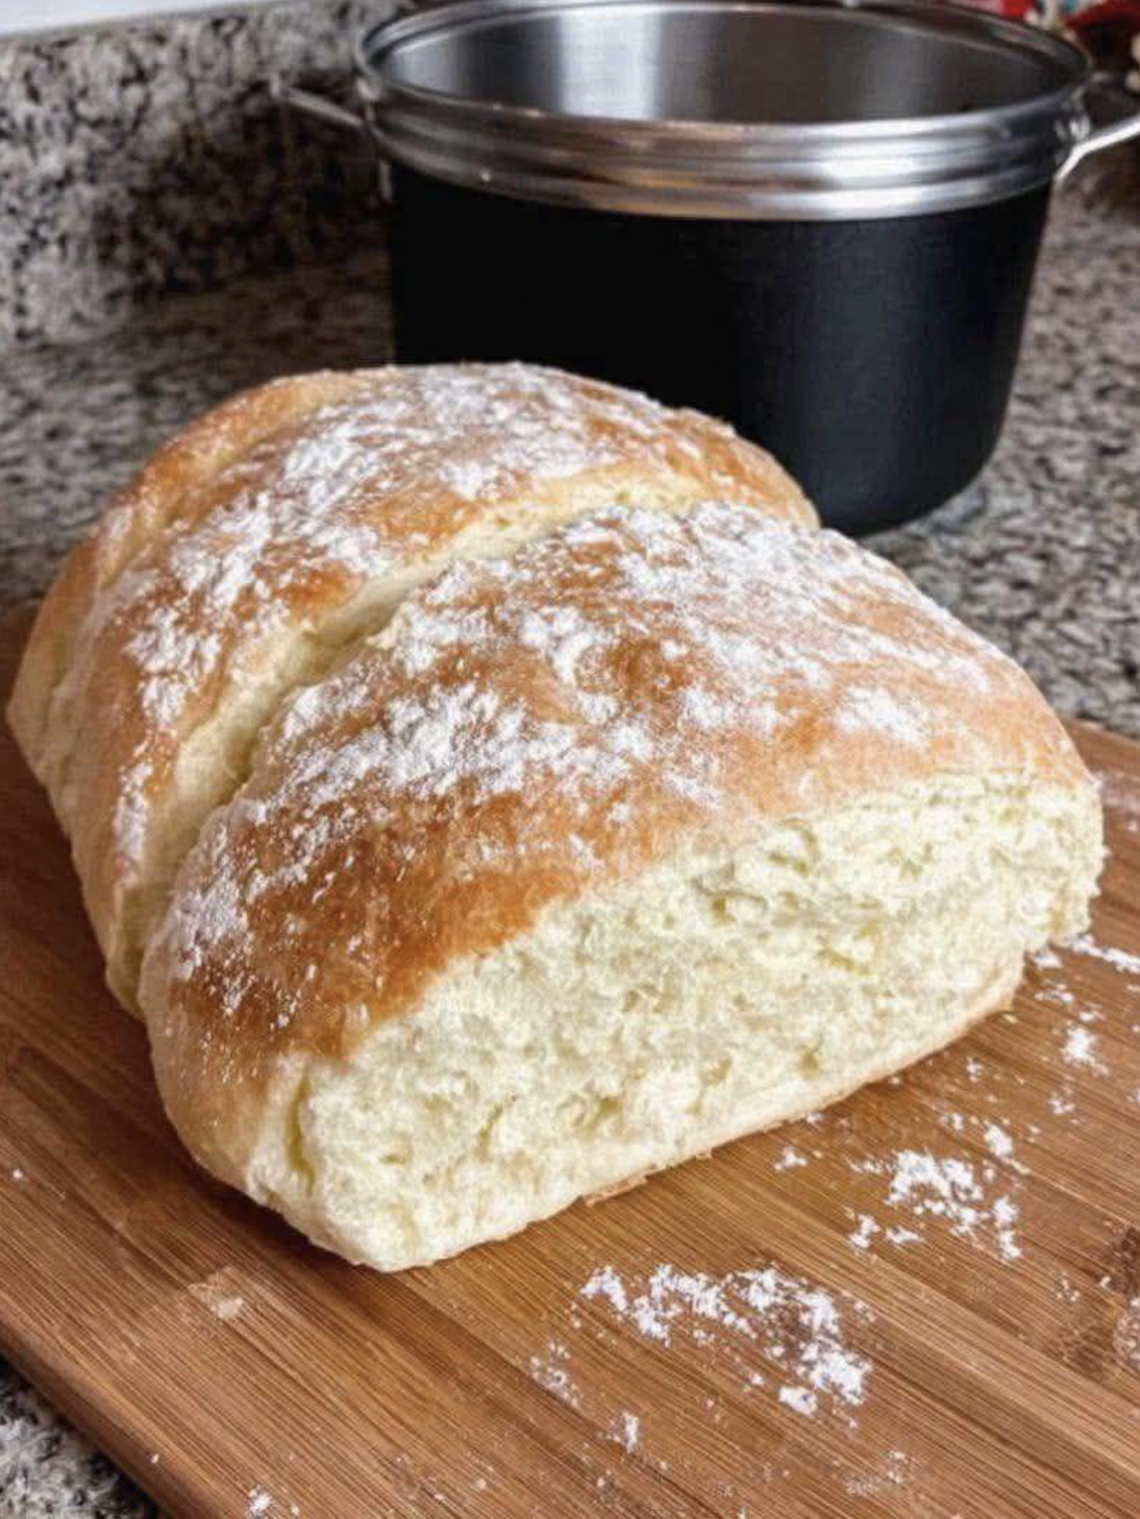
Few foods are as comforting and timeless as a freshly baked loaf of rustic bread. With its deeply golden crust, open and airy crumb, and rich, slightly nutty flavor, rustic bread has been a staple in homes and bakeries for centuries. Unlike highly processed commercial bread, rustic bread celebrates simplicity, relying on only a handful of basic ingredients and traditional baking techniques to create a loaf with exceptional taste, texture, and aroma.
Rustic bread is known for its handcrafted appearance. Rather than striving for perfect symmetry, this style of bread embraces natural shapes, bold scoring patterns, and an artisan look that reflects traditional baking methods. Every loaf is unique, with a crackling crust and a tender interior that is perfect for sandwiches, soups, stews, toast, or simply enjoyed warm with butter and olive oil.
One of the greatest characteristics of rustic bread is its remarkable versatility. It can be made with all-purpose flour, bread flour, or a blend of whole-grain flours, and it pairs beautifully with both savory and sweet foods. Whether baked in a Dutch oven, on a baking stone, or on a simple baking tray, rustic bread offers the rewarding experience of creating bakery-quality bread at home.
Although the ingredient list is short, achieving the perfect loaf requires patience. Time allows the dough to develop flavor naturally while strengthening the gluten structure that gives rustic bread its signature chewy texture and beautiful open crumb.
Why You’ll Love This Recipe
This rustic bread recipe has become a favorite among home bakers for many reasons.
It is:
- Made with simple pantry ingredients.
- Crispy on the outside.
- Soft and airy on the inside.
- Perfect for beginners and experienced bakers alike.
- Requires no special bread machine.
- Easy to customize.
- Wonderful for sandwiches and toast.
- Excellent for soups and stews.
- Naturally flavorful.
- Freezes well.
- Suitable for everyday baking.
What Makes Rustic Bread Different?
Rustic bread differs from standard sandwich bread in several important ways.
Instead of a soft, thin crust, rustic bread develops a thick, crisp crust during baking. The interior features large, irregular air pockets created by proper fermentation and careful handling of the dough. Because it contains relatively few ingredients, the quality of each ingredient becomes especially important.
Long fermentation develops deeper flavor, while high baking temperatures create the beautifully caramelized crust that artisan bread is known for.
Ingredients
- 4 cups (500 g) bread flour
- 1½ teaspoons salt
- 2 teaspoons instant yeast
- 1½ cups (360 ml) warm water (about 100–110°F / 38–43°C)
- 1 tablespoon olive oil (optional, for a slightly softer crumb)
Optional Additions
You can customize your rustic bread with ingredients such as:
- Whole wheat flour
- Rye flour
- Oat flour
- Chopped rosemary
- Fresh thyme
- Roasted garlic
- Sun-dried tomatoes
- Olives
- Caramelized onions
- Parmesan cheese
- Cheddar cheese
- Sesame seeds
- Pumpkin seeds
- Flaxseeds
- Chia seeds
- Dried cranberries
- Walnuts
Equipment Needed
- Large mixing bowl
- Wooden spoon
- Kitchen scale (recommended)
- Dough scraper
- Clean kitchen towel
- Dutch oven or baking stone
- Parchment paper
- Sharp bread lame or knife
- Cooling rack
Understanding the Ingredients
Bread Flour
Bread flour contains more protein than all-purpose flour, allowing stronger gluten development and creating the chewy texture associated with artisan bread.
Water
Warm water activates the yeast and hydrates the flour, allowing gluten to form.
Salt
Salt strengthens the dough while enhancing flavor and controlling yeast activity.
Yeast
Yeast ferments the sugars naturally present in the flour, producing carbon dioxide that causes the dough to rise.
Step 1: Mix the Dough
In a large bowl combine:
- Bread flour
- Salt
- Instant yeast
Mix thoroughly.
Gradually add the warm water.
If using olive oil, add it now.
Stir with a wooden spoon until no dry flour remains.
The dough will appear shaggy and somewhat sticky.
This is completely normal.
Step 2: Rest the Dough
Cover the bowl with a clean towel or plastic wrap.
Allow the dough to rest for 20 to 30 minutes.
This resting period, often called the autolyse stage, allows the flour to fully absorb the water, making the dough easier to handle and improving gluten development.
Step 3: Knead the Dough
Transfer the dough onto a lightly floured surface.
Knead for approximately 8 to 10 minutes.
As you knead, the dough becomes:
- Smoother.
- More elastic.
- Less sticky.
- Easier to shape.
The dough should pass the windowpane test, meaning a small piece can be stretched thin without tearing immediately.
Step 4: First Rise
Place the dough into a lightly oiled bowl.
Cover.
Allow it to rise in a warm place for about 1½ to 2 hours, or until doubled in size.
The exact time depends on room temperature.
Step 5: Shape the Dough
Gently transfer the risen dough onto a lightly floured work surface.
Avoid pressing out all the air bubbles.
Fold the edges toward the center several times to create surface tension.
Shape into a round boule or an oval bâtard.
Step 6: Second Rise
Place the shaped dough onto parchment paper or into a proofing basket dusted with flour.
Cover lightly.
Allow the dough to rise again for 45 to 60 minutes.
During this time the loaf becomes slightly puffy.
Step 7: Preheat the Oven
Preheat the oven to 450°F (230°C).
If using a Dutch oven, place it inside the oven while preheating.
A preheated Dutch oven creates steam, helping produce a beautifully crisp crust.
Step 8: Score the Dough
Using a sharp bread lame or knife, make one or more shallow cuts across the top of the loaf.
Scoring allows the bread to expand in a controlled manner during baking and also creates an attractive artisan appearance.
Step 9: Bake
Carefully transfer the dough into the hot Dutch oven.
Cover with the lid.
Bake for 30 minutes.
Remove the lid.
Continue baking for another 15 to 20 minutes, or until the crust is deeply golden brown and crisp.
The loaf should sound hollow when tapped on the bottom.
Its internal temperature should reach approximately 205–210°F (96–99°C).
Step 10: Cool
Transfer the bread to a cooling rack.
Allow it to cool completely before slicing.
Although tempting, slicing too early allows steam to escape, resulting in a gummy interior.
Cooling for at least one hour produces the best texture.
Understanding Crust Formation
The crisp crust develops because of three important factors:
- High oven temperature.
- Steam during the first part of baking.
- Proper fermentation.
Steam delays crust formation, allowing the bread to expand fully before the exterior hardens.
Serving Suggestions
Rustic bread is delicious served with:
- Butter
- Olive oil
- Balsamic vinegar
- Soft cheeses
- Aged cheeses
- Soups
- Beef stew
- Chicken stew
- Chili
- Pasta
- Fresh tomatoes
- Avocado
- Smoked salmon
- Eggs
Flavor Variations
Garlic Herb Rustic Bread
Add roasted garlic and fresh rosemary.
Cheese Bread
Mix shredded cheddar or Parmesan into the dough.
Olive Bread
Fold chopped olives into the dough before the first rise.
Whole Wheat Version
Replace up to half of the bread flour with whole wheat flour.
Seeded Rustic Bread
Cover the loaf with sesame, sunflower, flax, and pumpkin seeds before baking.
Walnut Cranberry Bread
Add chopped walnuts and dried cranberries for a sweet and savory loaf.
Tips for Perfect Rustic Bread
- Measure ingredients accurately.
- Use bread flour for the best texture.
- Allow sufficient rising time.
- Avoid adding too much extra flour.
- Handle the dough gently.
- Preheat the oven completely.
- Cool before slicing.
Common Mistakes
Dense Bread
Usually caused by insufficient kneading or under-proofing.
Flat Loaf
Often caused by over-proofing.
Pale Crust
Usually due to a low oven temperature or insufficient baking time.
Gummy Interior
Bread was sliced before cooling completely.
Storage
Store rustic bread in a paper bag or bread box for up to three days.
Avoid refrigerating, as refrigeration causes bread to become stale more quickly.
Freezing
Rustic bread freezes beautifully.
Wrap tightly in plastic wrap and aluminum foil.
Freeze for up to three months.
Thaw at room temperature before reheating in the oven for a freshly baked texture.
Nutritional Information (Approximate Per Slice)
- Calories: 150
- Protein: 5 g
- Fat: 1.5 g
- Carbohydrates: 30 g
- Fiber: 2 g
- Sugar: 1 g
- Sodium: 290 mg
Values are approximate.
Frequently Asked Questions
Can I use all-purpose flour?
Yes. All-purpose flour works well, although bread flour creates a chewier texture and better structure.
Do I need a Dutch oven?
No. A baking stone or baking tray can also be used. Placing a pan of hot water in the oven helps generate steam.
Can I let the dough rise overnight?
Yes. A slow overnight rise in the refrigerator develops even deeper flavor and improves texture.
Why should I score the bread?
Scoring directs expansion during baking and prevents random cracks from forming.
How do I know when the bread is done?
The crust should be deeply golden, the loaf should sound hollow when tapped, and the internal temperature should reach approximately 205–210°F (96–99°C).

Welcome to my kitchen!
I’m a passionate home cook and recipe creator who loves turning simple ingredients into delicious, comforting meals that everyone can enjoy. Through this website, I share carefully prepared recipes, practical cooking tips, and easy-to-understand food education to help you feel more confident in the kitchen.
My goal is to make cooking simple, enjoyable, and accessible. Whether you are looking for a quick family dinner, a delicious dessert, healthy meal ideas, or traditional recipes with a modern touch, you’ll find inspiration here.
More Than Just Recipes
I believe that cooking is also a way to learn. That’s why this website is not only about recipes. I also create educational articles about ingredients, cooking techniques, kitchen tips, food preparation, and the stories behind different dishes.
Each article is designed to give you useful knowledge that you can apply in your own kitchen. From understanding how ingredients work together to learning better cooking methods, my aim is to help you become a more confident and creative cook.
My Philosophy
Good food doesn’t always require complicated ingredients or professional equipment. With a little knowledge, patience, and creativity, simple ingredients can become something truly special.
I believe in sharing recipes that are practical, clearly explained, and enjoyable to make. I also love exploring new flavors while appreciating traditional cooking and the recipes passed down through generations.
Thank you for visiting my kitchen and being part of this food-loving community. I hope my recipes and articles inspire you to cook, learn, experiment, and most importantly, enjoy every bite!
Happy cooking!