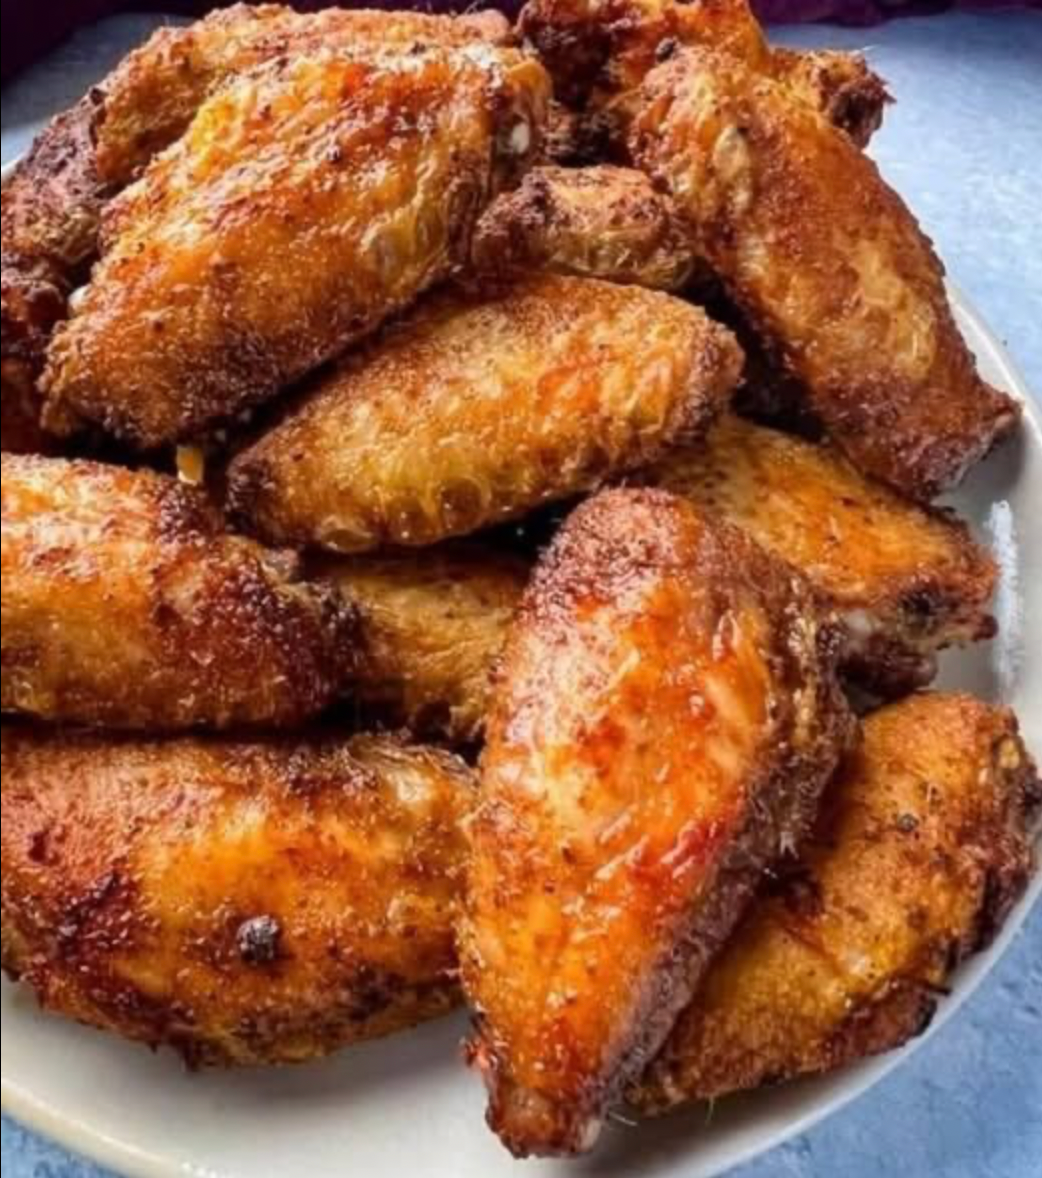
Ultra-Crispy, Flavor-Packed Wings Without Sauce
Dry rub chicken wings are all about texture and bold seasoning. Instead of relying on sticky sauces, these wings develop a deeply seasoned crust on the outside while staying juicy inside. When done right, they come out crispy, smoky, slightly spicy, and incredibly addictive—perfect for game day, gatherings, or a simple comfort meal.
The secret is not complicated ingredients—it’s technique. Getting that crisp skin without frying or heavy breading comes down to moisture control, seasoning balance, and high heat.
What Makes Dry Rub Wings Different?
Unlike sauced wings, dry rub wings:
- have no sticky glaze
- rely on spice blends for flavor
- develop a crisp, seasoned crust
- stay lighter and less messy
The seasoning becomes part of the crust itself rather than sitting on top.
Key Principles for Crispy Wings
Before getting into the recipe, it’s important to understand what actually creates crispiness:
1. Dry skin = crispy skin
Moisture is the enemy of crisp texture.
2. High heat is essential
Baking or air frying at higher temperatures renders fat from the skin.
3. Air circulation matters
Hot air needs to move around the wings to crisp evenly.
4. Time improves texture
A brief resting period after seasoning helps the rub stick better.
Ingredients
For the wings:
- 1 kg chicken wings (split into flats and drumettes)
- 1 tablespoon baking powder (aluminum-free, for crisping)
- 1 teaspoon salt
Dry rub seasoning:
- 1 teaspoon smoked paprika
- 1 teaspoon garlic powder
- 1 teaspoon onion powder
- 1 teaspoon black pepper
- 1/2 teaspoon cayenne pepper (optional for heat)
- 1 teaspoon dried oregano or thyme
- 1/2 teaspoon chili powder
Optional additions:
- brown sugar (1 teaspoon for a sweet-smoky crust)
- cumin (for deeper earthy flavor)
Step-by-Step Instructions
Step 1: Dry the wings thoroughly
Pat chicken wings completely dry using paper towels.
This step is critical because:
- excess moisture prevents crisping
- dry skin allows fat to render properly
For best results, leave wings uncovered in the refrigerator for 1–2 hours (or overnight) to air-dry further.
Step 2: Coat with baking powder and salt
In a large bowl, mix:
- baking powder
- salt
Toss wings until lightly coated.
Why baking powder works
It raises the pH level of the skin, helping it:
- brown faster
- crisp more efficiently
- develop a crunchy texture
Do not use baking soda—it will taste bitter.
Step 3: Add the dry rub
Mix all spices together, then coat the wings evenly.
Massage the seasoning into the skin so it adheres properly.
At this stage, the wings should look evenly coated but not wet or soggy.
Step 4: Rest the wings
Let the wings sit for:
- 20 to 30 minutes at room temperature
or
- up to 12 hours in the refrigerator (for deeper flavor)
This allows:
- seasoning absorption
- slight drying of surface moisture
- better crust formation during cooking
Step 5: Choose your cooking method
You can cook these wings in the oven or air fryer.
Oven Method (Classic Crispy Bake)
Step 1: Preheat oven
Set to:
- 220°C (425°F)
Step 2: Arrange wings
Place wings on a wire rack over a baking tray.
Do not overcrowd—air circulation is essential.
Step 3: Bake
Cook for:
- 40–45 minutes total
Flip halfway through for even browning.
Step 4: Optional broil finish
Broil for 2–3 minutes at the end for extra crispness.
Air Fryer Method (Faster Crisping)
Step 1: Preheat air fryer
Set to:
- 200°C (390°F)
Step 2: Arrange wings
Place wings in a single layer.
Step 3: Cook
Air fry for:
- 18–25 minutes
Shake or turn halfway through.
Step 4: Crisp finish
Add 2–3 extra minutes if needed for deeper crunch.
What to Expect While Cooking
During cooking:
- fat renders from the skin
- spices darken and form crust
- wings shrink slightly as moisture escapes
- aroma becomes smoky and rich
The transformation from raw to crispy happens gradually but visibly.
How to Know They Are Done
Wings are ready when:
- skin is golden brown and crisp
- edges look slightly dry and textured
- internal temperature reaches 75°C (165°F)
- juices run clear
The exterior should feel firm when touched.
Flavor Variations
1. Smoky BBQ dry rub
Add:
- extra smoked paprika
- brown sugar
- mustard powder
Creates a sweet-smoky profile.
2. Spicy heat version
Increase:
- cayenne
- chili powder
- black pepper
For a strong kick.
3. Garlic herb wings
Add:
- dried rosemary
- thyme
- extra garlic powder
More aromatic and savory.
4. Lemon pepper style
Add:
- lemon zest powder
- black pepper
- garlic powder
Bright and tangy flavor profile.
Common Mistakes to Avoid
Skipping drying step
This leads to soft skin instead of crispy texture.
Overcrowding the pan or air fryer
Traps steam and prevents crisping.
Too much rub
Excess seasoning can burn and become bitter.
Using sauce too early
If you add sauce, it should be after cooking—not before.
Serving Suggestions
Dry rub wings pair well with:
- roasted potatoes
- coleslaw
- garlic rice
- grilled vegetables
- simple dipping sauces (yogurt, garlic dip, or ranch)
They also work well as part of a larger appetizer spread.
Why Dry Rub Wings Are So Popular
People love them because they are:
- less messy than sauced wings
- crispier in texture
- easier to store and reheat
- more versatile in flavor
- lighter but still satisfying
They also allow spice blends to shine without being masked by sauce.
Storage and Reheating Tips
Storage:
- refrigerate in airtight container
- best eaten within 2–3 days
Reheating:
- air fryer (best method) at 180°C for 5–7 minutes
- oven at 200°C for 10–12 minutes
Avoid microwaving if you want to keep crispiness.