The Ultimate Guide to Effortless, Mess-Free, Perfectly Tender Eggs
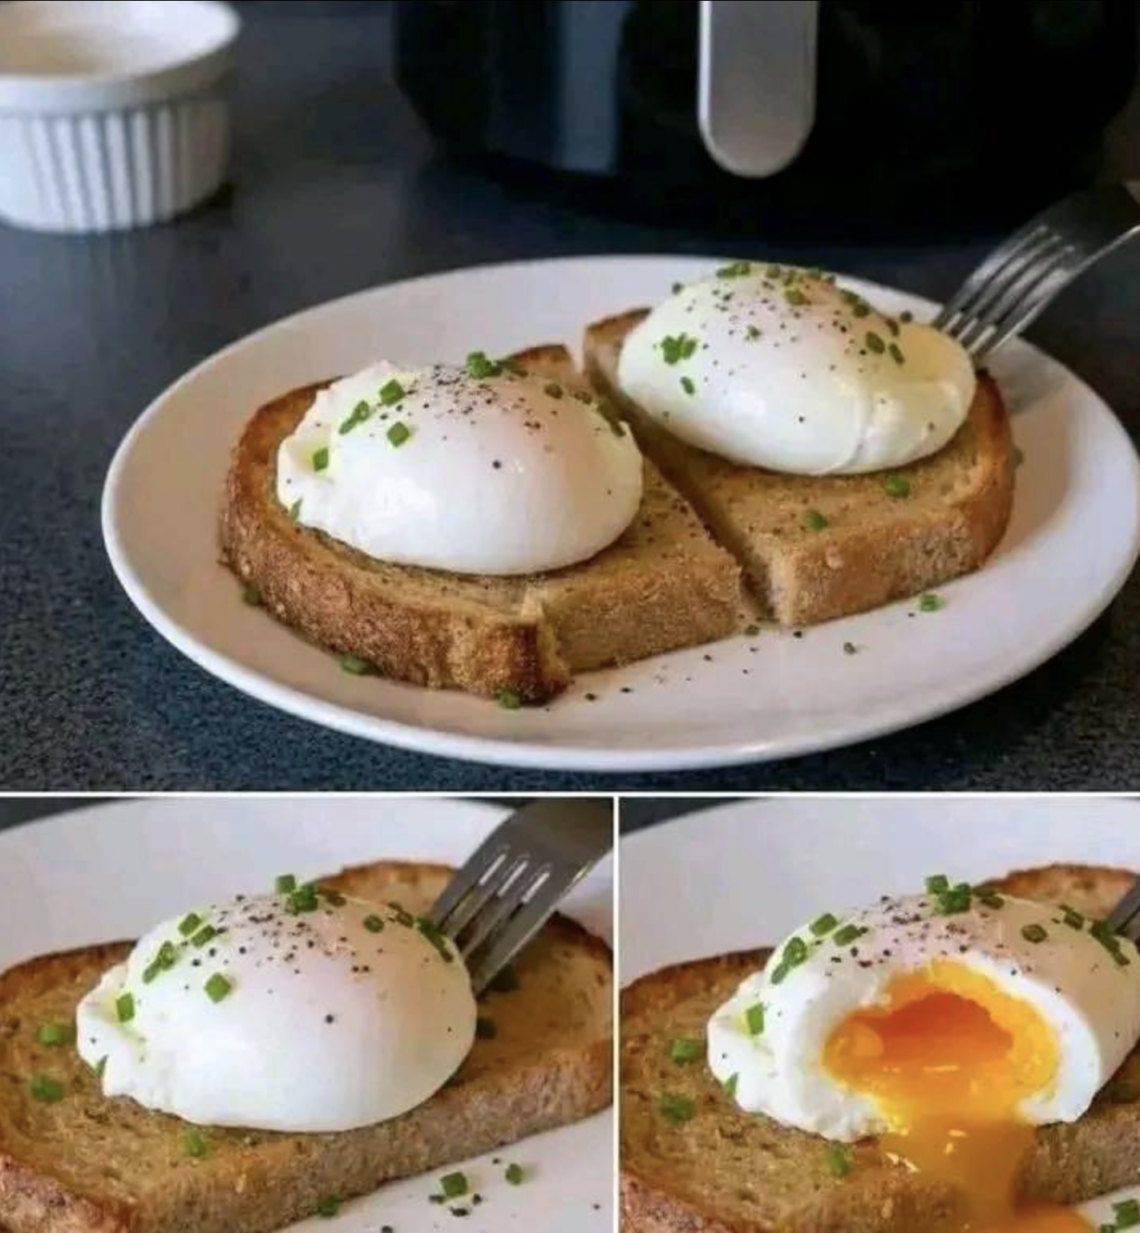
Poached eggs have always held a special place in the world of cooking. They’re elegant without being complicated on paper, simple in ingredients yet delicate in execution. A perfectly poached egg—with its softly set white and rich, flowing yolk—can elevate everything from a basic slice of toast to a carefully plated brunch dish.
But for many people, traditional poaching comes with frustration.
You stand over a pot of simmering water, adjusting the heat constantly. You try to create that perfect whirlpool. You worry about the egg spreading too much, breaking apart, or overcooking. Sometimes it works beautifully. Other times, it turns into a cloudy mess.
That’s where the air fryer method comes in—not as a replacement of tradition, but as a modern shortcut that removes much of the stress while preserving the essence of what makes a poached egg so appealing.
This method is about control, simplicity, and consistency. It transforms a technique that once required precision and attention into something almost effortless—without sacrificing the soft texture and rich flavor you’re looking for.
Rethinking Poaching: Why This Method Works
At its core, poaching is about gentle heat.
In traditional cooking, water acts as the medium that surrounds the egg and cooks it evenly. In the air fryer method, that role is shared between:
- A small amount of water in the ramekin
- The circulating hot air inside the appliance
This combination creates a controlled micro-environment. The water provides moisture, while the hot air supplies consistent heat. Together, they mimic the effect of poaching without needing a pot of simmering water.
What you end up with is not exactly identical in shape—but very close in texture and flavor:
- Soft, tender whites
- A custard-like yolk
- Minimal disruption to the egg’s structure
The Science Behind the Texture
To truly master this method, it helps to understand what’s happening inside the egg.
Egg whites begin to set at around 62–65°C, while yolks thicken at slightly higher temperatures. The goal is to:
- Fully set the whites
- Keep the yolk soft and runny
In an air fryer:
- Heat circulates evenly
- The ramekin retains warmth
- The water prevents the egg from drying out
This creates a gradual cooking process that is surprisingly forgiving compared to direct boiling.
Choosing the Right Equipment
The Air Fryer
Different models vary in:
- Power
- Air circulation
- Basket size
This means cooking time may need slight adjustments depending on your machine.
Ramekins or Small Dishes
These are essential.
Choose:
- Heat-safe ceramic or glass
- Small enough to hold one egg comfortably
The size of the ramekin affects how the egg cooks:
- Smaller dish → thicker egg shape
- Wider dish → flatter egg
Step-by-Step Process (Deep Dive)
Step 1: Preheating
Set your air fryer to around 175°C (350°F).
Why preheating matters:
- Ensures immediate and even cooking
- Prevents uneven texture
- Helps the whites set properly
Skipping this step can result in inconsistent eggs.
Step 2: Preparing the Water Base
Add 2–3 tablespoons of water to your ramekin.
This step is critical.
The water:
- Creates steam
- Prevents dryness
- Helps mimic traditional poaching
Too little water can lead to rubbery whites. Too much can dilute heat slightly.
Step 3: Cracking the Egg Properly
Crack the egg into a separate bowl first.
This gives you control:
- Avoids shell fragments
- Protects the yolk
- Allows a cleaner transfer
Then gently slide it into the ramekin.
Step 4: Cooking Phase
Place the ramekin in the air fryer basket.
Cook for 5–7 minutes depending on your preference.
Detailed Timing Breakdown:
- 5 minutes → very soft whites, runny yolk
- 6 minutes → set whites, creamy yolk
- 7 minutes → firmer yolk, still slightly soft
Step 5: Removing Safely
Use:
- Tongs
- A cloth or heat-safe glove
The ramekin will be hot, and careful handling prevents spills.
Step 6: Releasing the Egg
Use a spoon to gently lift the egg out.
If needed:
- Run a knife along the edge
- Tilt the ramekin slightly
Mastering Texture Control
Getting the perfect texture is about understanding your preferences.
For Runny Yolks:
- Shorter cooking time
- Slightly lower temperature if needed
For Medium Yolks:
- Add 30–60 seconds
For Firmer Yolks:
- Extend cooking time carefully
Advanced Tips for Better Results
Use Fresh Eggs
Fresh eggs:
- Hold their shape better
- Have tighter whites
Older eggs tend to spread more.
Lightly Grease the Ramekin
This helps:
- Prevent sticking
- Make removal easier
Covering the Ramekin (Optional)
A loose foil cover can:
- Trap steam
- Help cook the top evenly
Common Mistakes (Expanded)
1. Overcooking
Air fryers cook quickly.
Solution:
- Start with less time
- Add increments if needed
2. Uneven Cooking
Caused by:
- No preheating
- Incorrect placement
3. Dry Texture
Usually from:
- Not enough water
- Cooking too long
4. Broken Yolks
Prevent by:
- Cracking separately
- Handling gently
Flavor Enhancements
Simple Seasoning
Salt and pepper after cooking.
Herb Finish
Add:
- Chives
- Parsley
- Dill
Rich Additions
Serve with:
- Buttered toast
- Cheese
Bold Flavors
Add:
- Chili oil
- Garlic butter
Serving Ideas (Expanded)
Classic Toast
A timeless combination.
Avocado Toast Upgrade
Creamy avocado + runny yolk = perfect balance.
Grain Bowls
Adds protein and richness.
Salads
Enhances texture and flavor.
Breakfast Plates
Pair with:
- Vegetables
- Bread
- Light proteins
Comparing to Traditional Poaching
Traditional Method:
- Requires skill
- More cleanup
- Less predictable
Air Fryer Method:
- Easier
- Cleaner
- More consistent
Why This Method Fits Modern Cooking
Today’s kitchens prioritize:
- Speed
- Convenience
- Minimal cleanup
Air fryer poached eggs fit perfectly into this lifestyle. They allow you to enjoy a classic dish without the complexity that usually comes with it.