So They’re Smooth, Tender—and Actually Easy to Peel
Hard-boiled eggs seem simple. Water, eggs, heat—what could go wrong? Yet for many people, the result is frustrating: shells that stick, whites that tear, rubbery texture, or that dreaded green-gray ring around the yolk.
The truth is, perfect hard-boiled eggs are not about luck—they’re about understanding the science of heat, timing, and cooling. Once you master a few key principles, you’ll get eggs that are:
- Easy to peel
- Smooth and intact
- Firm but tender
- Bright yellow inside (not gray)
Let’s go deep into what really works—and why.
Why Eggs Are Hard to Peel
Before fixing the problem, you need to understand it.
The Real Reason
Fresh eggs are harder to peel because:
- The egg white sticks tightly to the inner shell membrane
- The pH level is lower, making the bond stronger
As eggs age slightly:
- The pH rises
- The membrane separates more easily
Result
- Slightly older eggs peel better than very fresh ones
The Core Secret: Controlled Cooking + Rapid Cooling
Perfect eggs come down to two things:
- Gentle, controlled cooking
- Immediate cooling (ice bath)
Step-by-Step Method for Perfect Eggs
Step 1: Start with the Right Eggs
- Use eggs that are a few days old (not extremely fresh)
- Keep them refrigerated until cooking
Step 2: Place Eggs in Cold Water
- Arrange eggs in a single layer in a pot
- Cover with cold water (about 2–3 cm above eggs)
Why This Matters
- Prevents cracking
- Ensures even heating
Step 3: Bring to a Gentle Boil
- Heat water until it reaches a boil
- Once boiling, reduce heat slightly
Important
Avoid aggressive boiling—it can:
- Cause eggs to bounce and crack
- Lead to uneven cooking
Step 4: Turn Off Heat and Cover
Once boiling:
- Turn off the heat
- Cover the pot
Let Eggs Sit
- Leave eggs in hot water for about 10–12 minutes
This gentle method prevents overcooking.
Step 5: Ice Bath (The Game-Changer)
Immediately transfer eggs to ice water.
Why This Is Critical
- Stops cooking instantly
- Shrinks egg contents slightly
- Separates the membrane from the shell
Result
- Easier peeling
- Better texture
Step 6: Peel the Right Way
- Tap egg gently on a hard surface
- Roll slightly to crack the shell evenly
- Start peeling from the wider end (where the air pocket is)
The Science Behind Perfect Eggs
1. Protein Control
Egg whites are proteins that:
- Tighten when heated
- Become rubbery if overcooked
Gentle heat keeps them:
- Firm but tender
2. Yolk Color
That green-gray ring forms when:
- Eggs are overcooked
- Sulfur reacts with iron
Solution
- Avoid overcooking
- Cool quickly
3. Shell Separation
The ice bath:
- Contracts the egg slightly
- Loosens the membrane
This is the key to easy peeling.
Alternative Method: Steaming (Even Better for Peeling)
Some experts prefer steaming.
How It Works
- Bring a small amount of water to a boil
- Place eggs in a steamer basket
- Cover and steam for 12–14 minutes
Advantages
- Easier peeling
- More consistent results
- Less cracking
Common Mistakes to Avoid
1. Overcooking
Leads to:
- Dry yolks
- Green ring
- Rubbery whites
2. Skipping the Ice Bath
Makes peeling much harder.
3. Using Very Fresh Eggs
More likely to stick to the shell.
4. Boiling Too Aggressively
Can:
- Crack shells
- Create uneven texture
Tips for Consistently Great Results
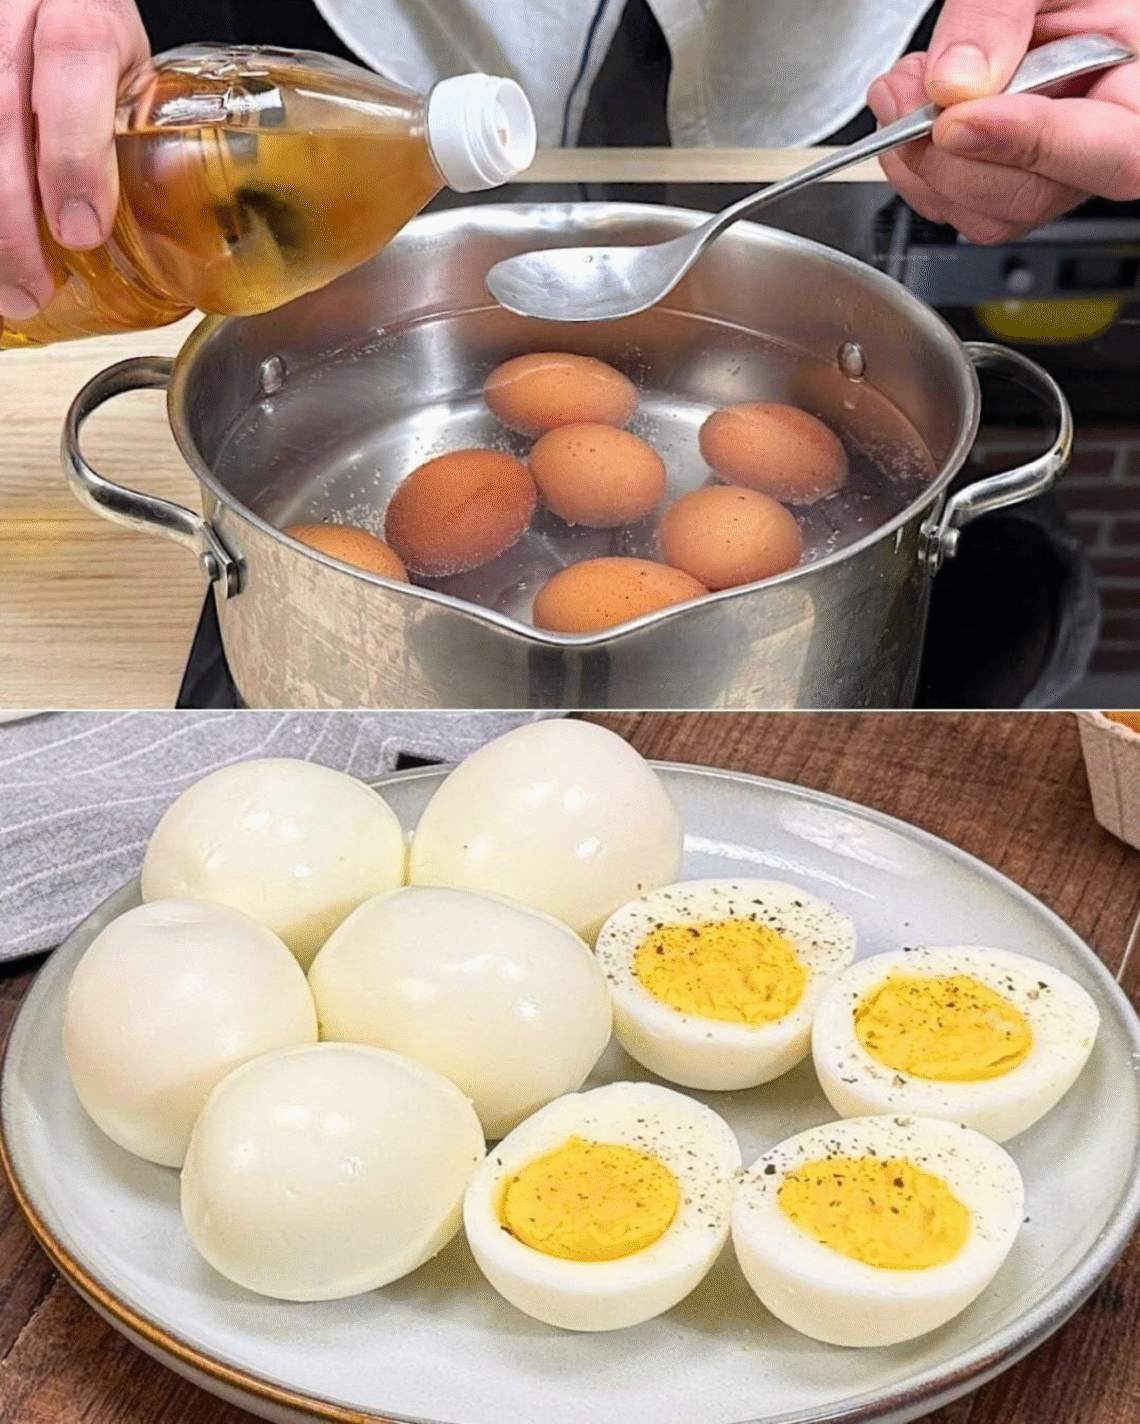
Add Salt or Vinegar?
- Can help slightly with shell cracking
- Not essential for peeling
Store After Cooking
- Keep unpeeled eggs in the fridge
- Use within a few days
Peeling Under Water
- Running water helps remove shell fragments
- Makes peeling smoother
Texture Guide (Based on Time)
Soft-Boiled
- Runny yolk
- Shorter cooking time
Medium
- Slightly creamy center
Hard-Boiled (Ideal)
- Fully set yolk
- Smooth texture
Why This Matters
Perfect hard-boiled eggs are more than just a small kitchen win. They are:
- A quick protein source
- A base for many dishes
- A reliable, healthy snack
When done right, they feel effortless—but behind that simplicity is precision.