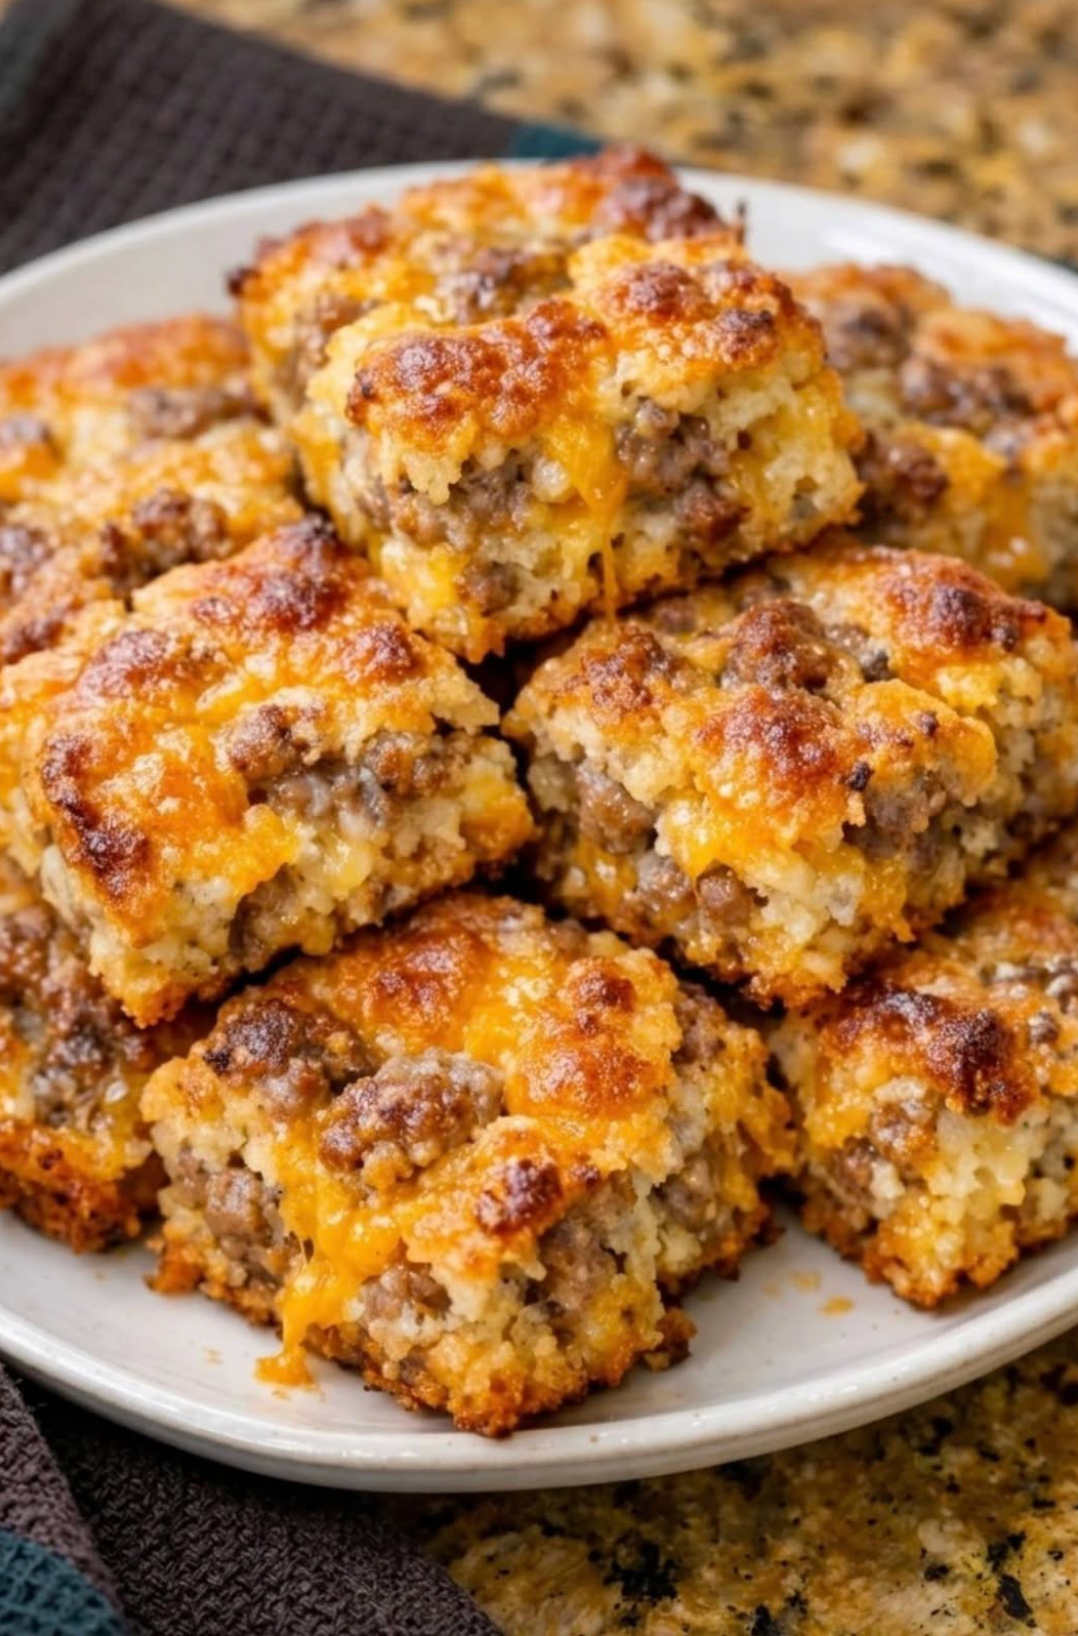
There are certain recipes that seem to appear at every Southern gathering, whether it’s a church potluck, holiday brunch, family reunion, game day party, or weekend breakfast with friends. They don’t require fancy ingredients or complicated techniques, yet somehow they disappear from the serving platter faster than anything else on the table. Southern Cheesy Sausage Squares are one of those treasured recipes. Warm, golden, cheesy, and packed with savory sausage flavor, these bite-sized squares have been a favorite in Southern kitchens for generations. They’re incredibly simple to prepare, using only three basic ingredients, but the end result tastes like something that took much more time and effort. The sausage becomes perfectly browned, the cheese melts into every bite, and the baking mix creates a light, fluffy texture that holds everything together beautifully.
One of the reasons this recipe has stood the test of time is its versatility. These squares are hearty enough for breakfast, satisfying enough for lunch, and always welcome as an appetizer at parties. They can be made ahead of time, served warm or at room temperature, and reheated with excellent results, making them ideal for busy families and entertaining alike.
If you’re looking for a reliable recipe that delivers maximum flavor with minimal effort, these Southern 3-Ingredient Cheesy Sausage Squares deserve a permanent place in your recipe collection.
Why You’ll Love This Recipe
This classic Southern favorite is popular because it is:
- Made with only three simple ingredients.
- Ready in under an hour.
- Perfect for breakfast, brunch, or appetizers.
- Easy enough for beginner cooks.
- Great for meal prep.
- Easy to transport to potlucks and gatherings.
- Freezer-friendly.
- Rich, cheesy, and satisfying.
- Easy to customize with additional ingredients.
- Loved by both kids and adults.
Ingredients
Main Ingredients
- 1 pound bulk breakfast sausage (mild, hot, or sage-flavored)
- 2 cups shredded sharp Cheddar cheese
- 2 cups baking mix (such as Bisquick or a similar all-purpose baking mix)
That’s all you need for the traditional version.
Optional Add-Ins
Although the original recipe uses only three ingredients, you can customize it with:
- 2 tablespoons chopped green onions
- ¼ cup diced bell peppers
- 1 teaspoon garlic powder
- ½ teaspoon onion powder
- ¼ teaspoon black pepper
- ½ teaspoon smoked paprika
- ¼ teaspoon cayenne pepper for extra heat
- 2 tablespoons chopped parsley
These additions aren’t necessary but can provide extra flavor and color.
Kitchen Equipment
- Large skillet
- Large mixing bowl
- Wooden spoon
- 9×13-inch baking dish
- Measuring cups
- Cheese grater (if shredding fresh cheese)
- Sharp knife
- Cooling rack
Step 1: Prepare the Oven
Preheat your oven to 350°F (175°C).
Lightly grease a 9×13-inch baking dish or line it with parchment paper for easier cleanup.
Step 2: Cook the Sausage
Place the sausage in a large skillet over medium heat.
Break it into small crumbles using a wooden spoon as it cooks.
Continue cooking for about 8 to 10 minutes, or until the sausage is fully browned and no pink remains.
If the sausage releases a large amount of grease, drain the excess before continuing. Leaving a small amount of moisture helps keep the finished squares tender, but too much grease can make them heavy.
Allow the sausage to cool slightly before mixing it with the remaining ingredients.
Step 3: Mix the Ingredients
In a large mixing bowl, combine:
- Cooked sausage
- Shredded Cheddar cheese
- Baking mix
Stir until everything is evenly distributed.
The mixture will be thick and somewhat crumbly at first. Continue mixing until the baking mix coats both the sausage and cheese evenly, forming a cohesive mixture.
Step 4: Transfer to the Baking Dish
Spread the mixture evenly into the prepared baking dish.
Use the back of a spoon or a spatula to gently press it into an even layer without packing it too tightly.
An even thickness helps ensure consistent baking.
Step 5: Bake
Bake for 25 to 30 minutes, or until:
- The top is golden brown.
- The edges are lightly crisp.
- The center is fully set.
- The cheese is melted throughout.
A toothpick inserted into the center should come out mostly clean, with just a few moist crumbs.
Step 6: Cool Slightly
Allow the dish to cool for about 10 minutes before cutting.
This resting time helps the squares firm up, making them easier to slice neatly.
Step 7: Slice and Serve
Using a sharp knife, cut into:
- Small appetizer squares.
- Larger breakfast portions.
- Bite-sized party pieces.
Serve warm or at room temperature.
Tips for the Best Sausage Squares
Use Freshly Shredded Cheese
Freshly grated Cheddar melts more smoothly than many pre-shredded varieties, which often contain anti-caking agents.
Don’t Overmix
Mix only until the ingredients are combined. Overworking the mixture can make the finished texture denser.
Drain Excess Grease
Too much grease can cause the squares to become oily.
Let Them Rest
Cooling for several minutes before cutting helps the squares hold their shape.
Use Sharp Cheddar
Sharp Cheddar provides a stronger, richer flavor than mild cheese and balances the savory sausage beautifully.
Delicious Variations
Spicy Southern Squares
Add:
- Pepper Jack cheese
- Jalapeños
- Cayenne pepper
Perfect for game day.
Breakfast Squares
Mix in:
- Cooked scrambled eggs
- Green onions
- Extra Cheddar
Serve with fresh fruit for brunch.
Italian Style
Use:
- Italian sausage
- Mozzarella cheese
- Parmesan cheese
- Italian seasoning
Tex-Mex Version
Add:
- Monterey Jack cheese
- Diced green chilies
- Taco seasoning
Serve with salsa.
Bacon Lover’s Version
Mix in:
- Cooked bacon
- Extra sharp Cheddar
- Chopped chives
What to Serve with Sausage Squares
These pair well with:
- Fresh fruit salad
- Scrambled eggs
- Hash browns
- Biscuits
- Fresh tomatoes
- Coleslaw
- Potato salad
- Garden salad
- Ranch dressing
- Honey mustard
- Hot sauce
For parties, serve alongside a variety of dips and finger foods.
Storage
Store leftover sausage squares in an airtight container in the refrigerator for up to 4 days.
To reheat:
- Microwave individual portions for about 20 to 30 seconds.
- Warm in a 325°F (163°C) oven for 8 to 10 minutes until heated through.
Freezing Instructions
These freeze exceptionally well.
To freeze:
- Allow the squares to cool completely.
- Wrap individual portions in plastic wrap or parchment paper.
- Place them in a freezer-safe container or resealable freezer bag.
- Freeze for up to 3 months.
Thaw overnight in the refrigerator before reheating.
Nutritional Information (Approximate Per Serving)
Makes approximately 24 appetizer squares.
Each serving contains roughly:
- Calories: 180
- Protein: 8g
- Carbohydrates: 10g
- Fat: 12g
- Saturated Fat: 5g
- Fiber: 0g
- Sugar: 1g
- Sodium: 450mg
Values vary depending on the type of sausage, cheese, and baking mix used.
Frequently Asked Questions
Can I make these ahead of time?
Yes. You can bake them a day in advance, refrigerate them, and reheat them just before serving. They also taste great at room temperature.
Can I use different cheeses?
Absolutely. While sharp Cheddar is the traditional choice, Monterey Jack, Colby, Pepper Jack, Swiss, or a Mexican cheese blend all work well.
Do I have to cook the sausage first?
Yes. Raw sausage should always be fully cooked before mixing it with the cheese and baking mix to ensure safe cooking and the best texture.
Can I make them gluten-free?
Yes, if you use a gluten-free baking mix and verify that the sausage and cheese are also gluten-free according to their labels.
Can I use turkey or chicken sausage?
Certainly. Turkey or chicken breakfast sausage can be substituted for pork sausage if you prefer a leaner option.
Why are my squares crumbly?
If the mixture seems too dry, it may be due to the type of baking mix or very lean sausage. Letting the baked squares cool for about 10 minutes before slicing also helps them hold together better.

Welcome to my kitchen!
I’m a passionate home cook and recipe creator who loves turning simple ingredients into delicious, comforting meals that everyone can enjoy. Through this website, I share carefully prepared recipes, practical cooking tips, and easy-to-understand food education to help you feel more confident in the kitchen.
My goal is to make cooking simple, enjoyable, and accessible. Whether you are looking for a quick family dinner, a delicious dessert, healthy meal ideas, or traditional recipes with a modern touch, you’ll find inspiration here.
More Than Just Recipes
I believe that cooking is also a way to learn. That’s why this website is not only about recipes. I also create educational articles about ingredients, cooking techniques, kitchen tips, food preparation, and the stories behind different dishes.
Each article is designed to give you useful knowledge that you can apply in your own kitchen. From understanding how ingredients work together to learning better cooking methods, my aim is to help you become a more confident and creative cook.
My Philosophy
Good food doesn’t always require complicated ingredients or professional equipment. With a little knowledge, patience, and creativity, simple ingredients can become something truly special.
I believe in sharing recipes that are practical, clearly explained, and enjoyable to make. I also love exploring new flavors while appreciating traditional cooking and the recipes passed down through generations.
Thank you for visiting my kitchen and being part of this food-loving community. I hope my recipes and articles inspire you to cook, learn, experiment, and most importantly, enjoy every bite!
Happy cooking!