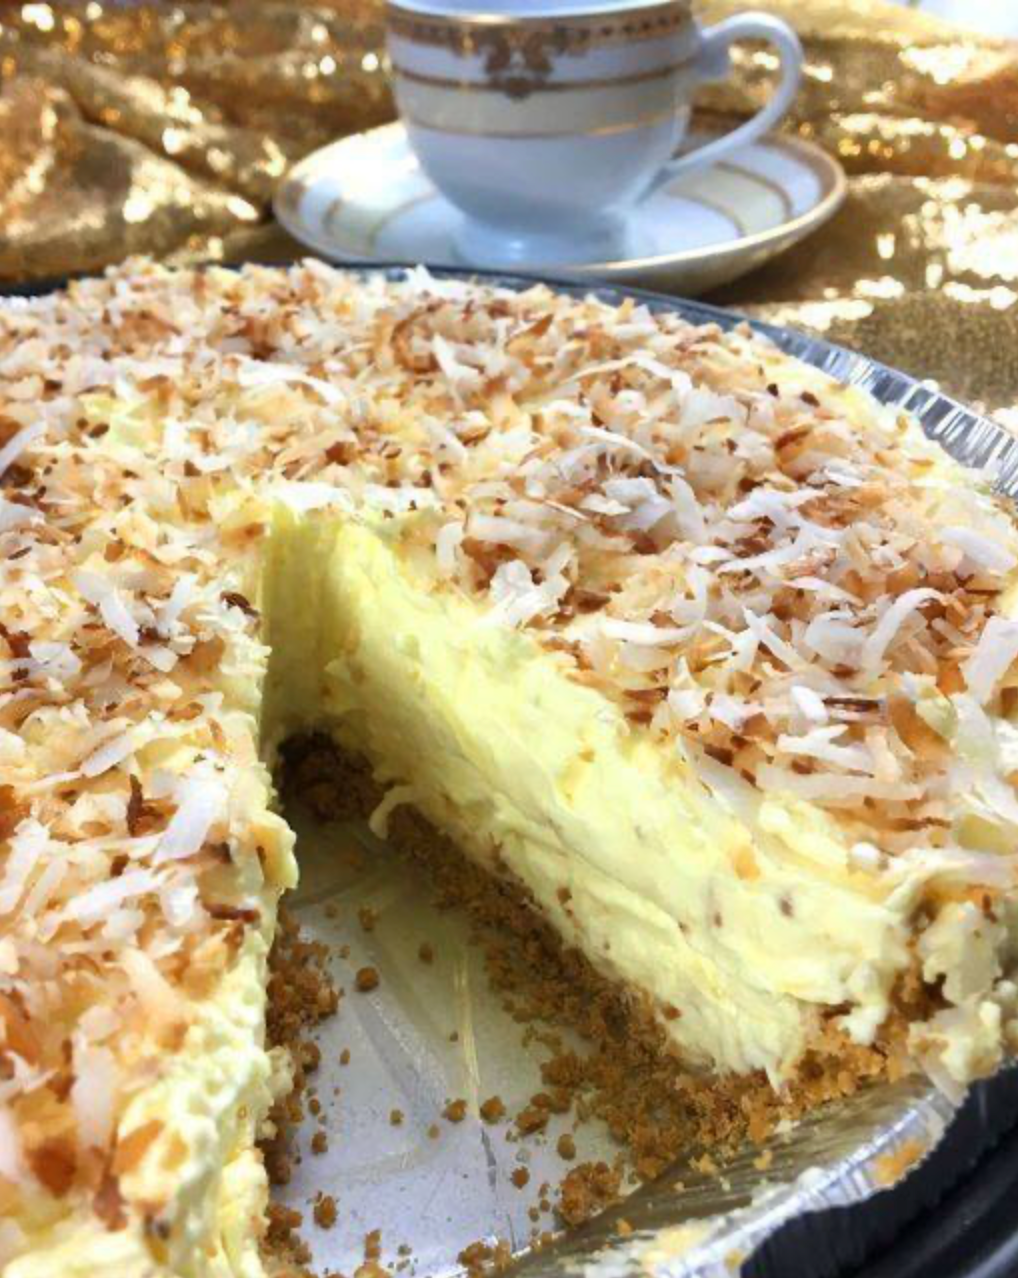
A silky, luxurious coconut pie with deep flavor, old-fashioned charm, and a bakery-quality finish
There are pies that people enjoy quietly, and then there are pies that make guests pause mid-bite, widen their eyes, and immediately ask for the recipe. Killer Creamy Coconut Pie belongs firmly in the second category. This dessert is the definition of comforting indulgence: a thick, velvety coconut custard nestled inside a buttery crust and topped with a generous layer of softly whipped cream. It is rich without being heavy, sweet without being cloying, and infused with the warm, tropical fragrance of toasted coconut.
This pie has the timeless feel of a recipe passed down through generations, yet its flavor and texture rival anything you could buy from a high-end bakery. The filling comes together on the stovetop in a creamy custard base enriched with whole milk, egg yolks, butter, and both shredded and extract forms of coconut. Once chilled, the custard becomes exceptionally smooth—almost silk-like—and slices beautifully.
Whether you are preparing this pie for a holiday table, a family gathering, or simply to satisfy a craving for something luxurious, this recipe delivers consistent, crowd-pleasing results every time.
Ingredients
For the Filling
- 2 cups whole milk
- 1 cup canned coconut milk (full-fat for the creamiest texture)
- 1 cup granulated sugar
- 3 large egg yolks
- 1 cup sweetened shredded coconut
- 1 teaspoon coconut extract (or 1/2 teaspoon for a lighter flavor)
- 1 teaspoon vanilla extract
- 1/3 cup cornstarch
- 3 tablespoons unsalted butter
- Pinch of salt
For the Crust
You may use:
- 1 pre-baked 9-inch pie shell, either homemade or store-bought
or - A graham cracker crust (1 and 1/2 cups graham crumbs, 1/3 cup sugar, 6 tablespoons melted butter, baked for 8 minutes at 350°F / 175°C)
For the Topping
- 1 and 1/2 cups heavy whipping cream
- 3 tablespoons powdered sugar
- 1 teaspoon vanilla extract
- Optional: 1/4 to 1/2 cup toasted shredded coconut for garnish
Step-by-Step Instructions
Step 1: Prepare the Pie Crust
If using a traditional pastry crust:
Blind-bake it until golden and fully set. Allow it to cool completely before filling it; a warm crust will prevent the custard from setting properly.
If using a graham cracker crust:
Press the crumb mixture firmly into the pan, making sure the sides are compact. Bake briefly until lightly golden and aromatic. Cool fully.
The crust must be completely cooled before the filling is added.
Step 2: Warm the Milk Mixture
In a medium saucepan, combine the whole milk, coconut milk, and a pinch of salt. Warm the mixture over medium heat until it begins to steam. Do not allow it to boil at this stage. Warming the milk helps the custard thicken evenly without lumps.
Step 3: Whisk the Egg Yolks and Sugar
In a separate bowl, whisk together the sugar and egg yolks until the mixture becomes pale and thick. This stage is important because it helps ensure a smooth, velvety custard later. Add the cornstarch and whisk again until the mixture is completely lump-free.
Step 4: Temper the Eggs
Slowly ladle a small amount of the warm milk mixture into the yolk mixture, whisking constantly. This gradual warming—called tempering—prevents the eggs from scrambling. Add another ladle of warm milk, still whisking continuously.
Once the yolks have warmed, pour the tempered mixture back into the saucepan with the remaining milk.
Step 5: Cook the Custard
Place the saucepan over medium heat and begin stirring constantly with a whisk or a heat-safe spatula. The mixture will gradually thicken. Once it begins to bubble softly, reduce the heat slightly and continue stirring for one full minute. This ensures the cornstarch reaches its full thickening power and the custard becomes stable.
You will notice the custard turning glossy and smooth.
Step 6: Add Coconut, Extracts, and Butter
Remove the saucepan from the heat.
Add the shredded coconut, coconut extract, vanilla extract, and butter. Stir until everything has melted and blended into the custard. At this stage, the mixture will smell rich and fragrant.
Step 7: Fill the Pie Shell
Pour the hot custard into the cooled crust. Use a spatula to smooth the surface evenly. The filling will be thick enough to level nicely without running over the edges.
Let the pie cool at room temperature for about 30 minutes, then transfer it to the refrigerator. Chill for at least 4 hours, though overnight chilling produces the cleanest slices and silkiest texture.
Step 8: Make the Whipped Cream Topping
Once the pie is fully chilled and firm, prepare the whipped cream.
In a cold mixing bowl, combine the heavy cream, powdered sugar, and vanilla. Beat until soft peaks form. Soft peaks provide the most velvety, cloud-like texture and complement the rich custard beautifully.
Spread or pipe the whipped cream over the chilled pie.
Step 9: Garnish with Toasted Coconut
Toast shredded coconut in a dry skillet over medium heat, stirring frequently, until golden and aromatic. Allow it to cool completely before sprinkling it over the whipped cream. The contrast between the creamy topping and the crisp toasted coconut adds complexity and texture.
Storage
This pie keeps well refrigerated for up to five days. Keep it loosely covered so the whipped cream does not absorb unwanted refrigerator odors. The crust remains crisp if the pie is stored in the coldest part of the refrigerator.
Extra Tips for a Perfect Result
- Use full-fat coconut milk; light coconut milk will not give the same richness.
- Stir the custard constantly to avoid scorching or lumps.
- If the custard ever develops small lumps, strain it through a fine mesh sieve while still hot.
- For deeper coconut flavor, toast half of the shredded coconut before mixing it into the custard.
- For a firmer pie, add one extra tablespoon of cornstarch.
- For a softer, silkier custard, use one tablespoon less cornstarch.

Welcome to my kitchen!
I’m a passionate home cook and recipe creator who loves turning simple ingredients into delicious, comforting meals that everyone can enjoy. Through this website, I share carefully prepared recipes, practical cooking tips, and easy-to-understand food education to help you feel more confident in the kitchen.
My goal is to make cooking simple, enjoyable, and accessible. Whether you are looking for a quick family dinner, a delicious dessert, healthy meal ideas, or traditional recipes with a modern touch, you’ll find inspiration here.
More Than Just Recipes
I believe that cooking is also a way to learn. That’s why this website is not only about recipes. I also create educational articles about ingredients, cooking techniques, kitchen tips, food preparation, and the stories behind different dishes.
Each article is designed to give you useful knowledge that you can apply in your own kitchen. From understanding how ingredients work together to learning better cooking methods, my aim is to help you become a more confident and creative cook.
My Philosophy
Good food doesn’t always require complicated ingredients or professional equipment. With a little knowledge, patience, and creativity, simple ingredients can become something truly special.
I believe in sharing recipes that are practical, clearly explained, and enjoyable to make. I also love exploring new flavors while appreciating traditional cooking and the recipes passed down through generations.
Thank you for visiting my kitchen and being part of this food-loving community. I hope my recipes and articles inspire you to cook, learn, experiment, and most importantly, enjoy every bite!
Happy cooking!