There is something uniquely satisfying about making ice cream at home. It turns a simple mixture of everyday ingredients into a smooth, creamy dessert that feels both indulgent and personal. Unlike store-bought versions, homemade ice cream gives you full control over flavor, sweetness, and texture—allowing you to create something that matches exactly what you love.
Whether you use a machine or go the no-churn route, the process itself is part of the experience. From mixing the base to watching it transform into a frozen, velvety treat, homemade ice cream is as rewarding to make as it is to eat.
Why Make Ice Cream at Home?
Homemade ice cream stands out because:
- It uses fresh, simple ingredients
- You can control sugar and flavor intensity
- No unnecessary additives or preservatives
- Endless customization possibilities
- A richer, more natural taste
It is not just dessert—it is a small creative project in your kitchen.
Basic Ingredients (Classic Vanilla Ice Cream)
Core ingredients:
- 2 cups heavy cream
- 1 cup whole milk
- ¾ cup sugar
- 1 tablespoon vanilla extract
Optional (for richer texture):
- 3–4 egg yolks (for custard-style ice cream)
Understanding the Ingredients
Each component plays an essential role:
- Heavy cream: Provides richness and smooth texture
- Milk: Lightens the mixture while keeping it creamy
- Sugar: Sweetens and helps prevent ice crystals
- Vanilla: Adds flavor and aroma
- Egg yolks (optional): Create a custard base for extra creaminess
The balance between fat, sugar, and liquid is what determines how soft and scoopable the ice cream will be.
Method 1: Classic Custard Ice Cream (Rich and Creamy)
Step 1: Heat the Milk and Cream
In a saucepan, combine milk and cream. Heat gently until warm but not boiling.
Step 2: Mix Egg Yolks and Sugar
In a separate bowl, whisk egg yolks with sugar until smooth and slightly pale.
Step 3: Temper the Eggs
Slowly add a small amount of warm milk mixture into the egg mixture while whisking.
This prevents the eggs from scrambling.
Step 4: Cook the Custard
Pour everything back into the saucepan.
Cook on low heat, stirring constantly until the mixture thickens slightly (it should coat the back of a spoon).
Step 5: Cool the Mixture
Remove from heat and add vanilla extract.
Let it cool completely, then refrigerate for at least 2–4 hours.
Step 6: Churn and Freeze
Pour the chilled mixture into an ice cream maker and churn according to instructions.
Freeze for a few hours until firm.
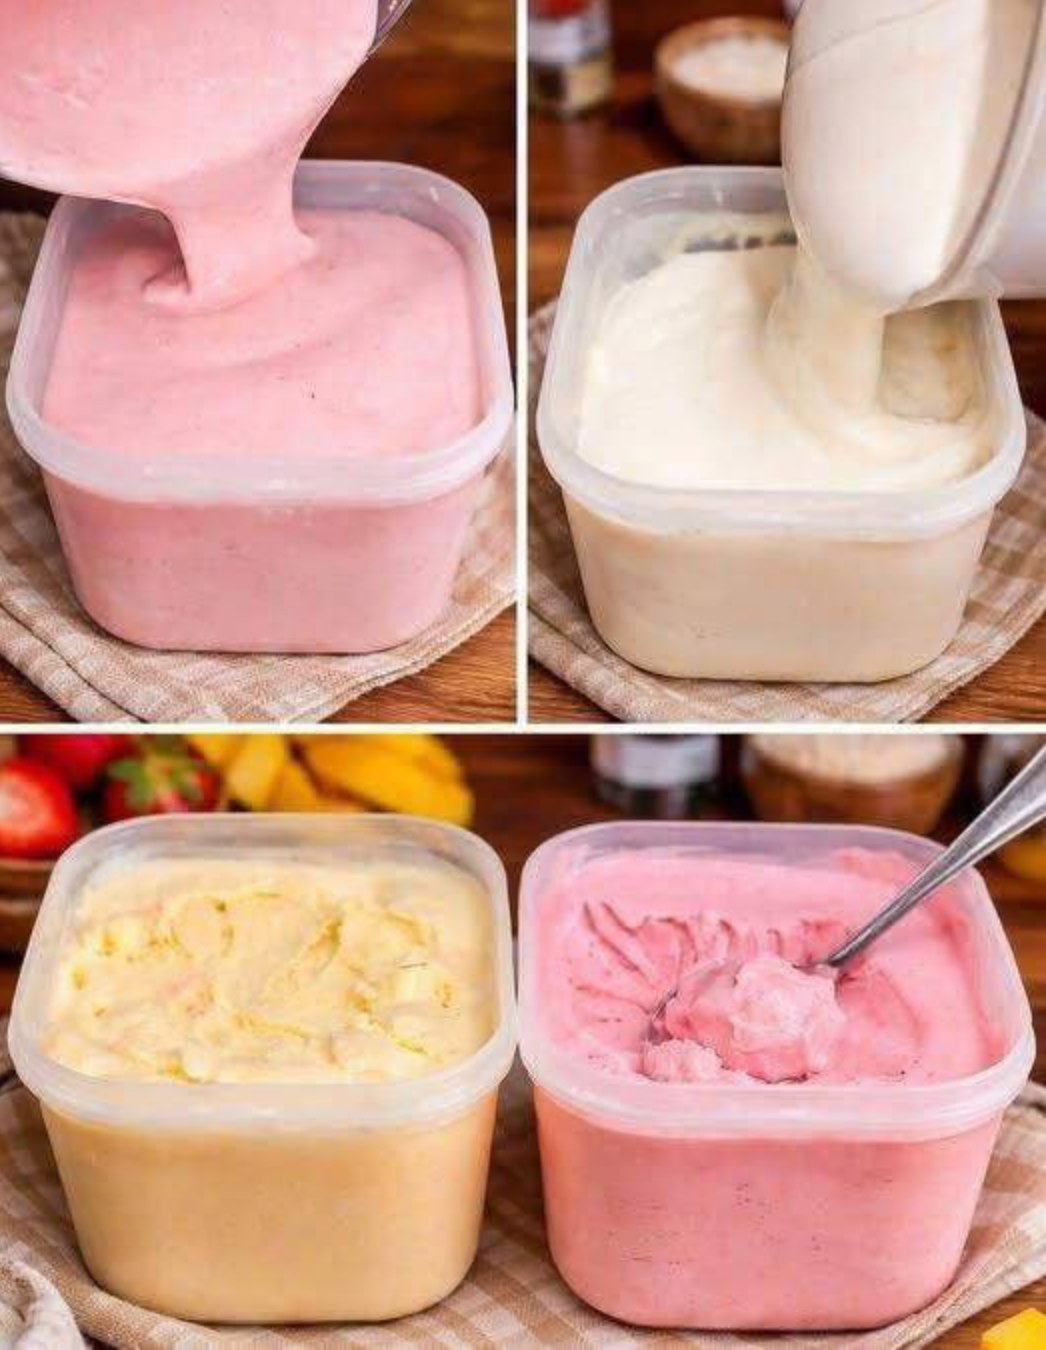
Method 2: No-Churn Ice Cream (Easy and Quick)
If you do not have an ice cream machine, this method works beautifully.
Ingredients:
- 2 cups heavy cream (cold)
- 1 can sweetened condensed milk
- 1 teaspoon vanilla extract
Steps:
- Whip the heavy cream until soft peaks form
- Gently fold in condensed milk and vanilla
- Pour into a container
- Freeze for 6–8 hours
This method creates a soft, creamy texture without churning.
Texture and Flavor Experience
Homemade ice cream delivers:
- A smooth, creamy consistency
- Rich, natural flavor
- Balanced sweetness
- A softer, fresher taste compared to store-bought
The absence of artificial stabilizers makes it feel more authentic and satisfying.
Flavor Variations to Try
Chocolate Ice Cream
Add melted chocolate or cocoa powder to the base.
Strawberry Ice Cream
Blend fresh strawberries and mix into the base.
Coffee Ice Cream
Add strong brewed coffee or espresso.
Cookies and Cream
Mix crushed cookies into the churned ice cream.
Nutty Ice Cream
Add roasted almonds, peanuts, or pistachios.
Tips for Perfect Ice Cream
- Chill the mixture before freezing for better texture
- Do not overmix after adding air (for no-churn)
- Use high-quality ingredients for best flavor
- Store in an airtight container to avoid ice crystals
- Let it sit a few minutes before scooping
Common Mistakes to Avoid
- Skipping chilling time
- Overheating the custard
- Using low-fat ingredients (reduces creaminess)
- Not sealing properly in freezer
- Expecting instant results—freezing takes time
Storage and Shelf Life
- Store in the freezer for up to 2 weeks
- Cover tightly to prevent freezer burn
- Best enjoyed within the first few days for optimal texture
Why Homemade Ice Cream Feels Special
Making ice cream at home is more than just following a recipe. It is about slowing down, experimenting with flavors, and enjoying the process. The result is a dessert that reflects your taste, your effort, and your creativity.
It may take a little time, but the reward is worth it: a bowl of ice cream that is fresher, richer, and more satisfying than anything you can buy.