Fairy Food is a confection with a personality all its own: light yet crisp, delicate yet dramatic, rustic yet enchanting. It begins as a simple golden sugar syrup bubbling quietly on the stove, then, in a single moment of transformation, it erupts into a billowing, airy structure filled with thousands of tiny pockets of caramelized sweetness. Once cooled, it fractures into feathery shards that seem almost weightless in your hand — yet melt on the tongue in a rush of warm honey-toffee flavor. When cloaked in chocolate, that fragile crunch meets smooth richness in a contrast that feels nostalgic, celebratory, and unmistakably festive.
This recipe reflects the way many Wisconsin families make it during the winter holidays, when kitchens fill with steam, laughter, and the faint scent of caramel drifting from room to room.
Ingredients
- 1 cup granulated sugar
- 1 cup light corn syrup
- 1 tablespoon white vinegar (or apple cider vinegar)
- 1 tablespoon baking soda, sifted to remove lumps
- 1 teaspoon vanilla extract (optional but traditional in many family versions)
For chocolate coating:
- 300 to 400 grams of chocolate melting wafers or chopped chocolate (milk or dark, depending on preference)
- Optional: 1 teaspoon neutral oil to help give the chocolate a softer snap
Equipment You Will Need
- A heavy-bottomed saucepan with high sides
- A candy thermometer (highly recommended for precision)
- A heat-safe whisk or long spoon
- A fine strainer or sifter for the baking soda
- A parchment-lined baking sheet or greased heatproof pan
- A spatula
- A large bowl for dipping chocolate
- A fork or dipping tool
Because the sugar becomes extremely hot while cooking, it is important to work slowly and carefully, keeping your hands and arms clear of the steam and bubbling syrup.
Step-by-Step Instructions with Explanations
1. Prepare the pan before you begin
Line a baking sheet or shallow pan with parchment paper or lightly grease it. This must be done ahead of time, because once the candy expands, you will need to pour it immediately, and there will be no time to prepare anything afterward.
Set the pan on a flat, steady surface where it can rest undisturbed while the candy cools and firms.
2. Combine sugar, corn syrup, and vinegar
Place the granulated sugar, corn syrup, and vinegar into the saucepan. Stir gently just until the sugar is moistened and combined. Once the mixture begins heating, avoid stirring again, as stirring can cause sugar crystals to form and change the texture of the candy.
The vinegar plays a quiet but essential role: it helps create an especially delicate, airy interior by breaking down some of the sugar as it cooks, making the final texture lighter and more brittle.
3. Heat the mixture slowly to temperature
Set the saucepan over medium heat. Allow the mixture to come to a steady simmer. Attach your candy thermometer and watch the temperature gradually rise.
Let it cook until it reaches approximately 300°F / 149°C, also known as the “hard crack stage.” At this point, the syrup will have turned a warm light amber color and will bubble more slowly and thickly.
Do not rush the heat. Gentle, even heating allows the flavor to deepen without burning.
4. Remove from heat and add vanilla
Once the syrup reaches temperature, remove the pan from the heat immediately. If using vanilla extract, stir it in now. The syrup may hiss or steam slightly as the vanilla hits the hot sugar — this is normal.
The candy is now moments away from transformation.
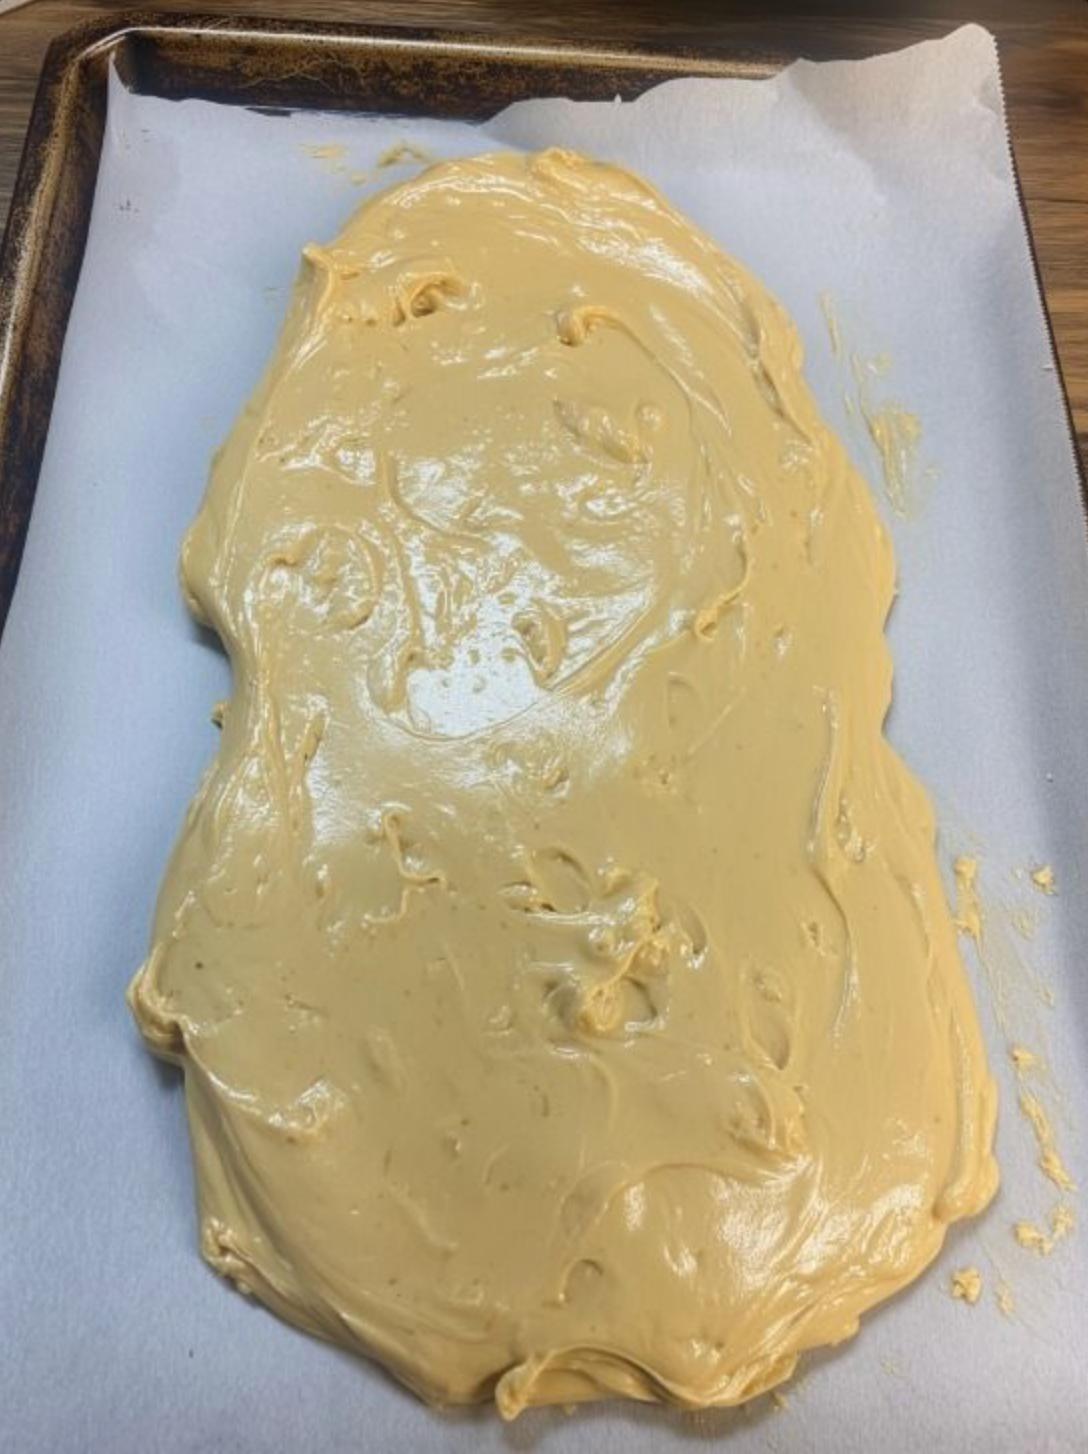
5. Dust in the baking soda — the magical moment
Sift the baking soda over the surface of the syrup, and then whisk or stir quickly but briefly. The reaction will be immediate and dramatic:
The entire mixture will foam, swell, and rapidly expand, rising upward in a soft, billowing mass. Countless tiny air bubbles form inside at the exact same moment, creating the signature light, honeycomb-like interior.
Stir only until the baking soda is fully incorporated. Over-mixing will crush the bubbles and make the candy dense instead of airy.
6. Pour and let the candy set
Without delay, pour the foaming mixture into the prepared pan. Do not spread it flat or tap the pan — allow it to settle naturally so the delicate structure is preserved.
Leave it completely undisturbed until it cools and becomes firm. This can take anywhere from 45 minutes to a couple of hours, depending on room temperature.
As it sets, the surface will develop an almost golden, matte finish, while the inside remains caverned and lace-like.
7. Break into pieces
Once fully cooled, lift the slab gently from the pan. Using your hands or the back of a knife, break it into irregular shards. The sound it makes — that subtle, crisp snap — is one of the most satisfying parts of the process.
The interior will appear airy, delicate, and beautifully porous, almost like crystallized honey trapped in time.
Chocolate Dipping Instructions
1. Melt the chocolate gently
Place the chocolate in a heat-safe bowl and melt it slowly using either a double-boiler setup or short bursts in the microwave, stirring between each melt cycle.
The chocolate should be smooth, fluid, and glossy, without overheating.
2. Dip or drizzle
You may fully dip each piece for a rich shell, or simply dip one side or corner for contrast. A fork or dipping tool works well to lift and shake off excess chocolate.
Set the coated candy onto parchment paper and allow the chocolate to cool and firm. As it sets, it creates a thin, crisp layer that beautifully encases the airy interior.
The pleasure lies in the contrast: brittle sweetness, airy crunch, and silky chocolate merging together in each bite.
Storage and Texture Notes
Fairy Food is highly sensitive to humidity because the airy interior absorbs moisture. Store it in an airtight container in a cool, dry place. If left exposed to air, it will soften and lose its delicate crunch.
Some Wisconsin families tuck small packets of dry rice or a silica packet into the jar to help keep the candy crisp during damp winter months.
When stored well, the candy remains light, fragile, and almost cloud-like in texture.