Magic Custard Cake is one of those desserts that feels almost impossible—yet it works like a charm every single time. With one simple batter, you get three distinct layers after baking:
- A delicate, soft sponge layer on top
- A silky, wobbly, custard layer in the middle
- A dense, slightly chewy base at the bottom
It looks beautiful, tastes elegant, and comes together with surprisingly basic ingredients. The magic lies in the science: a thin, loose batter combined with gentle baking separates naturally into layers as it cooks.
Below is a fully detailed, long, and deeply explained recipe so you can make it perfectly every time.
Ingredients
Dry Ingredients
- ¾ cup (95g) all-purpose flour
Provides structure. Sift it to avoid lumps. - Pinch of salt
Enhances sweetness and balance.
Wet Ingredients
- 4 large eggs, room temperature, separated
Egg yolks give richness; egg whites create the airy top layer. - ¾ cup (150g) granulated sugar
Sweetens and helps achieve golden color on top. - 1 tablespoon vanilla extract or 1 vanilla bean
Adds aroma and flavor. - ½ cup (115g) unsalted butter
Melted and cooled; creates richness and texture. - 2 cups (480ml) warm milk (lukewarm, not hot)
This is crucial—warm milk helps form the custard layer.
Optional Add-Ins
- Zest of 1 lemon for brightness
- ½ teaspoon almond extract for depth
- 2 tablespoons cocoa powder (for chocolate version)
- Powdered sugar for dusting
Equipment Needed
- 8×8 inch (20×20 cm) baking pan
- Mixing bowls
- Electric hand mixer or stand mixer
- Whisk
- Rubber spatula
- Sifter
- Baking parchment (optional)
Step-By-Step Instructions (Highly Detailed)
STEP 1: Prepare the oven and pan
- Preheat your oven to 325°F (160°C).
Magic Custard Cake requires gentle, even heat. Higher temperatures may ruin the layering. - Lightly grease your baking pan with butter and, if desired, line it with parchment paper for easy removal.
STEP 2: Separate the eggs
Carefully separate the egg whites from the yolks:
- Place whites into a very clean bowl
Any trace of fat prevents them from whipping correctly. - Place yolks in a separate bowl
Let both sit at room temperature for about 10–15 minutes. This ensures the batter mixes smoothly.
STEP 3: Beat the egg whites
Using an electric mixer, beat the egg whites on medium-high speed:
- When they become foamy, add a tablespoon of sugar.
- Continue beating until stiff peaks form.
You want them glossy and firm—this creates the sponge-cake top layer.
Set aside for later.
STEP 4: Prepare the yolk mixture
In a large bowl, combine:
- Egg yolks
- Remaining sugar
Beat with the mixer until the mixture becomes pale, thick, and creamy—this takes 2–3 minutes.
Add:
- Melted butter (make sure it’s warm, not hot)
- Vanilla extract
- Lemon zest, if using
Beat again until fully combined.
STEP 5: Add the flour
Sift the flour over the yolk mixture and whisk gently until fully incorporated.
It might look thick—this is normal.
STEP 6: Add the warm milk
Slowly pour in the warm milk while whisking constantly.
The batter will become extremely thin and runny—almost like pancake batter.
Do NOT worry. This is exactly what creates the magic layers.
STEP 7: Fold in the egg whites
This is the most important technique for the magic effect.
- Add about 1/3 of the whipped egg whites to the thin batter.
- Gently fold using a spatula.
- The whites will float and create clumps—this is NORMAL.
- Add more whites and gently fold again.
- Don’t overmix. You WANT visible fluffy chunks—these form the top sponge layer.
Your final batter will look:
- Thin and liquid
- With white fluffy pieces floating around
Perfect!
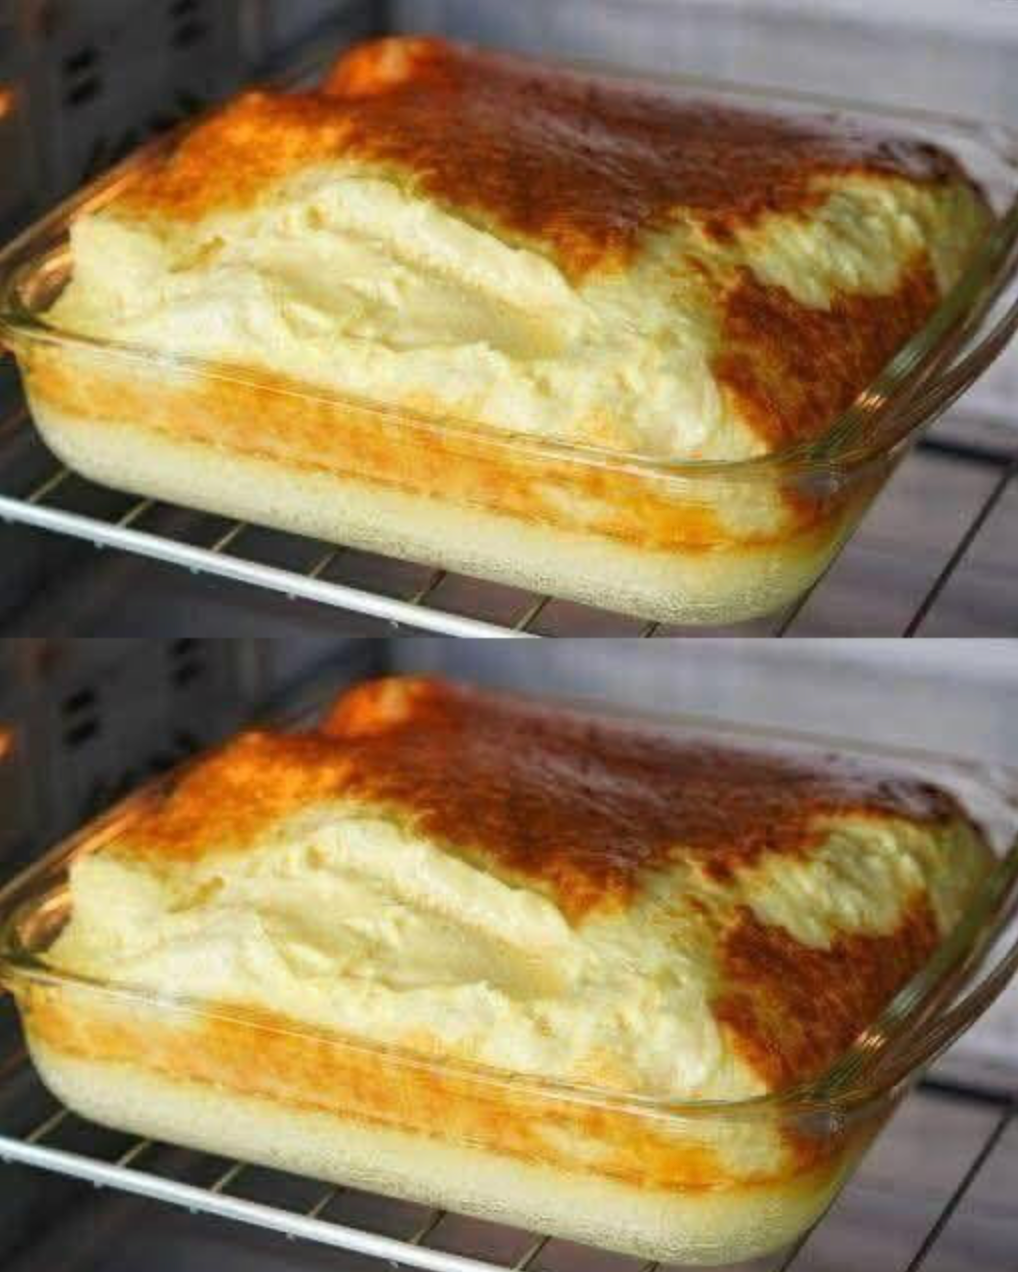
STEP 8: Pour and bake
Pour the batter into your prepared pan.
Place the pan in the center of the oven and bake for:
45–55 minutes
The exact time depends on the oven.
You’ll know it’s ready when:
- The top is golden brown
- The center jiggles slightly when gently shaken
- The edges are set
Avoid overbaking, or the custard layer will disappear.
STEP 9: Cool completely
Let the cake cool fully in the pan.
Then refrigerate for at least 2–3 hours (overnight is best).
Cooling helps the layers settle and firm up for slicing.
STEP 10: Slice and serve
Dust generously with powdered sugar.
Cut into squares using a sharp knife (wipe between cuts for clean layers).
Serve chilled or at room temperature.
Texture Breakdown: What You Should Expect
When cut, you’ll see three beautiful layers:
- Top Layer — Soft Sponge
Light, airy, slightly golden. - Middle Layer — Silky Custard
Creamy, smooth, pudding-like, melts on your tongue. - Bottom Layer — Dense Base
Firm, slightly chewy, like a dense flan foundation.
Flavor Variations
Chocolate Magic Custard Cake
Add:
- ¼ cup cocoa powder
- Reduce flour by 1 tablespoon
- Add ¼ cup extra sugar
Lemon Magic Cake
Add:
- Zest of 2 lemons
- 1 tablespoon lemon juice
Coffee Magic Cake
Replace ½ cup milk with strong brewed coffee.
Coconut Magic Cake
Replace 1 cup milk with coconut milk.
Serving Suggestions
- Dust with powdered sugar
- Serve with fresh berries
- Pair with vanilla ice cream
- Add a drizzle of caramel or chocolate
- Serve with whipped cream for a richer dessert
Storage Tips
- Refrigerate for up to 3 days
- Cover tightly to prevent drying
- Do not freeze—custard texture may break
Troubleshooting (Very Helpful)
Cake didn’t form layers
- Batter wasn’t loose enough
- Oven too hot
- Overmixed egg whites
Top burned
- Oven rack too high
- Use foil loosely over top during last 10 minutes
Custard too runny
- Underbaked
- Milk too hot or too cold