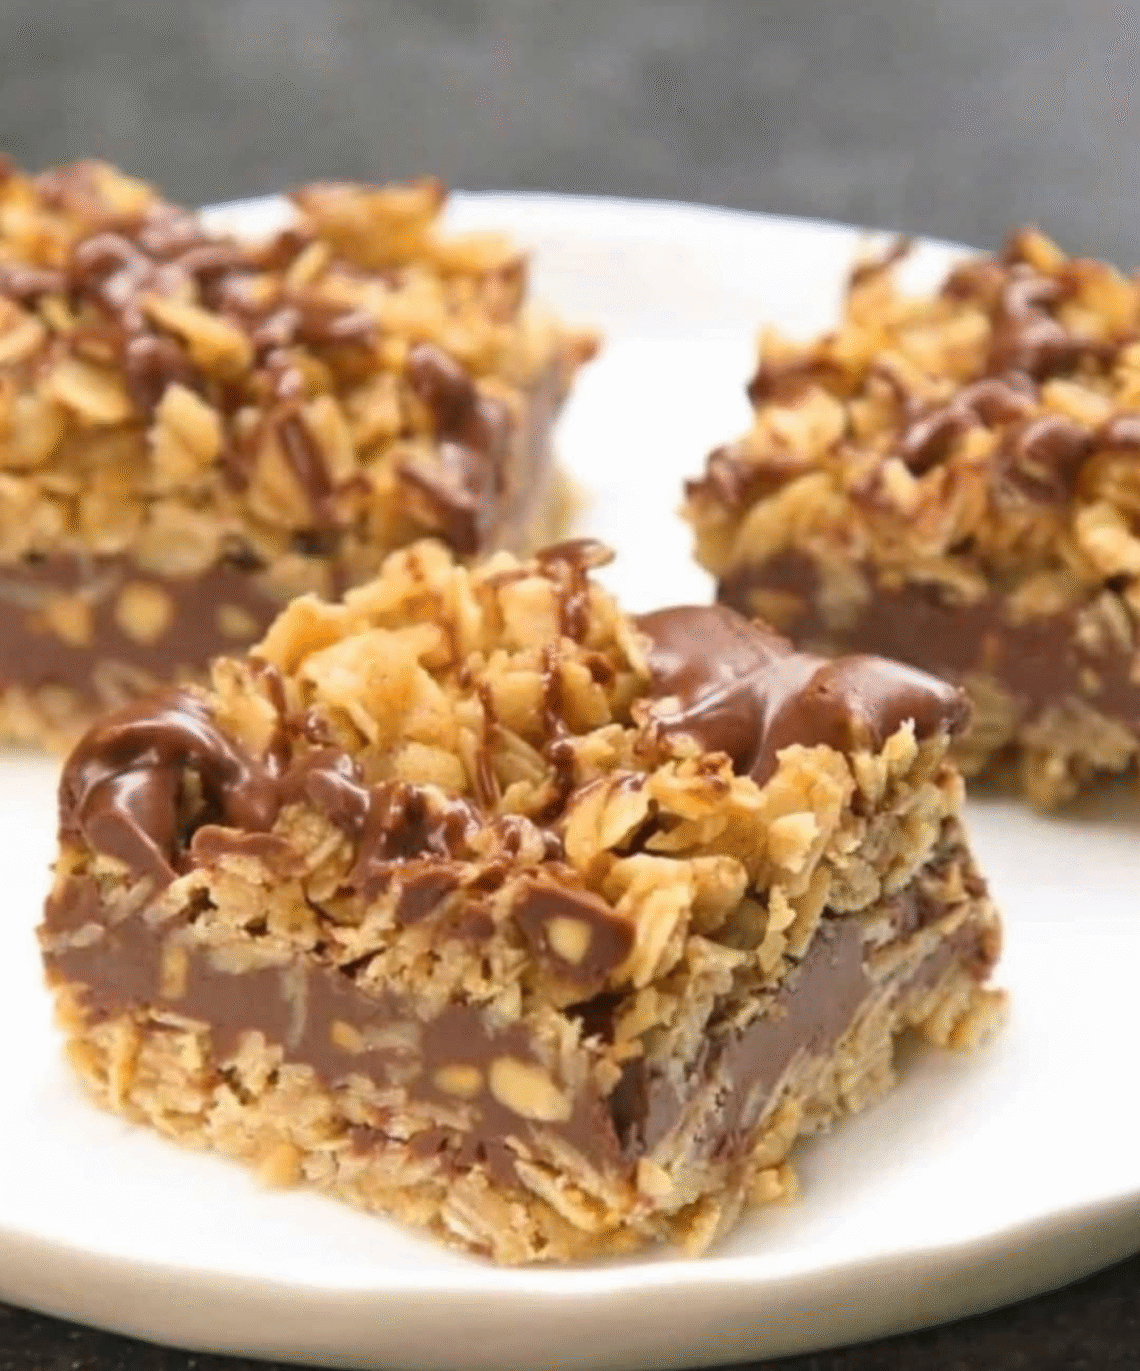
No-Bake Chocolate Oatmeal Bars – Rich, Chewy, and Peanut-Buttery
There are desserts that take hours, precise measurements, and complicated techniques.
And then there are desserts like these: fast, forgiving, and utterly indulgent.
With just a handful of pantry staples, these bars come together in under 15 minutes. No oven. No baking trays. No stress. Just a smooth, chocolate-peanut butter mixture, hearty oats, and a cooling period that transforms simple ingredients into chewy, rich bars that taste like a miniature chocolate celebration in every bite.
They are snackable, packable, and perfect for satisfying sudden cravings. Each bite melts creamy peanut butter and chocolate together with the heartiness of oats—comfort food meets convenience.
Ingredients
Base & Binding
- 1 cup unsalted butter (2 sticks) – melted. Butter carries richness and helps bind oats into chewy bars.
- 1/2 cup unsweetened cocoa powder – provides deep chocolate flavor without overpowering sweetness.
- 2 cups granulated sugar – sweetens and balances chocolate and peanut butter.
- 1/2 cup milk (dairy or plant-based) – softens sugar and allows cocoa to bloom, creating a creamy texture.
- 1 cup creamy peanut butter – the star flavor. Smooth, rich, and nutty, it binds the dry ingredients and adds indulgence.
Heartiness & Texture
- 3 cups quick-cooking oats – the base of the bars, adding chew, fiber, and structure.
- 1 teaspoon vanilla extract – adds aroma, depth, and a subtle sweetness that amplifies chocolate.
Optional Additions
- A pinch of salt – balances sweetness.
- 1/2 cup mini chocolate chips – for extra chocolate bursts.
- 1/4 cup chopped nuts (almonds, walnuts, or pecans) – adds crunch.
- 1/4 teaspoon instant espresso powder – intensifies chocolate flavor.
Equipment Needed
- Medium saucepan
- Wooden spoon or heatproof spatula
- 8×8 inch baking pan (or similar size)
- Parchment paper for lining
- Measuring cups & spoons
Instructions
Step 1 – Prepare the Pan
Line an 8×8 inch pan with parchment paper. This makes it easy to lift the bars out once they’ve set. Grease lightly with butter or oil to prevent sticking, though parchment usually suffices. Set aside.
Step 2 – Melt Butter & Combine Wet Ingredients
In a medium saucepan over medium heat, melt the butter completely. Once melted, add sugar, milk, and cocoa powder.
- Stir constantly as it warms. The sugar begins to dissolve, and the cocoa blooms into a shiny, smooth chocolate sauce.
- Bring mixture to a gentle boil for 1–2 minutes, stirring constantly. This step slightly thickens the sauce and ensures sugar is fully dissolved, creating a glossy, creamy chocolate base.
Remove from heat.
- Stir in peanut butter until completely smooth. The mixture should become glossy and pourable.
- Add vanilla extract (and optional salt or espresso powder) for depth and flavor.
Step 3 – Add Oats
Fold in the oats slowly, using a wooden spoon or spatula.
- Make sure every oat is coated in chocolate-peanut butter mixture.
- If using nuts or chocolate chips, fold them in now. The mixture will be thick and slightly sticky—this is normal.
Step 4 – Transfer to Pan
Spoon the thick oat mixture into the prepared pan.
- Use the back of a spatula or your hands (lightly greased) to press it down evenly.
- Press firmly, but do not compact too much—the bars need to stay chewy, not rock-hard.
- Smooth the top carefully so it’s level.
Step 5 – Chill
Place the pan in the refrigerator for at least 1–2 hours, or until fully set.
- The mixture firms into chewy, sliceable bars.
- Avoid cutting too early—chocolate will stick, oats may crumble.
Once chilled, lift the parchment paper out and cut into bars or squares.
- For clean edges, use a sharp knife warmed under hot water and wiped dry between cuts.
Step 6 – Serve & Store
- Serve immediately or keep in an airtight container at room temperature for up to 5 days, or refrigerated for up to 2 weeks.
- For longer storage, bars freeze beautifully for up to 2 months—wrap individually in plastic wrap and place in a freezer-safe bag.
Tips for Perfect Bars
- Quick oats vs. old-fashioned oats – Quick oats absorb chocolate more evenly for a uniform chewy texture. Old-fashioned oats give a slightly chunkier texture.
- Peanut butter type – Natural peanut butter may be thinner; you may need slightly less milk to maintain thick consistency.
- Chocolate drizzle topping – For extra flair, melt 1/4 cup chocolate chips with a teaspoon of coconut oil and drizzle over the set bars. Chill again to harden.
- Press evenly but gently – Too much pressure makes the bars hard; too little, they crumble.
Serving Suggestions
- Pair with cold milk, coffee, or tea.
- Serve as an after-school snack, a travel-friendly lunchbox addition, or a last-minute dessert.
- Add a scoop of dairy-free ice cream for extra indulgence.
These No-Bake Chocolate Oatmeal Bars are fast, rich, and irresistible.
Chocolate melts into peanut butter. Oats hold everything together with chewiness. Every bite is indulgence without the stress of baking.