Few recipes capture the essence of true comfort food quite like Butter Swim Biscuits. These golden, buttery squares are the kind of old-fashioned baked good that feels like a warm hug from your grandmother’s kitchen. They’re crisp and slightly caramelized around the edges, soft and fluffy in the center, and soaked with the rich flavor of real melted butter.
Unlike traditional biscuits that require cutting cold butter into the flour and rolling out the dough, butter swim biscuits take a simpler, more rustic approach. The secret lies in the name itself: the dough literally swims in a pool of melted butter as it bakes. This method eliminates the need for kneading or shaping while ensuring that each biscuit absorbs butter from top to bottom. The result is something between a biscuit and a tender bread—flaky on the edges, airy within, and impossible to stop eating.
These biscuits are perfect for breakfast with jam or honey, as a side dish for fried chicken or soups, or as a comforting snack enjoyed warm from the oven.
Ingredients
For the Biscuits:
- 2 ½ cups (315 g) all-purpose flour
- 1 tablespoon granulated sugar
- 1 tablespoon baking powder
- 1 teaspoon salt
- 2 cups (480 ml) buttermilk, well-shaken
- ½ cup (115 g) unsalted butter (1 stick)
Optional for Flavor Variations:
- ½ teaspoon garlic powder or onion powder for savory biscuits
- 1 teaspoon fresh chopped herbs (like chives, thyme, or rosemary)
- A handful of shredded cheddar cheese for a cheesy version
Step-by-Step Instructions
Step 1: Preheat and Prepare the Butter
Preheat your oven to 450°F (230°C). Choose an 8×8-inch or 9×9-inch glass or metal baking dish.
Place the stick of butter directly in the baking dish and slide it into the oven as it heats. Allow the butter to melt completely while you prepare the batter. The melted butter will form the base for your biscuits and help them develop that beautifully crisp, golden crust.
Once melted, carefully remove the dish from the oven and set it aside.
Step 2: Make the Batter
In a large mixing bowl, whisk together the flour, sugar, baking powder, and salt until well combined.
Make a small well in the center and pour in the buttermilk. Using a spoon or spatula, gently stir until the mixture forms a thick, sticky batter. It will look wetter and softer than traditional biscuit dough—this is exactly how it should be.
Avoid overmixing, as that can make the biscuits dense. You only need to combine the ingredients until no dry patches remain.
Step 3: Pour and Spread the Dough
Carefully pour the biscuit batter into the baking dish containing the melted butter. Use a spatula to spread the dough evenly, ensuring it reaches all corners. You’ll notice the butter rising up around the edges and even pooling slightly on top of the dough. This is the magic that gives the biscuits their rich, buttery flavor and signature crispness.
Step 4: Cut Before Baking
Using a sharp knife or bench scraper, gently score the dough into 9 or 12 equal squares right in the pan. This helps the butter distribute evenly between each biscuit as it bakes and makes it easier to separate them once they’re done.
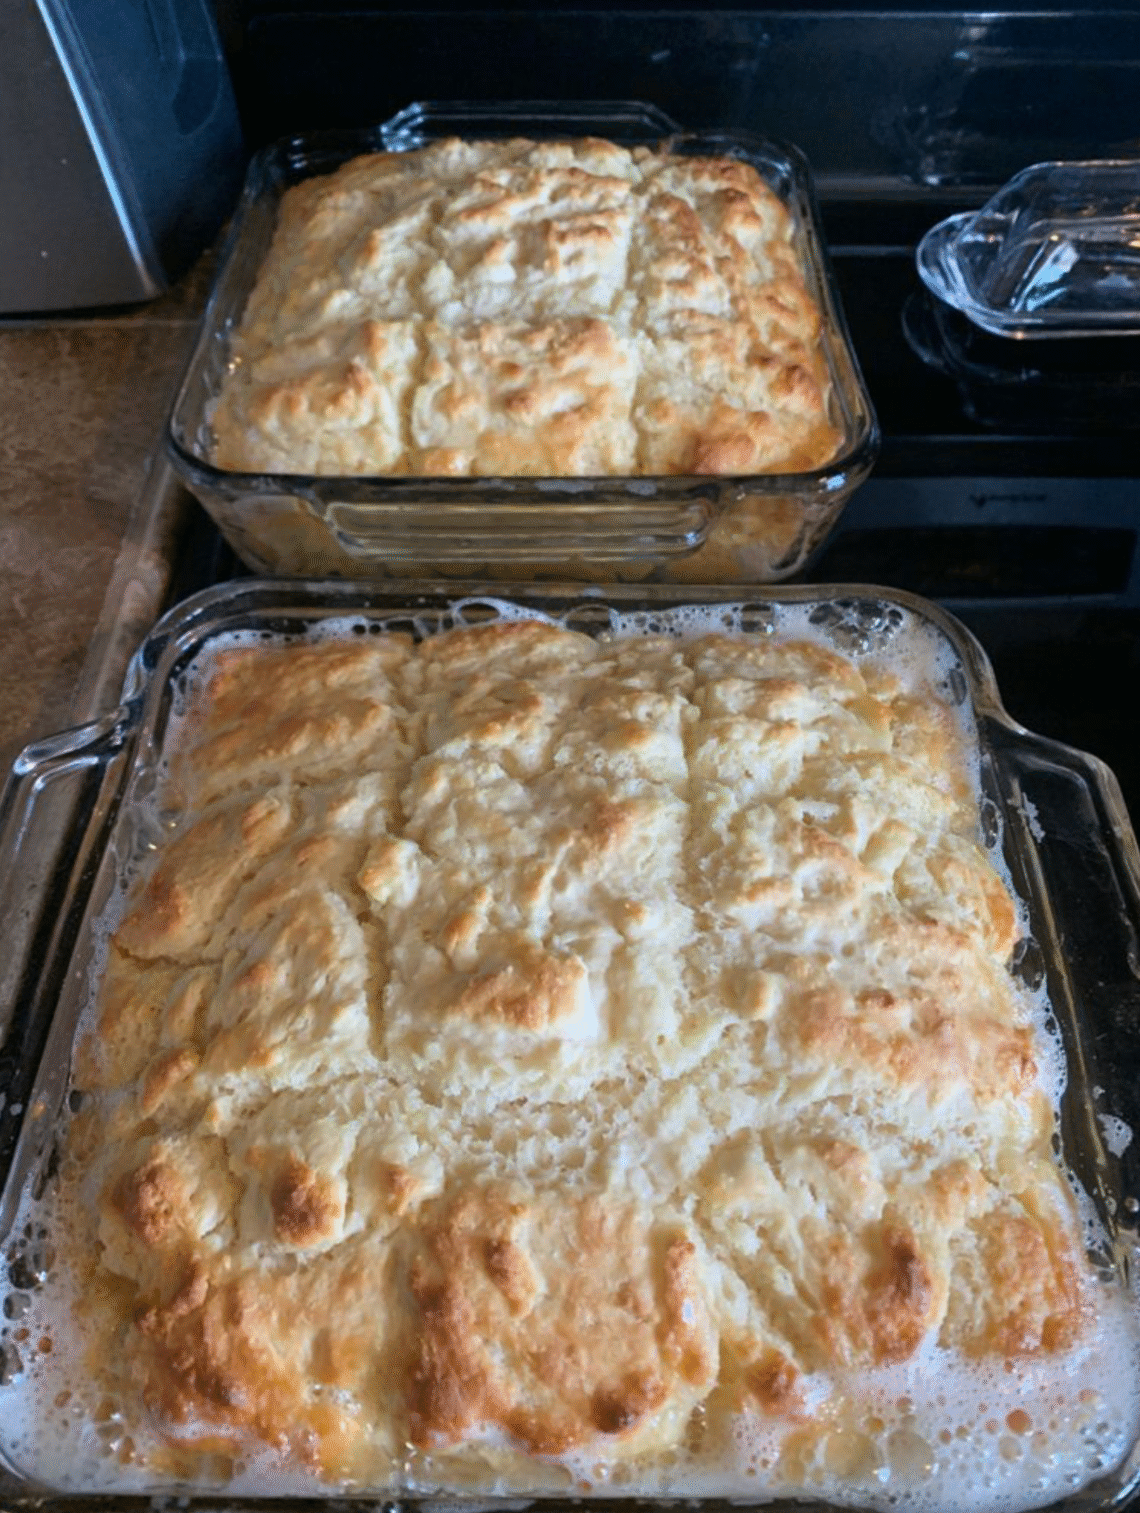
Step 5: Bake to Golden Perfection
Place the dish in the preheated oven and bake for 25 to 30 minutes, or until the biscuits are beautifully golden on top and the edges are sizzling in butter.
You’ll notice that the sides will crisp and turn a deep golden brown, while the centers stay tender and fluffy. The aroma that fills your kitchen will be irresistible—warm butter, toasted flour, and a subtle sweetness from the buttermilk.
Step 6: Rest and Serve
Once baked, remove the biscuits from the oven and allow them to rest for 5 minutes. This brief resting period helps the butter soak into the bottom of the biscuits while keeping the tops crisp.
Use a knife to separate along the scored lines, then lift the biscuits gently from the pan. Serve them warm, ideally straight from the dish.
Serving Suggestions
- Classic Style: Split the biscuits in half and spread with extra butter, honey, or homemade jam.
- Savory Meal Companion: Serve alongside fried chicken, gravy, chili, or creamy soups.
- Breakfast Sandwiches: Cut the biscuits in half and fill them with scrambled eggs, cheese, and bacon or sausage.
- Sweet Option: Sprinkle a little sugar or cinnamon sugar over the top before baking for a lightly sweet version that pairs beautifully with coffee.
Tips for Perfect Butter Swim Biscuits
- Use Real Buttermilk: The acidity in buttermilk reacts with the baking powder to make the biscuits rise higher and taste richer. If you don’t have buttermilk, you can make a substitute by adding 1 tablespoon of lemon juice or vinegar to 2 cups of milk and letting it sit for 10 minutes.
- Do Not Overmix: Stir the batter just until combined. Overworking the dough develops gluten, which can make the biscuits tough.
- Don’t Drain the Butter: It may seem like too much, but all that butter is essential. It creates the crispy, caramelized edges that make these biscuits special.
- Use a Glass Dish if Possible: Glass pans help you see how the butter browns and give a slightly softer crust, while metal pans yield a crispier edge.
- Serve Fresh: These biscuits are best eaten warm from the oven, though you can reheat leftovers in a toaster oven for a few minutes to revive the crisp texture.
Storage and Reheating
If you have leftovers, store them in an airtight container at room temperature for up to 2 days or in the refrigerator for up to 5 days.
To reheat, place the biscuits on a baking sheet in a 350°F (175°C) oven for 5–7 minutes until warm and slightly crisp again.
Why They’re So Special
Butter swim biscuits stand out because they’re a perfect example of simplicity meeting perfection. There’s no rolling, cutting, or fancy technique involved—just a handful of pantry staples and one stick of butter. Yet the result tastes like something that took hours to perfect. The melted butter bakes right into the bottom of the dough, giving each bite a balance of crispiness and soft, cloud-like interior.
It’s the kind of recipe that feels timeless—humble, comforting, and endlessly satisfying.