Cauliflower has undergone a major glow-up in recent years. Once dismissed as the “boring” cousin of broccoli, it has become the star of countless recipes — from low-carb pizza crusts to creamy soups. But perhaps the most irresistible way to enjoy it is the simplest: roasted until golden, crispy, and full of flavor.
Crispy Roasted Cauliflower transforms this humble vegetable into something that feels indulgent, almost like the bar snacks you’d order at a cozy pub. With a crisp exterior, tender interior, and just the right seasoning, it’s the kind of dish you’ll find yourself snacking on straight from the pan before it ever makes it to the table.
Ingredients
Here’s what you’ll need to create this irresistible dish:
- 1 large head cauliflower (about 2 to 2 ½ pounds) – cut into even-sized florets so they cook uniformly.
- 3–4 tablespoons olive oil – coats the florets to encourage browning and crisping.
- 1 teaspoon salt (or to taste) – enhances natural flavor.
- ½ teaspoon black pepper – for mild heat and depth.
- 1 teaspoon garlic powder – adds a savory punch.
- 1 teaspoon smoked paprika (or regular paprika) – brings warmth and that “pub snack” flair.
- ½ teaspoon onion powder – balances the seasoning blend.
- Optional extras: pinch of cayenne pepper for heat, grated Parmesan for cheesy crispiness, or a squeeze of lemon for brightness after roasting.
Step-by-Step Instructions
Step 1: Preheat the Oven
Set your oven to 425°F (220°C). A hot oven is crucial for caramelizing the cauliflower and ensuring it becomes crispy rather than soggy. Place a large baking sheet inside the oven while it preheats — starting with a hot pan helps the cauliflower crisp faster.
Step 2: Prepare the Cauliflower
- Remove the leaves and stem from the cauliflower head.
- Cut it into evenly sized florets, about 1 ½ to 2 inches in size.
- Tip: If the florets are too large, the outsides may burn before the insides cook through. Too small, and they may dry out instead of becoming tender.
Step 3: Season the Florets
- In a large mixing bowl, toss the florets with olive oil, salt, pepper, garlic powder, paprika, and onion powder.
- Make sure each piece is evenly coated — use your hands if necessary. The oil should lightly coat the cauliflower without pooling at the bottom of the bowl.
Step 4: Roast the Cauliflower
- Remove the hot baking sheet from the oven and carefully spread the seasoned cauliflower into a single layer.
- Do not overcrowd the pan; otherwise, the cauliflower will steam instead of crisp.
- Roast for 25–30 minutes, flipping halfway through.
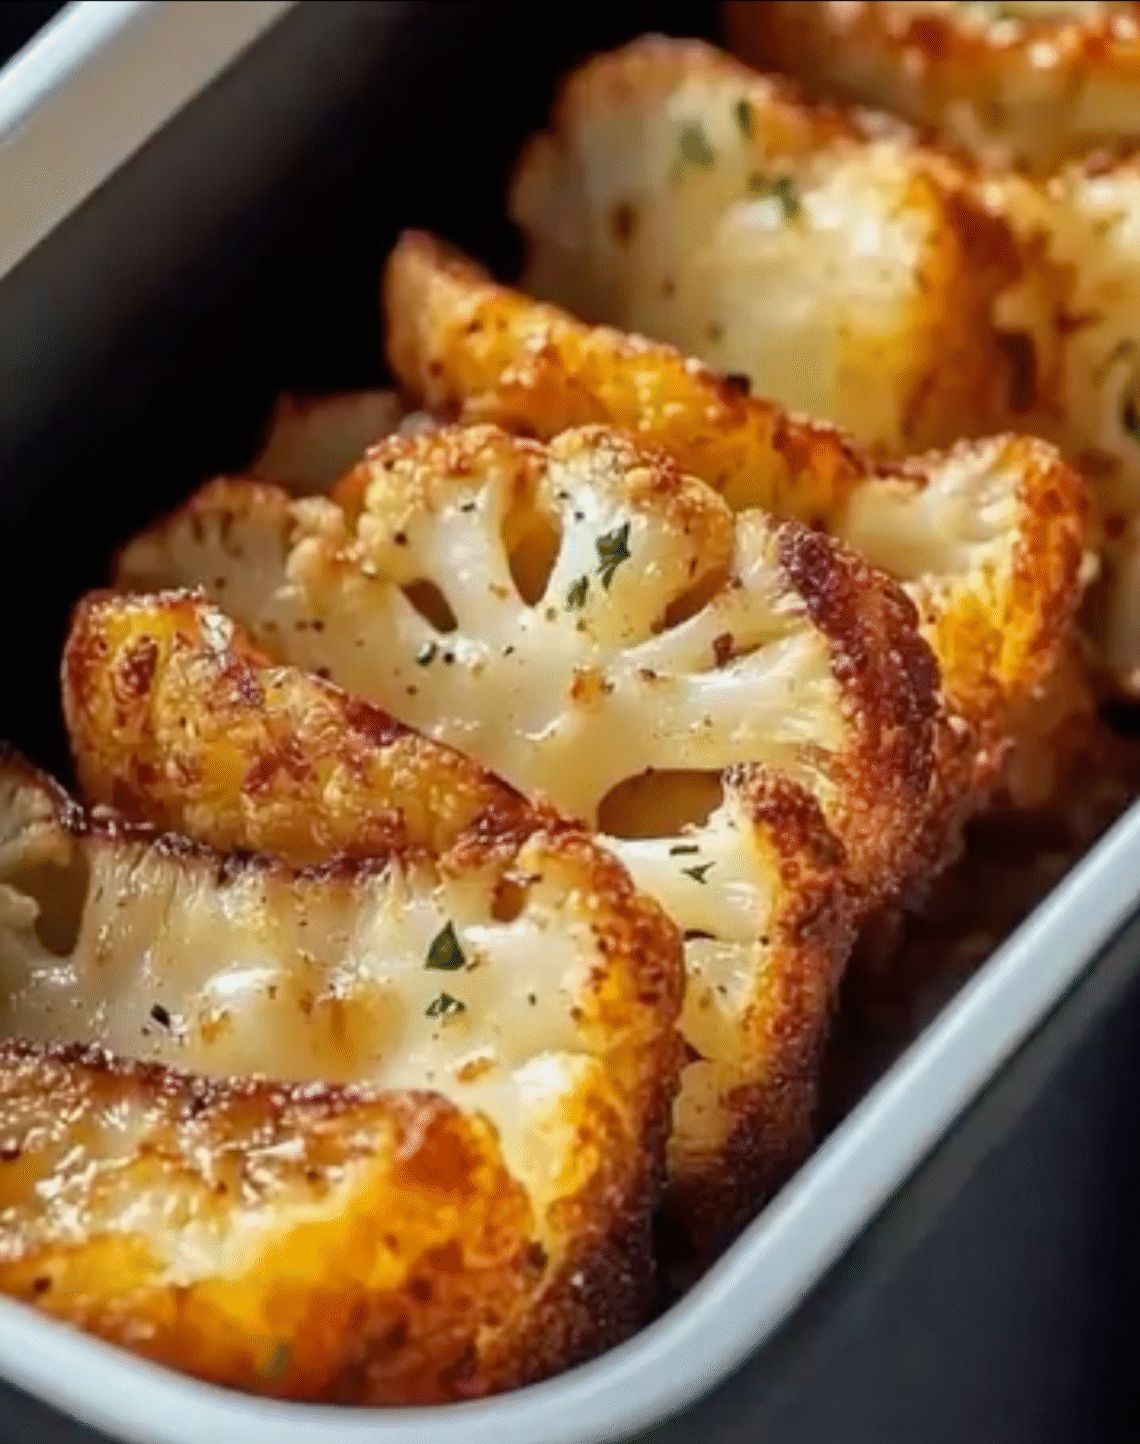
- When done, the cauliflower should be golden brown, with crispy edges and a tender bite.
Step 5: Add Finishing Touches
- Taste and adjust seasoning. Add more salt if needed.
- For a richer flavor, sprinkle grated Parmesan over the hot cauliflower.
- For brightness, drizzle with lemon juice or add chopped fresh herbs like parsley or cilantro.
Serving Suggestions
- Snack Style: Serve with ranch, blue cheese dip, or spicy aioli — just like pub appetizers.
- As a Side Dish: Pair with roasted chicken, grilled fish, or steak for a balanced meal.
- In Bowls: Add to grain bowls with quinoa, chickpeas, and tahini dressing.
- Taco Filling: Use the crispy florets as a plant-based substitute for taco meat, topped with salsa and avocado.
- Salad Topper: Toss into a green salad for added crunch and roasted flavor.
Variations
- Buffalo Cauliflower: Toss roasted florets with buffalo sauce for a spicy, game-day favorite.
- Cheesy Cauliflower: Sprinkle with cheddar or mozzarella in the last 5 minutes of roasting.
- Indian-Inspired: Season with curry powder, turmeric, and cumin, then garnish with cilantro.
- Asian-Style: Toss with soy sauce, sesame oil, and chili flakes for a savory twist.
- Low-Oil Version: Use an air fryer at 400°F (200°C) for 15–20 minutes, shaking the basket halfway through.
Tips for Success
- Dry Thoroughly: After washing, pat the cauliflower florets very dry with a kitchen towel. Extra moisture prevents browning.
- Don’t Skimp on Oil: While too much oil makes the florets greasy, too little won’t allow proper crisping. Aim for a thin, even coating.
- Use High Heat: Roasting below 400°F (200°C) won’t give you the same caramelization.
- Spread Evenly: Crowding leads to steaming — always use a large enough pan.
- Flip Once Only: Constant stirring prevents deep browning. One flip halfway is enough.
Storage & Reheating
- Refrigeration: Store leftovers in an airtight container in the fridge for up to 3 days.
- Reheating: Reheat in the oven at 400°F (200°C) for 8–10 minutes to restore crispness. Avoid microwaving, as it makes the cauliflower soft.
- Freezing: Not recommended — roasted cauliflower tends to become mushy after thawing.
Nutritional Benefits
Cauliflower isn’t just tasty when roasted — it’s incredibly nutritious:
- Low in calories but packed with fiber, helping you feel full.
- Rich in vitamin C for immune support.
- Contains vitamin K, folate, and B vitamins.
- A source of antioxidants like glucosinolates, which may support overall health.
- A low-carb alternative for those watching their carbohydrate intake.
Troubleshooting
- Why isn’t my cauliflower crispy?
- The florets may not have been dried properly.
- The oven temperature might have been too low.
- The pan may have been overcrowded.
- Why does it taste bitter?
- Over-roasting or burning the edges can create a bitter flavor. Pull it out once golden brown, not blackened.
- Why is it mushy?
- Too much oil, not enough heat, or using frozen cauliflower without thawing and drying first can lead to sogginess.
Final Thoughts
Crispy Roasted Cauliflower is proof that the simplest ingredients, treated with care, can turn into something extraordinary. With just one head of cauliflower, a drizzle of oil, and a few spices, you can create a dish that’s versatile enough for weeknight dinners, party platters, or even guilt-free snacking while watching a movie. It’s satisfying, flavorful, and endlessly adaptable — a vegetable that truly deserves its spot in the spotlight.