The Rich, Moist, Decadent Loaf That Melts in Your Mouth
There are desserts that are elegant, and then there are desserts that are simply irresistible. A perfectly baked chocolate pound cake belongs in the latter category — humble yet luxurious, simple yet indulgent. It’s the kind of dessert that brings back childhood comfort and grown-up satisfaction all at once.
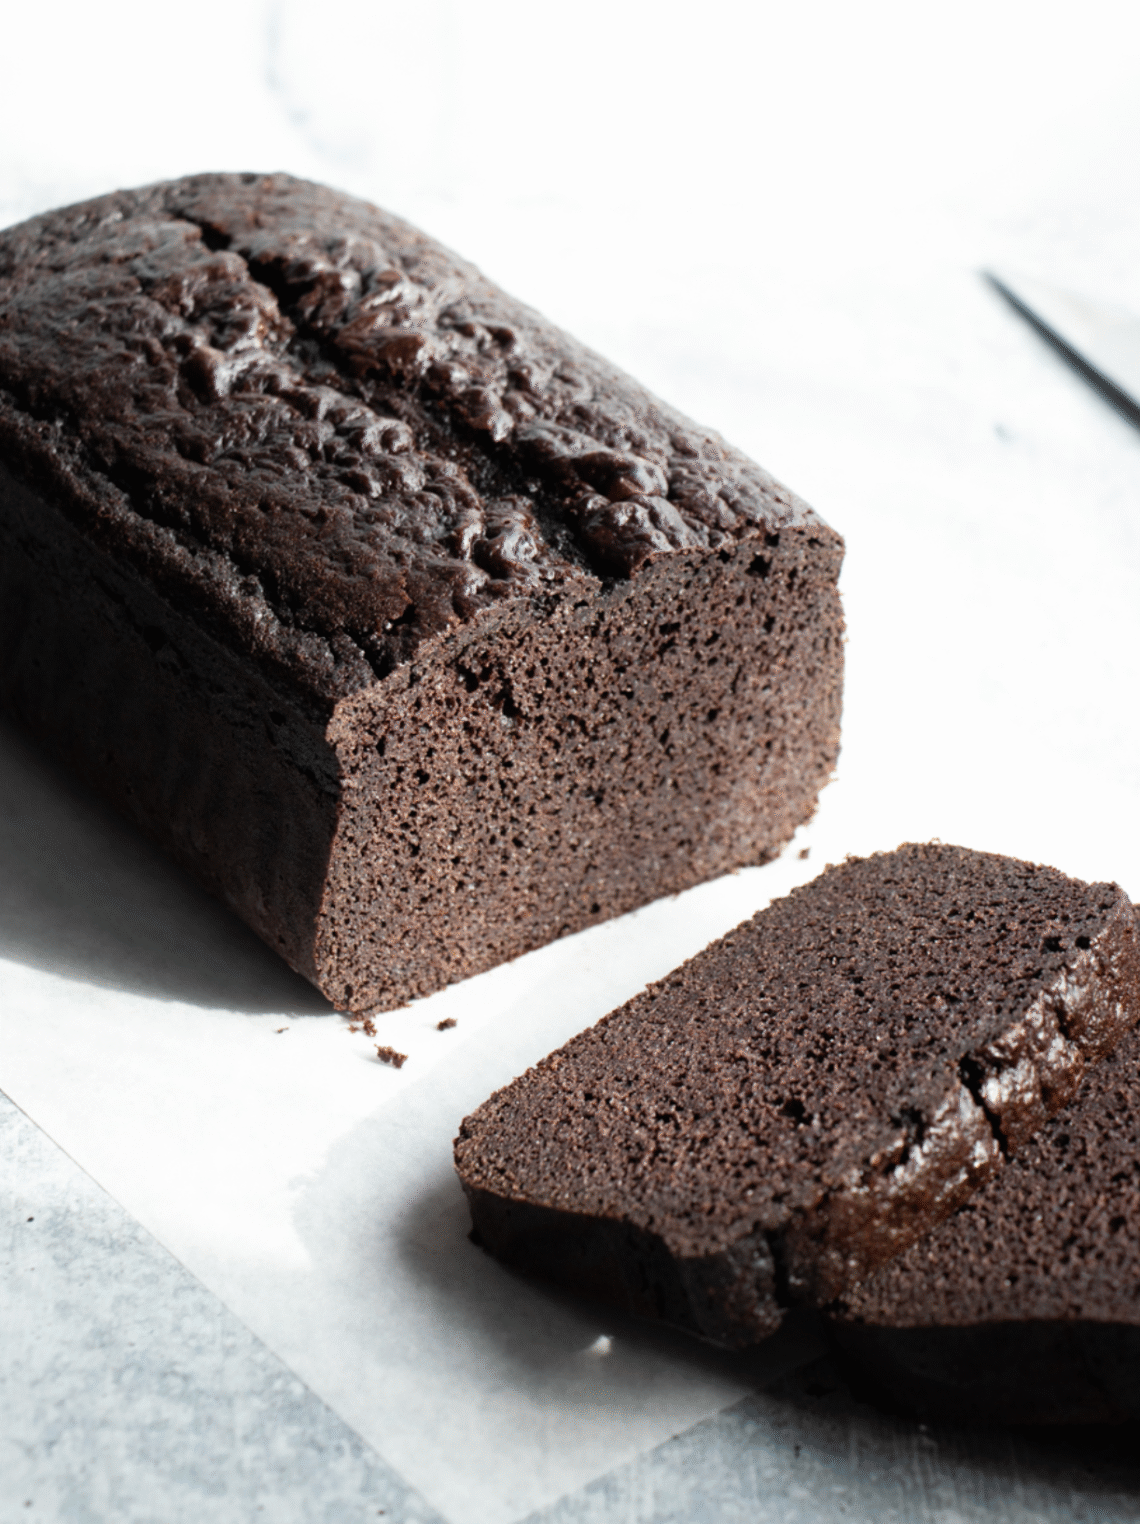
The first bite tells you everything: a deep cocoa flavor, a fine, velvety crumb, and a buttery richness that coats your palate without being heavy. It’s a loaf that holds its shape beautifully, slices cleanly, and stays moist for days. Whether served plain with a cup of coffee, topped with a glossy chocolate glaze, or layered with whipped cream and berries, this cake always feels special.
Unlike lighter sponge cakes, pound cake has a denser, richer texture — and this chocolate version elevates that tradition to a new level of decadence. The secret lies in the perfect balance of butter, sugar, eggs, and flour — and, of course, high-quality cocoa and melted chocolate.
Ingredients
For the Cake:
- 1 cup (230 g) unsalted butter, softened to room temperature
- 1 ¾ cups (350 g) granulated sugar
- 4 large eggs, room temperature
- 2 teaspoons pure vanilla extract
- 1 ¾ cups (220 g) all-purpose flour, spooned and leveled
- ½ cup (60 g) unsweetened cocoa powder (use high-quality Dutch-processed for a deep, rich flavor)
- 1 teaspoon baking powder
- ½ teaspoon salt
- 1 cup (240 ml) whole milk (or buttermilk for extra tenderness)
- 4 oz (115 g) dark chocolate, melted and slightly cooled
Optional Add-ins or Variations:
- ½ cup (120 ml) sour cream for even more moistness (replace part of the milk if desired)
- 1 teaspoon espresso powder to deepen the chocolate flavor
- ½ cup (90 g) mini chocolate chips or chunks for extra bursts of chocolate inside
- 1 tablespoon instant coffee or hot water to bloom the cocoa
Step-by-Step Instructions
Step 1: Prepare the Pan and Oven
Preheat your oven to 325°F (165°C).
Grease a 9×5-inch loaf pan generously with butter, then line it with parchment paper, leaving a bit of overhang on the sides for easy removal. Lightly dust the inside with cocoa powder instead of flour — this keeps the cake beautifully dark and prevents any white streaks on the crust.
Step 2: Cream the Butter and Sugar
In a large mixing bowl (or the bowl of a stand mixer fitted with the paddle attachment), beat the softened butter on medium speed until smooth and creamy — about 2 minutes.
Gradually add the granulated sugar, continuing to beat for another 3 to 5 minutes until the mixture turns pale, fluffy, and light. This process is crucial: it incorporates air into the batter, which gives pound cake its tender crumb despite its rich texture.
Step 3: Add the Eggs and Vanilla
Beat in the eggs one at a time, mixing well after each addition. Scrape down the sides of the bowl as you go to ensure even blending.
Once all the eggs are incorporated, add the vanilla extract. The batter should now look smooth, thick, and slightly glossy.
Step 4: Mix the Dry Ingredients
In a separate bowl, whisk together the flour, cocoa powder, baking powder, and salt. If your cocoa is clumpy, sift it to remove lumps — this ensures a silky batter.
If you’re using espresso powder, whisk it in at this stage. It won’t make the cake taste like coffee, but it will intensify the chocolate flavor beautifully.
Step 5: Combine Wet and Dry
Reduce the mixer speed to low. Add the dry ingredients in three parts, alternating with the milk (or buttermilk) in two parts — starting and ending with the dry mixture.
This gradual process prevents overmixing and keeps the batter tender.
Once incorporated, stop mixing as soon as no dry streaks remain. Overmixing at this point can make the cake dense.
Step 6: Fold in the Melted Chocolate
Gently fold in the melted dark chocolate using a spatula. The batter will become thick, rich, and glossy, almost like chocolate frosting.
If you’re adding chocolate chips or chunks, fold them in now.
Step 7: Fill and Bake
Pour the batter into the prepared loaf pan, smoothing the top with a spatula. Tap the pan lightly on the counter to release any air bubbles.
Bake in the preheated oven for 60 to 70 minutes, or until a toothpick inserted into the center comes out mostly clean (a few moist crumbs are perfect).
If the top starts browning too quickly, tent it loosely with foil after about 45 minutes.
Step 8: Cool and Unmold
Allow the cake to cool in the pan for 15 minutes, then use the parchment overhang to lift it out onto a wire rack. Let it cool completely before slicing or glazing.
This cooling period allows the crumb to set and prevents breakage. The aroma at this stage will fill your kitchen — rich cocoa and butter, with a subtle sweetness that promises pure indulgence.
Optional Chocolate Glaze
For an extra layer of decadence, top your pound cake with a silky chocolate glaze.
Ingredients for the Glaze:
- ½ cup (85 g) semisweet chocolate chips or chopped chocolate
- 2 tablespoons butter
- 1 tablespoon light corn syrup or honey (for shine)
- 2–3 tablespoons heavy cream
How to Make It:
Place all ingredients in a heatproof bowl. Microwave in 20-second bursts, stirring after each, until smooth and glossy. Pour the warm glaze over the cooled cake, letting it drip naturally down the sides.
Let the glaze set for at least 30 minutes before slicing.
Texture and Flavor
The finished cake has a tight, buttery crumb that’s moist without being heavy. Each slice is rich but balanced — the cocoa provides depth, the butter brings warmth, and the melted chocolate adds an almost truffle-like smoothness.
The edges develop a delicate crust that contrasts beautifully with the soft interior, making every bite layered in texture.
When served slightly warm, the aroma and taste are almost intoxicating — like the best parts of a brownie and a classic pound cake combined.
Serving Suggestions
- With coffee or espresso: The deep chocolate pairs beautifully with bitterness.
- With whipped cream or vanilla ice cream: A classic, crowd-pleasing combination.
- With fresh berries: Strawberries, raspberries, or cherries add brightness and acidity.
- As a base for a trifle: Layer slices of the cake with chocolate pudding, cream, and fruit.
For a breakfast-style treat, toast a thin slice lightly and spread a bit of butter on top — the heat brings out the chocolate’s aroma all over again.
Storage and Make-Ahead
This cake keeps extremely well:
- At room temperature: Store covered or wrapped in plastic wrap for up to 4 days.
- In the fridge: Up to 7 days, though let it come to room temperature before serving.
- In the freezer: Wrap tightly in plastic wrap and foil, and it will keep for up to 3 months. Thaw overnight in the refrigerator before serving.
Tips for Perfect Results
- Use room-temperature ingredients. Cold butter or eggs will cause the batter to curdle and won’t cream properly.
- Measure accurately. Pound cake depends on balance — too much flour or cocoa can make it dry.
- Don’t rush the creaming stage. This is where air gets incorporated, which helps the cake rise.
- Bake low and slow. Pound cake needs time to set gently for a fine crumb.
- Let it cool completely. Cutting too soon can cause the texture to compress.
The Story Behind Chocolate Pound Cake
The traditional pound cake dates back to 18th-century Europe, named for its original formula: one pound each of butter, sugar, eggs, and flour. Over time, bakers adapted it, introducing leavening agents and new flavors. The chocolate variation gained popularity in the early 20th century, when cocoa became widely available — transforming the simple buttery loaf into something far more luxurious.
Today, chocolate pound cake represents the perfect balance of comfort and elegance — ideal for casual gatherings, family desserts, or even formal dinner parties. Its simplicity is what makes it timeless, and its flavor is what makes it unforgettable.